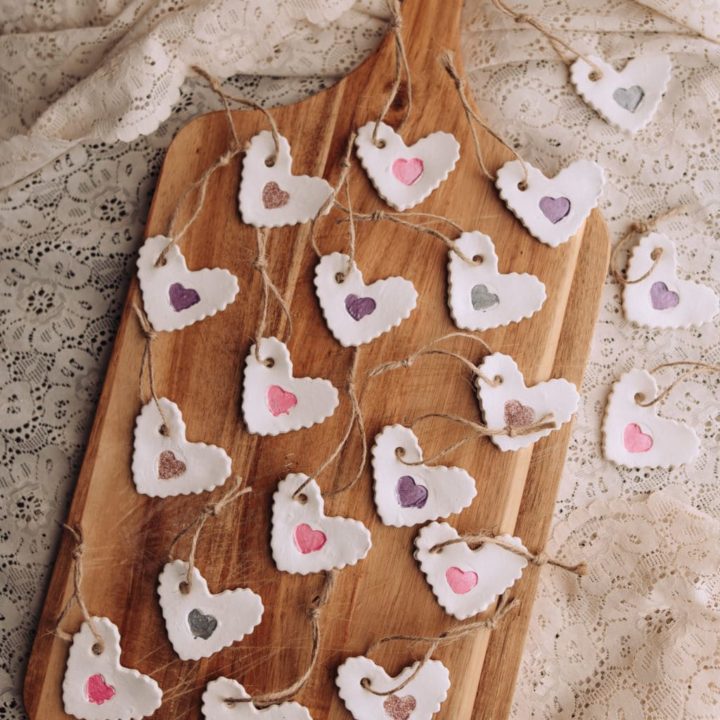
Looking for a simple and unique Valentine’s gift idea? These decorated Clay Hearts should fit the bill!

Like a lot of kids right now, my daughter continues to attend school remotely this spring, but her class will still be exchanging Valentine’s this year! We love making handmade Valentine’s gifts because each one is unique for each of her classmates. This year, we decided to make these pretty Clay Hearts for her teachers and classmates. All you need is clay, heart shaped cookie cutters, and twine to make them. And then you can decorate them however you like! My daughter used a small heart stamp, biodegradable glitter, and paint for her’s.
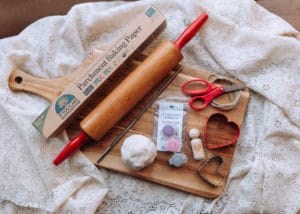
Materials needed to make Clay Hearts
- Clay – We like using Crayola’s Air Dry Clay for this project because it’s easy to roll out, dries quickly, and dries into a really nice creamy white color.
- Rolling pin – You’ll need a rolling pin to roll out the clay into a flat and smooth disk.
- Parchment paper – This or wax paper will really come in handy to roll the clay onto. It keeps your workspace from getting dirty and helps the clay shapes to not stick, so you can pick them up easily. I also used it to line baking sheets to put the clay hearts onto as they dried.
- Heart-shaped cookie cutters – We used a two-inch by one-inch cookie cutter for the the Valentine’s for her classmates and we used a slightly larger cookie cutter for her teacher’s Valentine’s. I recommend keeping it smaller than 4×4, but any size heart should work!
- Heart stamp(s) – This is optional, but we used a small heart stamp to create a small heart inside the Clay Heart. You could use small heart stamp or even press the clay with your thumbs to make a heart-shape.
- Twine – This will be used to create a hanger for your Clay Hearts to turn them into ornaments.
- Straw – We used a metal reusable straw to create the little circles in the hearts to string the twine through. A straw is the perfect size to create a hanger hole.
- Glitter – If you ask my kids, they’ll tell you I CANNOT stand glitter. I never let the kids use glitter, haha, but I will make a concession once in awhile. As long as it is biodegradable, anyway. We found some pretty pink biodegradable glitter on Amazon, which worked perfectly to decorate these Clay Hearts.
- Paint – Any kind of paint will work fine. My daughter used pink and purple acrylic paint to decorate the Clay Hearts, but washable paint would work as well.
- Scissors – You’ll need to scissors to cute the twine.
- Paint brush – A paintbrush will be needed for the paint and can also be used to paint on glue for the glitter as well.
- Glue – This is needed to adhere the glitter to the Clay Hearts.

Steps to cut out shapes for Clay Hearts
- Gather supplies and prepare your workspace – Having all the supplies ready and available makes this project super easy. First, cover your workspace with parchment paper or wax paper.
- Roll out clay – Form a tennis ball sized piece of clay into a ball shape. Then, with a rolling pin, with medium pressure start rolling your ball out into a flat, round disk. A tennis ball sized piece of clay should roll out flat to about a 6-inch by 6-inch disk.
- Cut out heart shapes – Grab a cookie cutter and start cutting out heart shapes. The clay may stick in the cookie cutter a little bit, so carefully pop it out with your fingers tips. Set each heart to the side. After you’ve cut all the shapes you can from your first disk, gather all the leftover clay bits and form them into ball and roll them out again. Keep doing this until you’re out of clay.
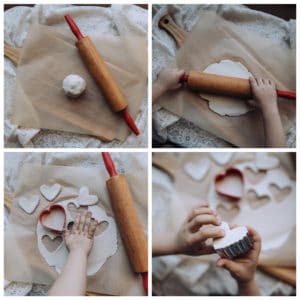
- Stamp hears in the middle – Find a small heart stamp or using your thumb, create a small heart shape in the middle of your clay heart.
- Create string holes – With a straw, create a small hole in the top left corner of each heart. This will allow a piece of twine to string through to create an ornament.
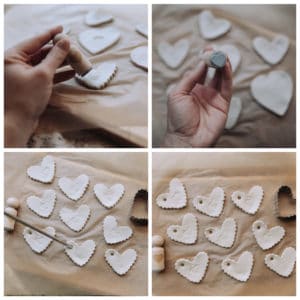
- Set aside to dry – Once you are done stamping and creating holes in your heart shapes, place them on a baking sheet lined with wax or parchment paper. Be sure they are laying flat and smooth, so they dry flat and smooth. Then put somewhere quiet and allow them to dry overnight.
Steps for decorating Clay Hearts
- Gather supplies and prepare your workspace – Grab all the decorating supplies you want to use and put them nearby. This part might get a little mess with paint and glitter so we recommend covering your workspace with paper or towels to ensure easy clean-up.
- Add glitter – With a small paint brush, add a thin layer of glue or mod podge on the middle heart print on your clay hearts. Then with your finger tips, grab a small pinch of glitter and sprinkle it on the wet glue. Pick it up and tap the heart to release the excess glitter.
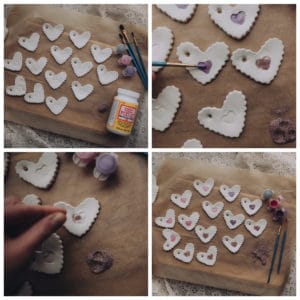
- Paint – With a small paint brush, paint the middle heart print with whatever color you like. My daughter used pink and purple paint to decorate her Clay Hearts.
- Dry – Allow each heart to fully dry.
- Add a twine hanger – Cut a 6-inch piece of natural twine. Send one end through the hole and tie the ends together. This will create an ornament, which makes a really sweet Valentine!
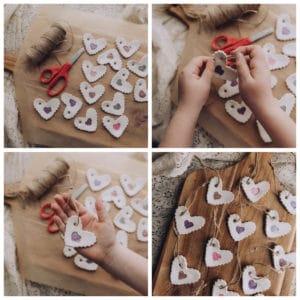
- Finish up – After each heart was decorated and dry, my daughter used a permanent marker to add a little note to each of her classmates.
Other ideas like Clay Hearts that also use air-dry clay
How to Make Clay Hearts
Looking for a simple and unique Valentine's gift idea? These decorated Clay Hearts should fit the bill!
Materials
- Clay
- Parchment paper
- Heart-shaped cookie cutters
- Heart stamp(s)
- Twine
- Straw
- Glitter
- Paint
- Glue
- Rolling pin
- Scissors
- Paintbrush
Tools
Instructions
STEPS TO CUT OUT SHAPES FOR CLAY HEARTS
1. Cover your workspace with parchment paper or wax paper.
2. Form a tennis ball sized piece of clay into a ball shape. Then, with a rolling pin, with medium pressure, start rolling your ball out into a flat, round disk. A tennis ball sized piece of clay should roll out flat to about a 6-inch by 6-inch disk.
3. Grab a cookie cutter and start cutting out heart shapes. The clay may stick in the cookie cutter a little bit, so carefully pop it out with your fingers tips. Set each heart to the side. After you've cut all the shapes you can from your first disk, gather all the leftover clay bits and form them into ball and roll them out again. Keep doing this until you're out of clay.
4. Find a small heart stamp or using your thumb, create a small heart shape in the middle of your clay heart.
Create string holes - With a straw, create a small hole in the top left corner of each heart. This will allow a piece of twine to string through to create an ornament.
5. Once you are done stamping and creating holes in your heart shapes, place them on a baking sheet lined with wax or parchment paper. Be sure they are laying flat and smooth, so they dry flat and smooth. Then put somewhere quiet and allow them to dry overnight.
STEPS FOR DECORATING CLAY HEARTS
1. Grab all the decorating supplies you want to use and put them nearby. This part might get a little messy with paint and glitter so we recommend covering your workspace with paper or towels to ensure easy clean-up.
2. With a small paint brush, add a thin layer of glue or mod-podge on the middle heart print on your clay hearts. Then with your finger tips, grab a small pinch of glitter and sprinkle it on the wet glue. Pick it up and tap the heart to release the excess glitter.
3. With a small paint brush, paint the middle heart print with whatever color you like.
4. Allow each heart to fully dry before moving to the next step.
5. Cut a 6-inch piece of natural twine. Send one end through the hole and tie the ends together. This will create an ornament, which makes a really sweet Valentine gift.
Leave a Reply