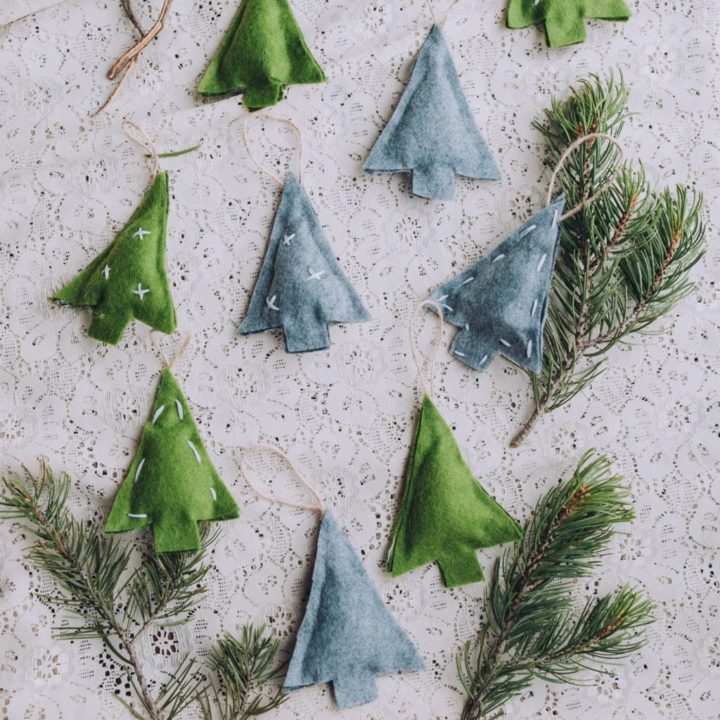
These No-Sew Felt Christmas Tree Ornaments are so cute and very quick and easy to make. Your kids will love making them and they will be a sweet keepsake for every Christmas to come.

You’re going to love these no-sew felt ornaments because they’re really easy and quick for kids to make, but they also turn out looking super cute! They don’t require any sewing, so they’re easy enough for kids to do without much help from you. Your kids will love hanging them up on your Christmas tree every year too!
What you need to make No-Sew Felt Christmas TREE Ornaments
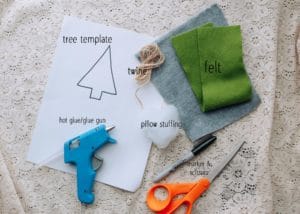
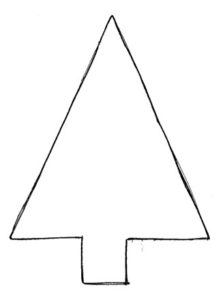
- Tree template – We used this simple triangle Christmas tree, but you could also just eyeball it. Just remember, you’ll want all your trees to be uniform.
- Felt – We went with green and gray, but you could use any color you like!
- Twine – This is needed to make the ornament hanger. But you could also use stitching thread if you wanted to add any details to your trees.
- Hot glue/glue gun – This is needed to glue the trees together to complete the ornament.
- Pillow stuffing – You won’t need much, so look for a small bag of polyester fiber fill, like this one from Amazon.com to use.
- Marker – This is used to trace the tree template onto the felt.
- Scissors – You’ll need scissors to cut out all of your trees and to cut the thread and twine.
How to make these Felt Christmas TREE Ornaments
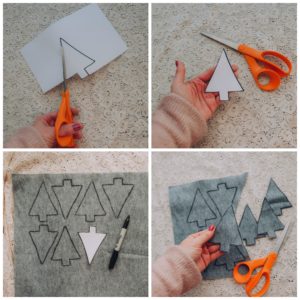
- Find a tree template – First, you’ll need to cut out the tree template you’re going to use on paper. You could use the one we used or draw or print out your own style.
- Trace your trees and cut them out – Next, trace them onto pieces of felt. We went with green and grey felt, but you could choose any color you like. Once you have several trees traced, cut them out.
- Create an ornament hanger – Cut a 6-12 inch piece of twine and knot it at the end to create a loop. With a hot glue gun, glue it at the top of your tree.
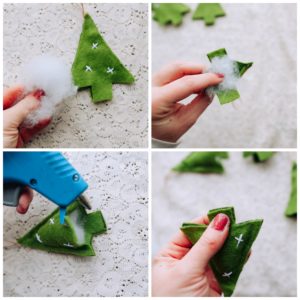
- Glue tree together – With a hot glue gun, glue the front piece of your tree to the back piece of your tree. Squeeze a line of glue going down the two sides of the tree, but leave the bottom free. Then stick the two sides together, carefully, so they match up evenly.
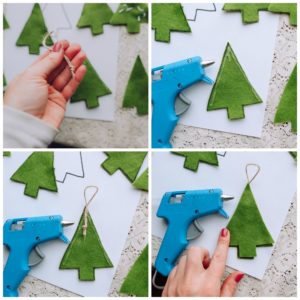
- Stuff your tree with fluff – After the glue dries, take a small amount of polyester fiber lining fluff and shove it inside the cavity of the tree.
- Glue bottom together – Once you’ve stuffed your tree with fluff, grab your glue gun again and add a line of glue along the bottom (trunk) of the tree. Then carefully pinch the front and back together until it dries.
Optional details to add to your Felt Christmas TREE Ornaments
- Stars – With embroidery thread, you could stitch little white stars onto the front of your tree. Be sure to stitch them onto your felt before you glue the front and back of your tree together.
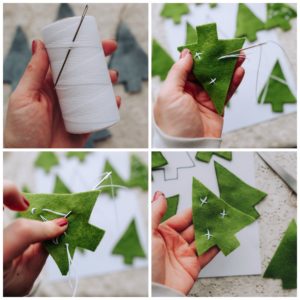
- Edging – With white embroidery thread, you could add stitching along the border of your tree.
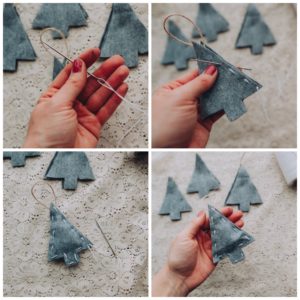
- Other ideas – You could add little bells, buttons, or sequence to the front of your trees before glueing the front and backs together too!
If you like these Felt Christmas TREE Ornaments, you might like these too
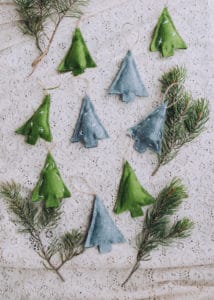
How to Make No-Sew Felt Christmas Ornaments
These No-Sew Felt Christmas Tree Ornaments are so cute and very quick and easy to make. Your kids will love making them and they will be a sweet keepsake for every Christmas to come.
Materials
- Felt
- Twine
- Stuffing
Tools
- Hot glue/glue gun
- Scissors
- Marker
- *Optional - embroidery thread
Instructions
1. First, you'll need to cut out the tree template on paper. You could use the one we used or draw or print out your own style.
2. Next, trace them onto pieces of felt. We went with green and grey felt, but you could choose any color you like. Once you have several trees traced, cut them out.
3. Cut a 6-12 inch piece of twine and knot it at the end to create a loop. With a hot glue gun, glue it at the top of your tree.
4. With a hot glue gun, glue the front piece of your tree to the back piece of your tree. Squeeze a line of glue going down the two sides of the tree, but leave the bottom free. Then stick the two sides together, carefully, so they match up evenly.
5. After the glue dries, take a small amount of polyester fiber lining fluff and shove it inside the cavity of the tree.
6. Once you've stuffed your tree with fluff, grab your glue gun again and add a line of glue along the bottom (trunk) of the tree. Then carefully pinch the front and back together until it dries.
Leave a Reply