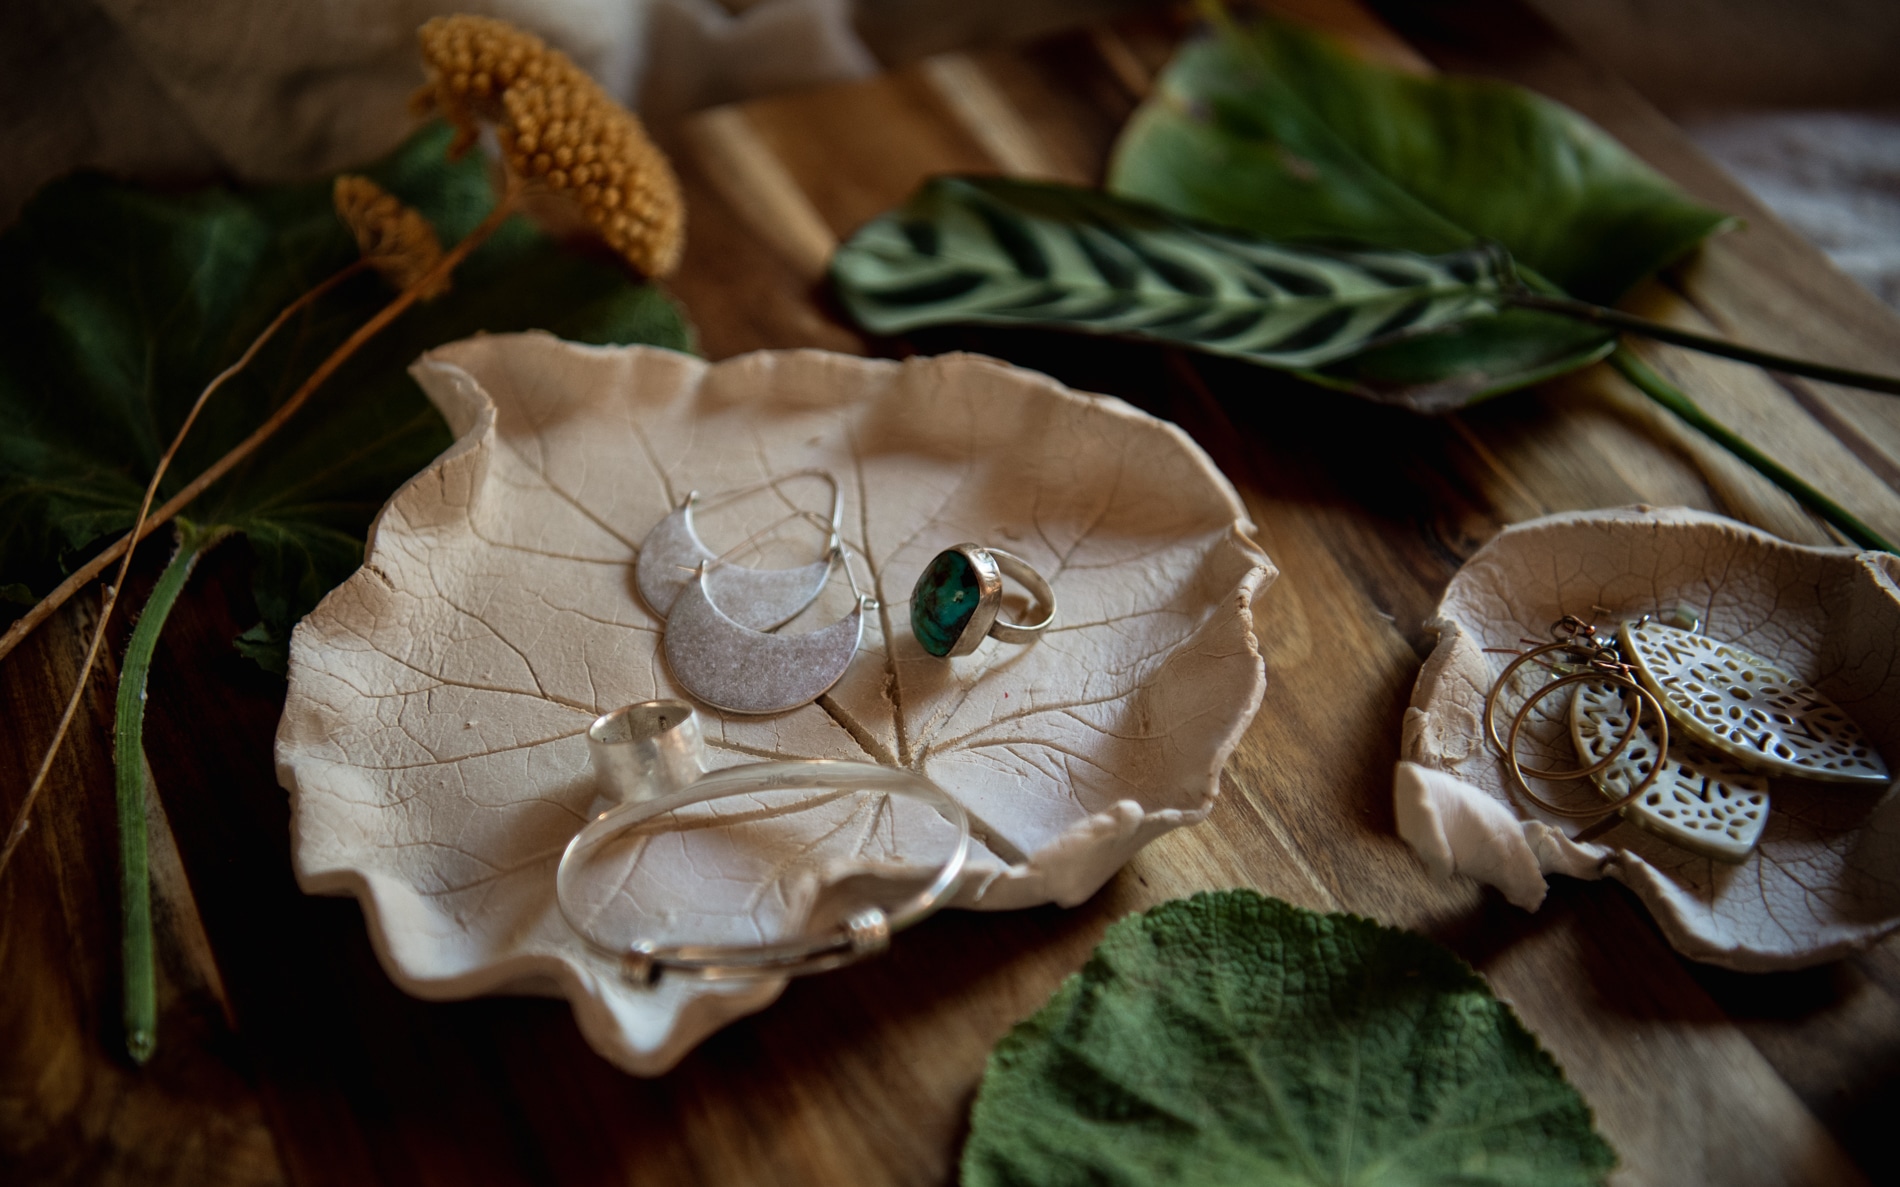
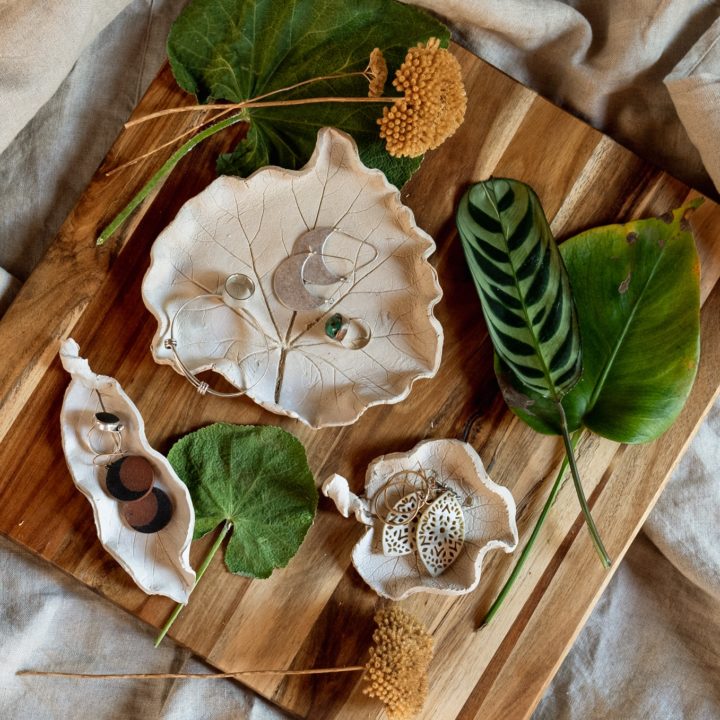
This Leaf Imprint Jewelry Dish craft uses leaf imprints in clay to create a beautiful handmade gift for the Mother’s Day or any special occasion!
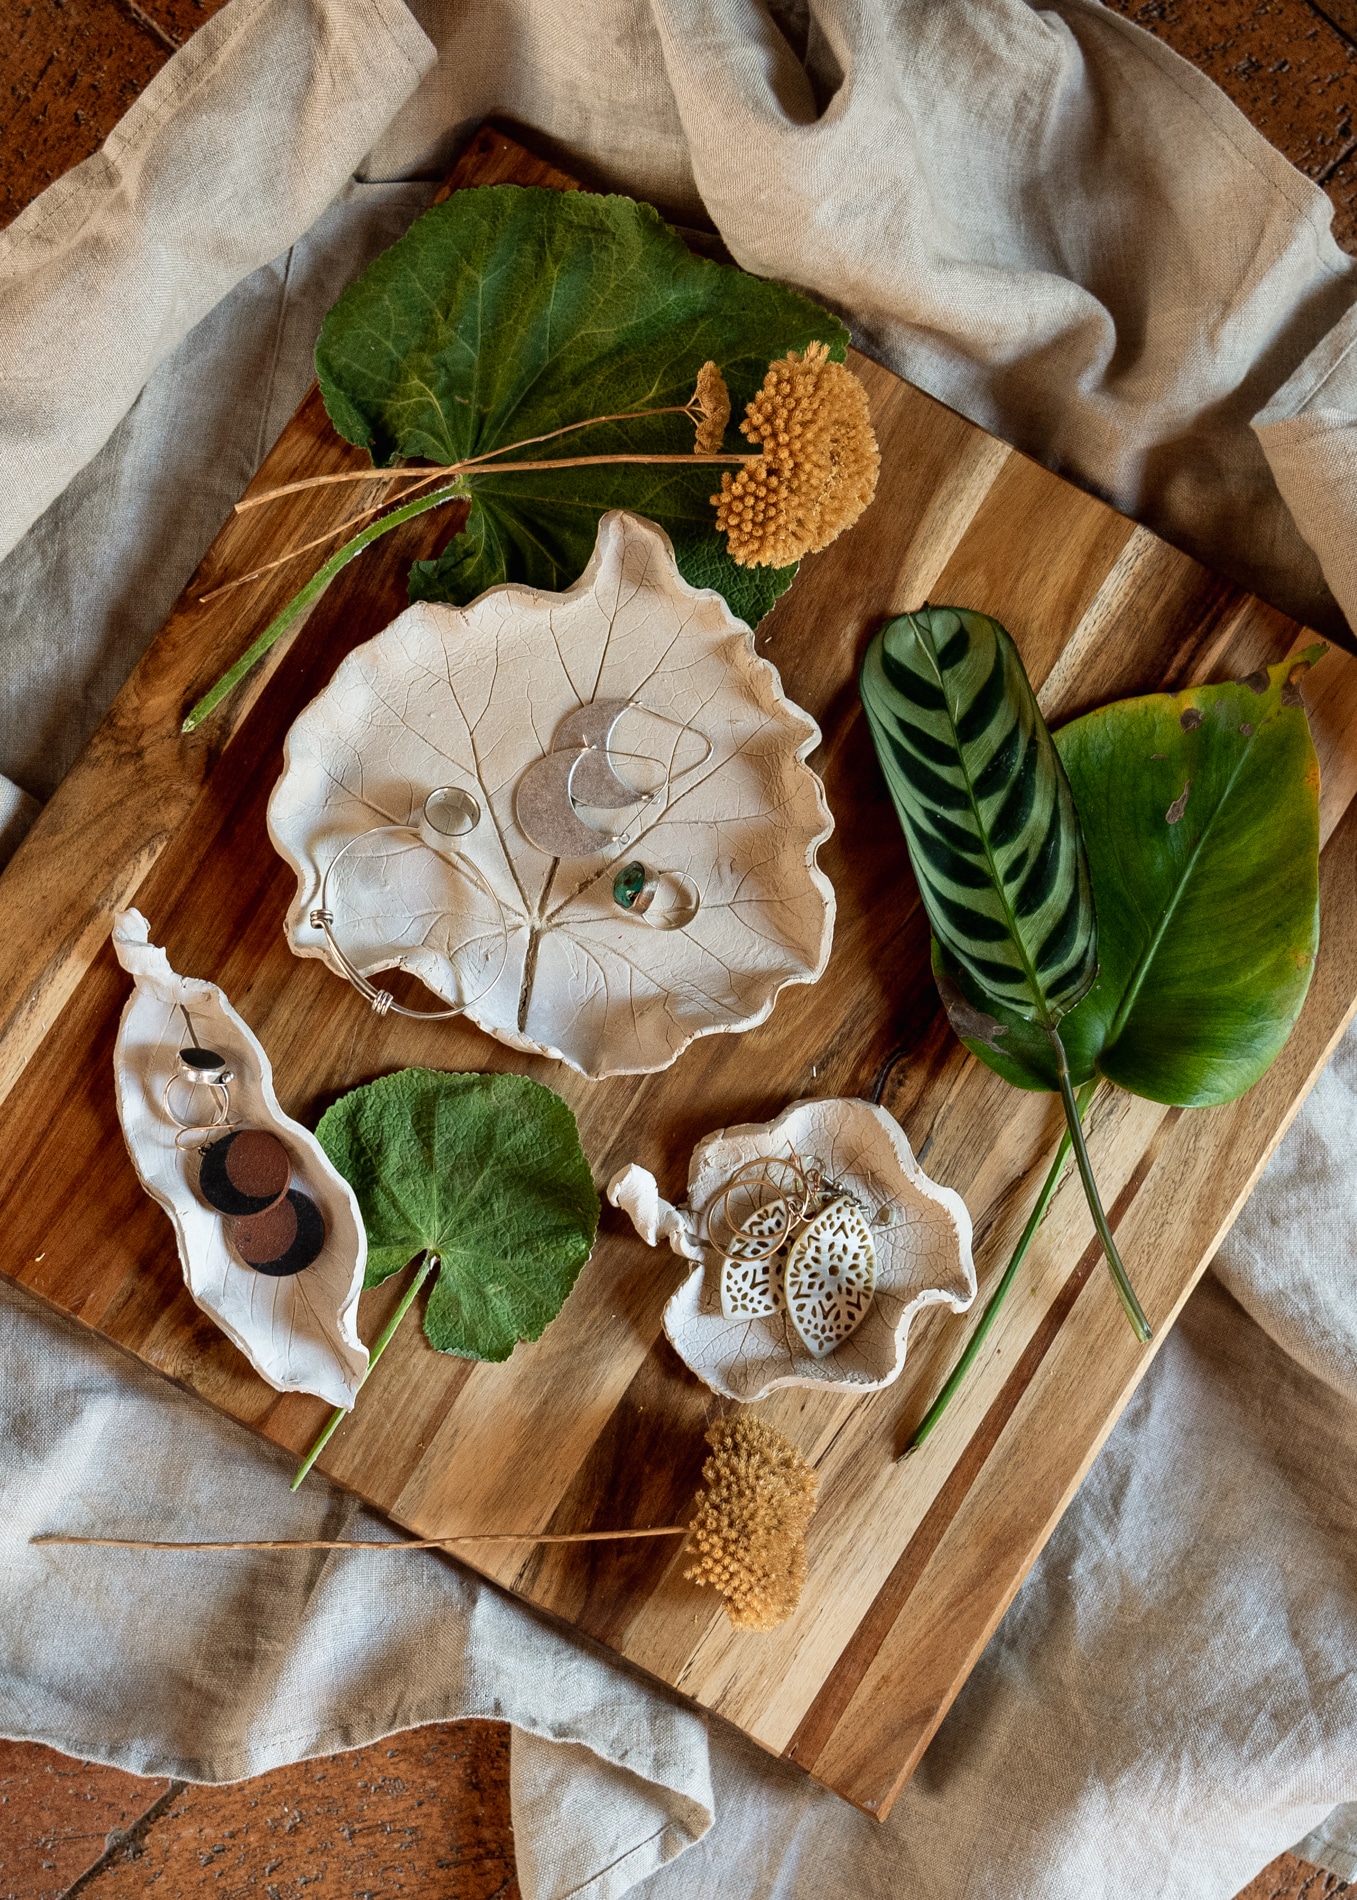
Mother’s Day is only a few days away, but there’s still time to make Mom or Grandma a special gift to celebrate Mother’s Day! Using leaf imprints and air dry clay, these hand-made clay dishes are perfect for storing jewelry or trinkets. They look so beautiful, you’ll be surprised by how easy they are to make! Read on to learn how to make your own.
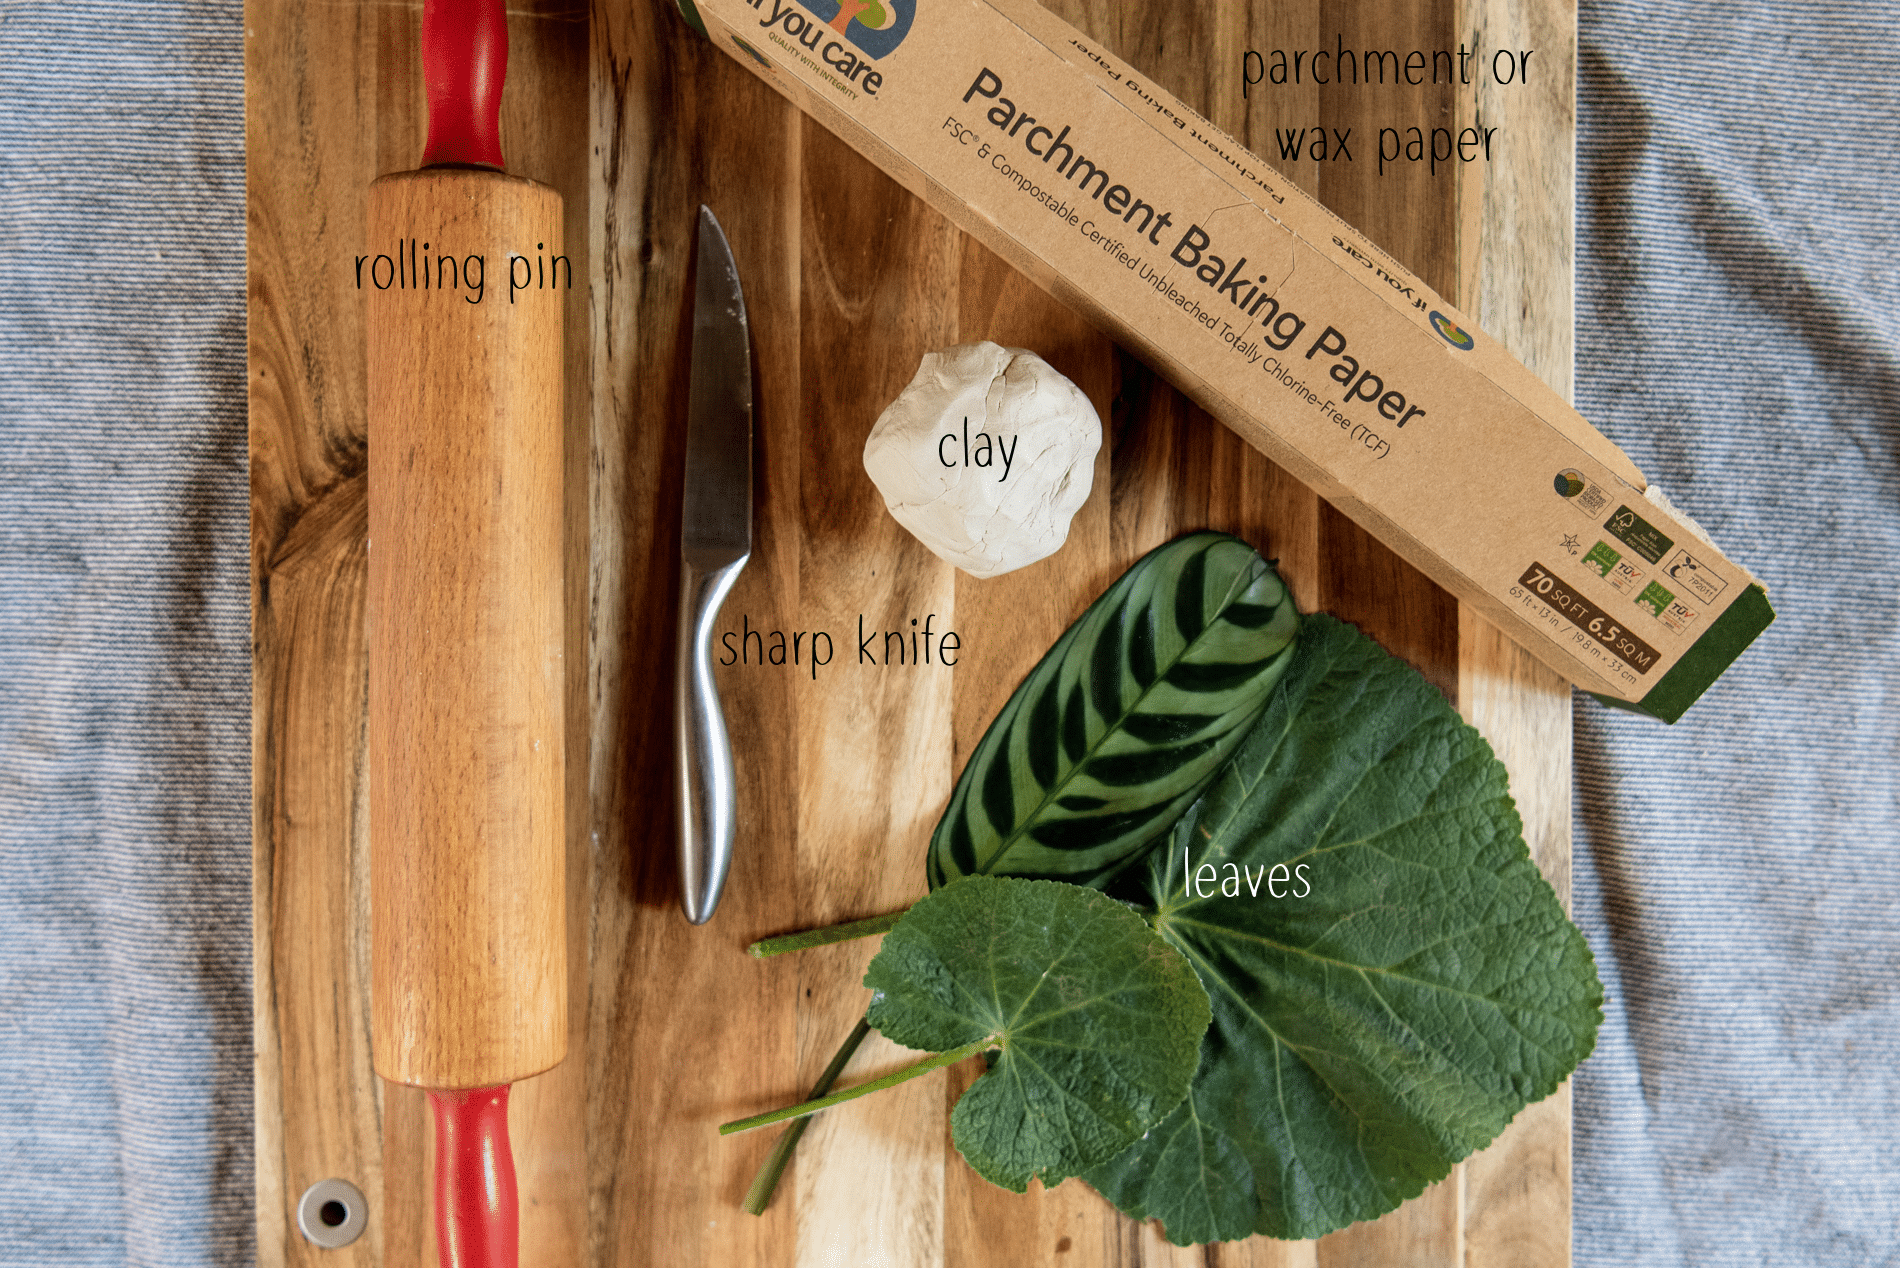
Materials Needed to Make A LEAF IMPRINT JEWELRY DISH
- Clay – I like to use white Crayola Air-Dry Clay because it’s easy to use and dries overnight.
- Rolling pin – This is needed to roll out the clay.
- Parchment or wax paper – This keeps the clay from sticking on your work surface and avoids making a mess.
- Cutting board – You’ll want to use one on your work space to avoid cutting something unintentionally.
- Leaves – You’ll need medium to large sized fresh leaves, about 4 inches wide or long.
- Knife – Any knife will do, but I found a sharp knife to be easier to work with than a butter knife.
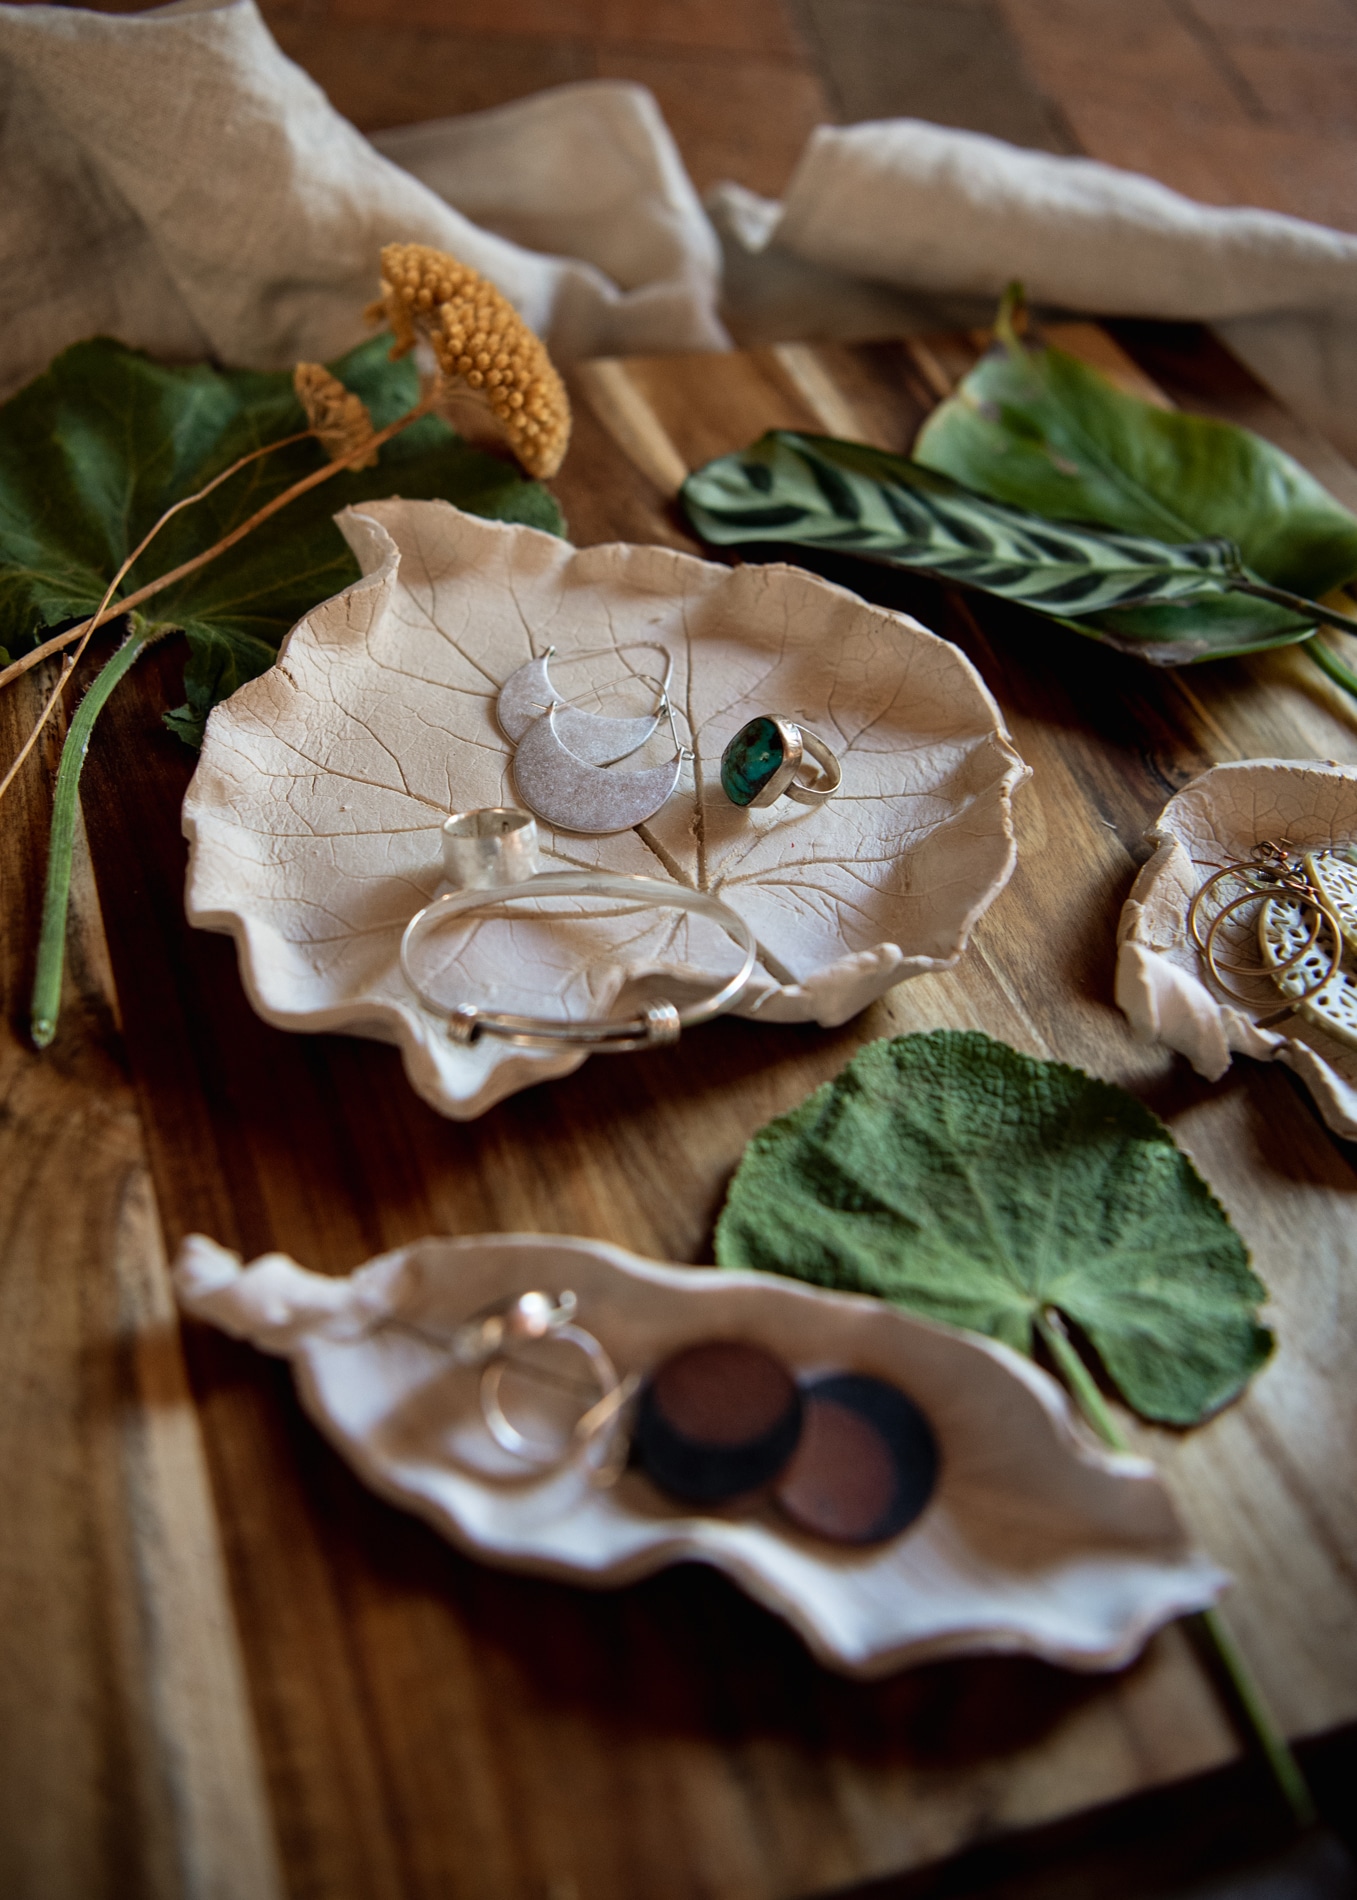
HOW TO MAKE A LEAF IMPRINT JEWELRY DISH
- Prepare your workspace – I like to have my kids’s workspace all ready to go before we start a craft. We always start the craft by laying down a cloth on the table, a cutting board on top of that, and then parchment or wax paper on top of that.
- Gather supplies – Once your workspace is ready, you’ll need to gather your materials: air-dry clay, a rolling pin, and a sharp knife.
- Pick out leaves – We used leaves from a couple of houseplants as well as a few from the hollihocks that are just starting to pop up in our flower garden. You could use leaves from trees or bushes too! Just be sure to use fresh leaves. Dry or dead leaves will be too brittle and they will crack and break. Use medium to large leaves, at least 4 inches long or wide. Also, look for leaves with lots of veins in them – they make the prettiest designs!
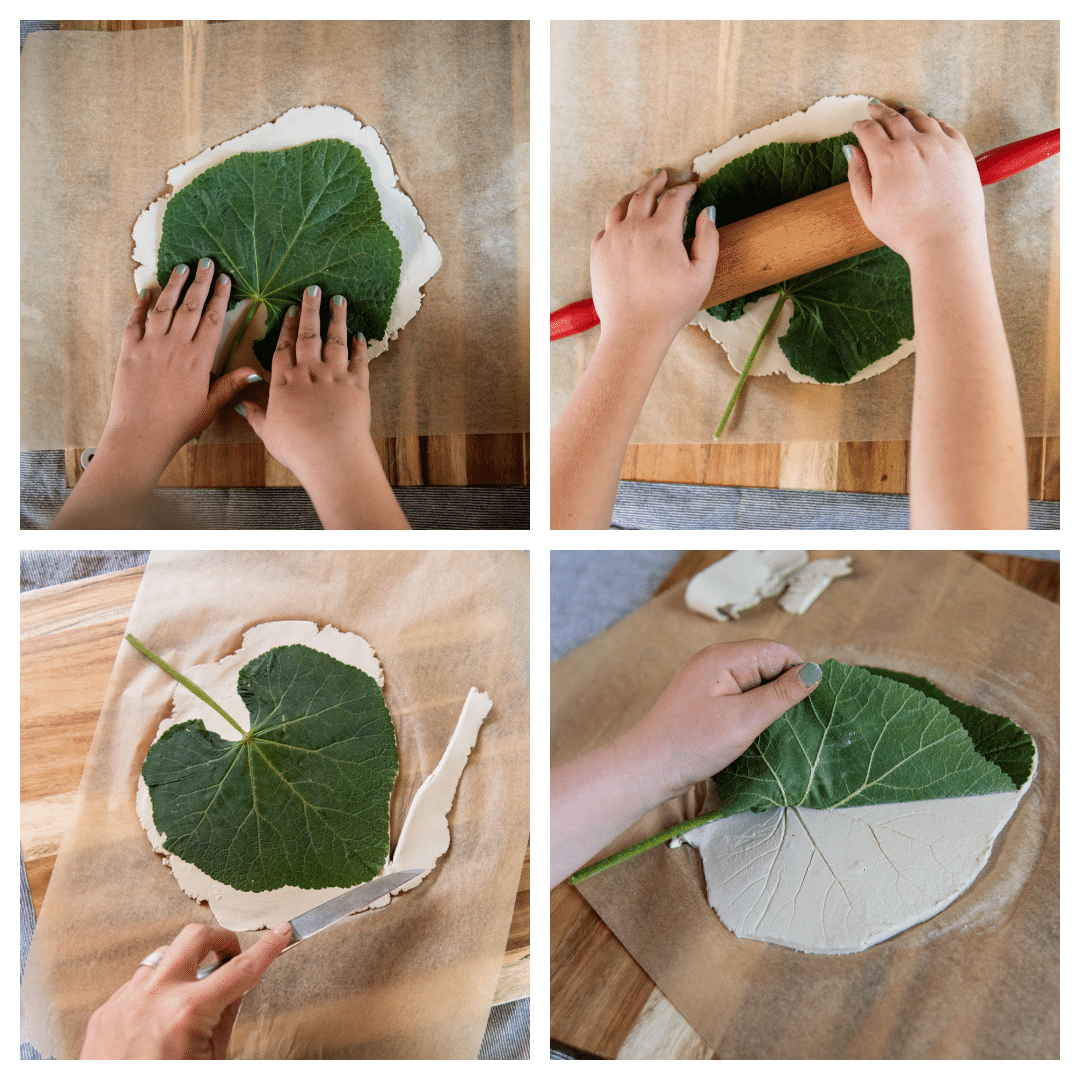
- Roll out clay – Make a tennis ball sized ball of clay and put it on a sheet of wax or parchment paper, then grab a rolling pin and roll the clay out flat into a disk between 1/4 and 1/8 of an inch thick.
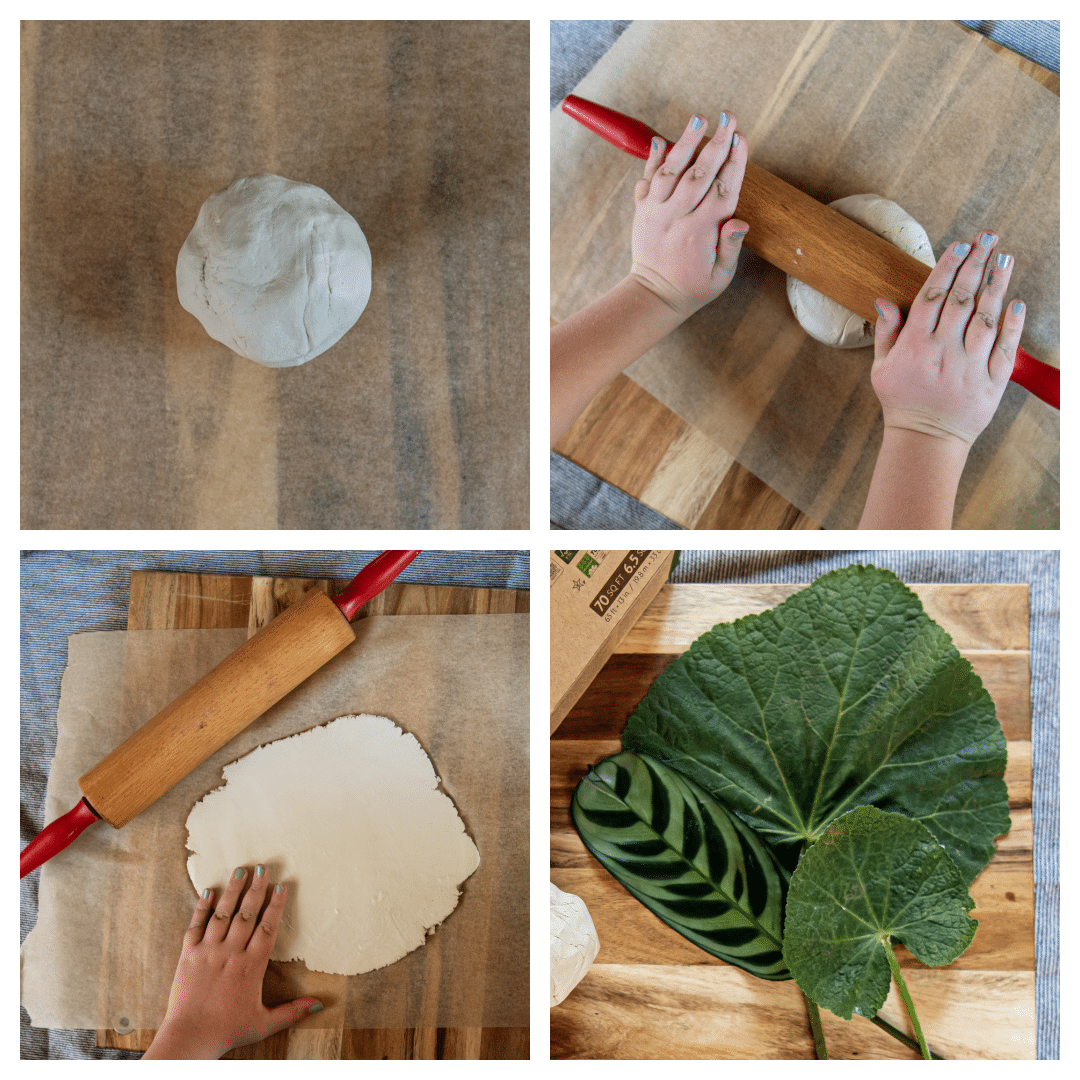
- Lay out leaf – Once your clay is rolled out flat, place your leaf directly on top of the clay, face-up, with the veiny side down.
- Create a leaf imprint in the clay – After your leaf is laying flat on your clay, grab the rolling pin and start rolling the leaf into the clay with medium pressure. You want to make sure that it’s leaving an indentation into the clay. You can check by carefully lifting up a piece of the leaf. If it’s not leaving an indentation that you can clearly see, try pressing a little harder.
- Cut out shape – Very carefully, or with an adult’s help, use a sharp knife to cut the leaf shape out of the clay. Then, carefully remove the leaf and set aside.
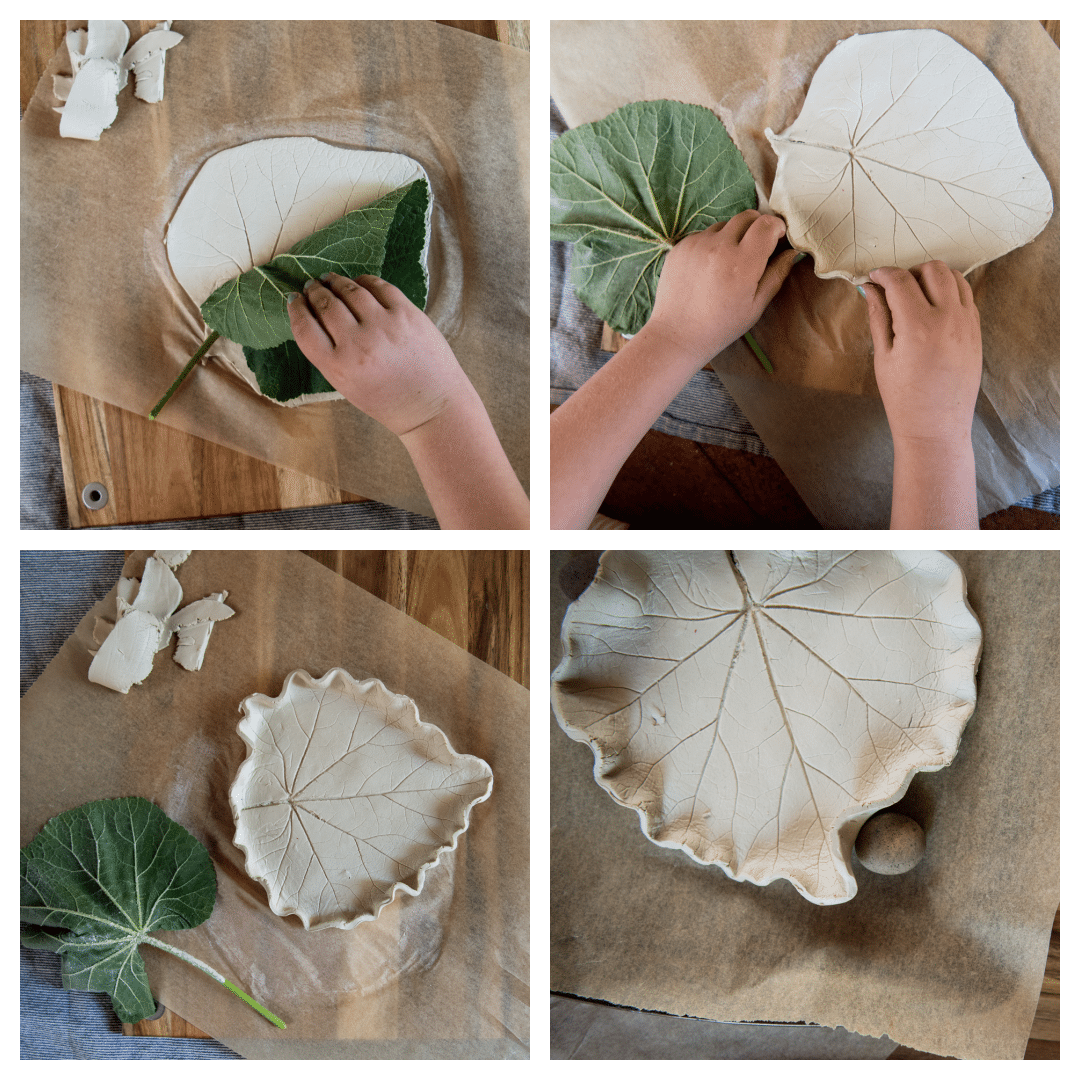
- Fold up edges – Once you’re happy with your leaf shape, using your fingertips, gently curl the edges up to form a shallow dish. Our edges took on a flutter effect. To create this look, it was similar to crimping a pie. But feel free to use your creativity and fold up your edges however you like!
- Let dry – Now, carefully place the finished dish onto a fresh piece of wax or parchment paper and allow them to dry and harden overnight before moving on to the next step. You may need to use something to brace the edges, so they don’t collapse as they dry. We used little stones to keep our edges in place.
- Optional – We didn’t do this step, but after your clay dishes have fully dried, you could paint them, decorate them with glitter, or use a clay glaze.
IF YOU LIKED MAKING A LEAF IMPRINT JEWELRY DISH, CHECK OUT THESE OTHER FUN CLAY CRAFTS
- Flower Pressed Ornaments are another fun clay craft using nature materials.
- Clay Hearts are for Valentine’s Day or any time!
- Lace Star Ornaments use lace instead of leaves to leave an imprint in clay.
- Clay Easter Eggs use air dry clay and leaf imprints.
How to Make a Leaf Imprint Jewelry Dish
This Leaf Imprint Jewelry Dish craft uses leaf imprints in clay to create a beautiful handmade gift for the Mother's Day or just because!
Materials
- Air-Dry Clay
- Parchment or wax paper
- Cutting board
- Leaves
Tools
- Rolling pin
- Knife
Instructions
1. Prepare your workspace - I like to have my kids's workspace all ready to go before we start a craft. So, we always start the craft by laying down a cloth on the table, a cutting board on top of that, and then parchment or wax paper on top of that.
2. Gather supplies - Once your workspace is ready, you'll need to gather your supplies: air-dry clay, a rolling pin, and a sharp knife.
3. Pick out leaves - We used leaves from a couple of houseplants as well as a few from the hollihocks that are just starting to pop up in our flower garden. But you could use leaves from trees or bushes too! Just be sure to use fresh leaves, dry or dead leaves will be too brittle and they will crack and break. Use medium to large leaves, at least 4 inches long or wide, so that it's large enough to create a dish. Also, look for leaves with lots of veins in them - they make the prettiest designs!
4. Roll out clay - Make a tennis ball sized ball of clay and put it on a sheet of wax or parchment paper, then grab a rolling pin and roll the clay out flat into a disk between 1/4 and 1/8 of an inch thick.
5. Lay out leaf - Once your clay is rolled out flat, place your leaf directly on top of the clay, face-up (you'll want the veiny side down).
6. Press leaf into clay - After you lay your leaf flat on your clay, grab the rolling pin and start rolling the leaf into the clay with medium pressure. You want to make sure that it's leaving an indentation into the clay. You can check by carefully lifting up a piece of the leaf. Decide if you need to roll harder or if it looks fine.
7. Remove leaf and cut out shape - Carefully remove the leaf and set aside. Very carefully, or with an adult's help, use a sharp knife to cut the leaf shape out of the clay.
8. Fold up edges - Once you are happy with your leaf shape, using your fingertips, gently curl the edges up to form a shallow dish. Our edges took on a flutter effect, to do this, it was sort of like crimping a pie. But feel free to use your creativity and fold your edges up however you like!
9. Let dry - Now, carefully place the finished dish onto a fresh piece of wax or parchment paper and allow them to dry and harden overnight before moving on to the next step. You may need to use something to brace the edges, so they don't collaps as they dry. We used little stones to keep our edges in place.
10. Optional - We didn't do this step, but after you clay dishes have dried, you could paint them, decorate with glitter, or use a clay glaze.