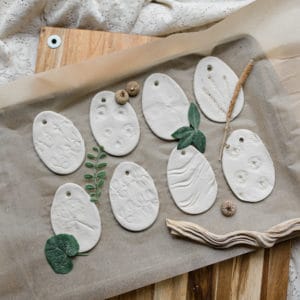
These Clay Easter Eggs are the perfect nature based craft for Easter. All you need is clay and a variety of nature materials to make these beautiful egg ornaments!
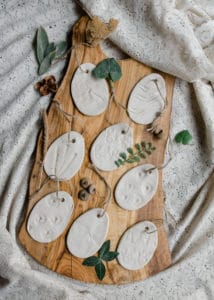
Easter is right around the corner and although we will always dye and decorate Easter Eggs, we also love doing seasonal crafts to help celebrate the holidays. You can have a lot of fun and get really creative with these simple Clay Easter Eggs by using all sort of different nature materials! Read on for the steps to make your own.
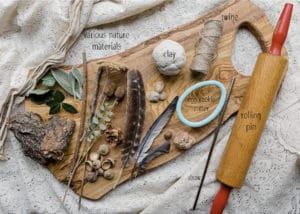
Materials Needed to Make Clay Easter Eggs
- Clay – We like to use white Crayola Air-Dry Clay because it’s easy to use and dries quickly.
- Rolling pin – This is needed to roll out the clay before you cut the shapes.
- Egg shaped cookie cutter – This makes cutting out the shapes so easy. This time of year, you’ll definitely be able to find egg cookie cutters at most stores, but you can also always find good quality cookie cutters here at Ann Clark.
- Straw – We use a straw to create the hole at the top that the twine can pass through so you can hang these clay eggs up. We have a metal re-usable straw that we just keep with our crafting supplies so we can use it more than once.
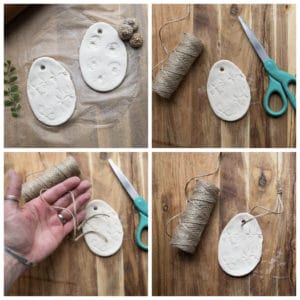
- Twine – I like the look of natural twine, but any yarn or thick string will work for these!
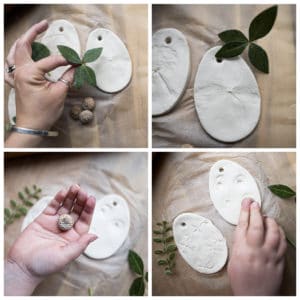
- Nature materials – This is where you can get really creative! Look for nature materials that have texture that will make a good imprint on the clay. Things like leaves, bark, grasses, and flowers all work great!
Steps to make Clay Easter Eggs
- Gather supplies – Whenever we make nature based crafts or art, going out in nature to gather supplies is always me and my kids’s favorite part! We usually take a basket with us on a nature walk out in the forest or even just around the neighborhood park and collect things as we go. Any nature material will work, but be sure to look for things with texture that will add an interesting imprint onto the clay.
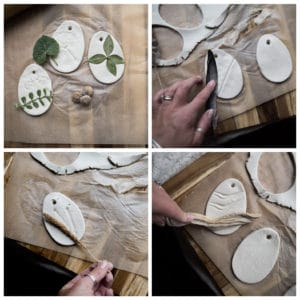
- Roll out clay – Make a tennis ball sized ball of clay and put it on a clean workspace, then grab a rolling pin and roll the clay out flat into a disk between 1/4 and 1/8 of an inch thick.
- Cut shapes – Grab your egg shaped cookie cutter and start cutting out shapes. Re-roll the left over clay until you have used it up. Make as many as you like!
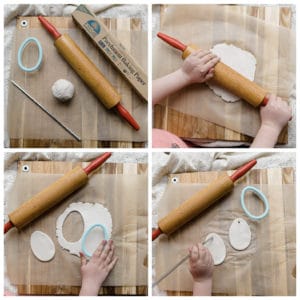
- Create a string hole – Using a straw, create a small hole at the top of the egg to pass a piece of twine through. This is optional, but you’ll need a hole if you’d like to use these as ornaments or as a garland.
- Press imprints into clay – Find the nature materials you collected earlier and start laying various items on top of the clay and with your fingertips, gently press the texture of the item into the clay. Gently peel up the material to leave behind the imprint. You can get really creative with this part. Make patterns or lines or shapes. Decorate the egg with any textures you like!
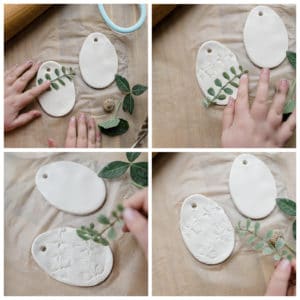
- Let dry – Now, place the clay eggs onto a flat surface (we used a baking sheet covered with parchment paper). Allow the eggs to dry and harden overnight before moving on to the next step.
- Add twine to hang up – Pick out twine or thick string or yarn to use to hang up your ornaments. Cut a 6-8 inch piece of twine and pass one end through the hole at the top of the egg and tie the ends together. Or in the alternative, you could grab a long piece of twine and string it through all the egg tops to create a garland instead of ornaments.
- Optional – We didn’t do this step, but you could continue decorating your Clay Easter Eggs by painting or coloring the imprints or adding glitter!
Nature materials you could use when making Clay Easter Eggs
- Leaves, grasses, flowers, herbs
- Acorn caps, nuts, feathers, snail shells
- Sticks, twigs, bark, pinecones
Other crafts that use Air-Dry Clay like these Clay Easter eggs
- Flower Pressed Ornaments are another fun clay ornament using nature materials.
- Clay Hearts are a fun craft using clay to celebrate Valentine’s Day.
- Lace Star Ornaments use clay like these Clay Easter Eggs, but instead of using nature materials, we used lace to leave an imprint.
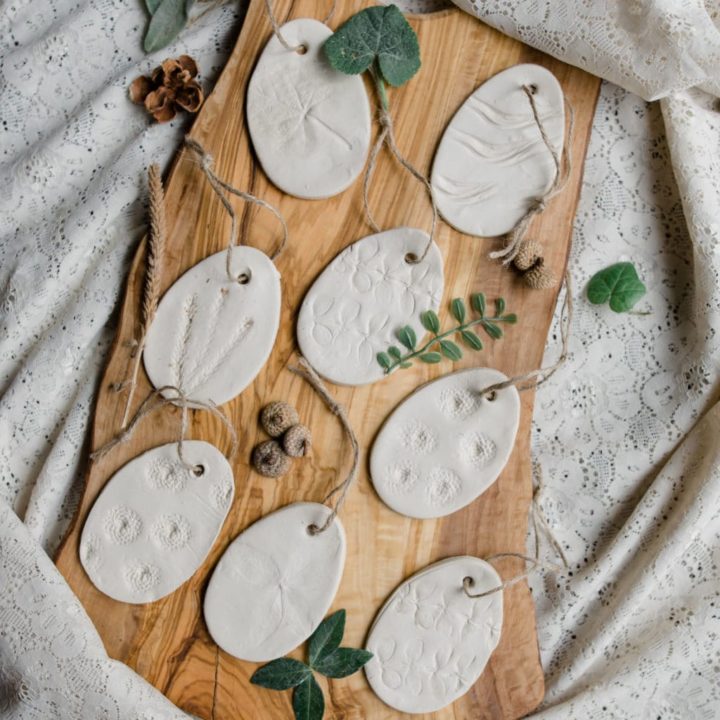
How to Make Clay Easter Eggs
These Clay Easter Eggs are the perfect nature based craft for Easter. All you need is clay and a variety of nature materials to make these beautiful egg ornaments!
Materials
- Clay
- Nature Materials
- Twine
Tools
- Rolling pin
- Egg shaped cookie cutter
- Straw
Instructions
1. Gather various nature materials, especially things with texture that will add an interesting imprint onto the clay.
2. Make a tennis ball sized ball of air-dry clay and put it on a clean workspace, then grab a rolling pin and roll the clay out flat into a disk between 1/4 and 1/8 of an inch thick.
3. Grab your egg shaped cookie cutter and start cutting out shapes. Re-roll the left over clay until you have used it all up. Make as many as you like!
4. Once you've cut out your egg shapes, use a straw to create a small hole at the top of the egg to pass a piece of twine through. This is optional, but you'll need a hole if you'd like to use these as ornaments or as a garland.
5. Grab the nature materials you collected earlier and start laying various items on top of the clay. With your fingertips, gently press the material into the clay. Gently peel up the material to leave behind the imprint. You can get really creative with this part. Make patterns or lines or shapes. Decorate the egg with any textures you like!
6. Once you're done imprinting the clay eggs, lay them on a flat surface (we used a baking sheet covered with parchment paper) and allow them to dry and harden overnight before moving on to the next step.
7. Pick out twine or thick string or yarn to use to hang up your ornaments. Cut a 6-8 inch piece of twine and pass one end through the hole at the top of the egg and tie the ends together. Or in the alternative, you could grab a long piece of twine and string it through all the egg tops to create a garland instead of ornaments.
8. Optional - You could continue decorating your Clay Easter Eggs by painting or coloring the imprints or adding glitter if you'd like!
Leave a Reply