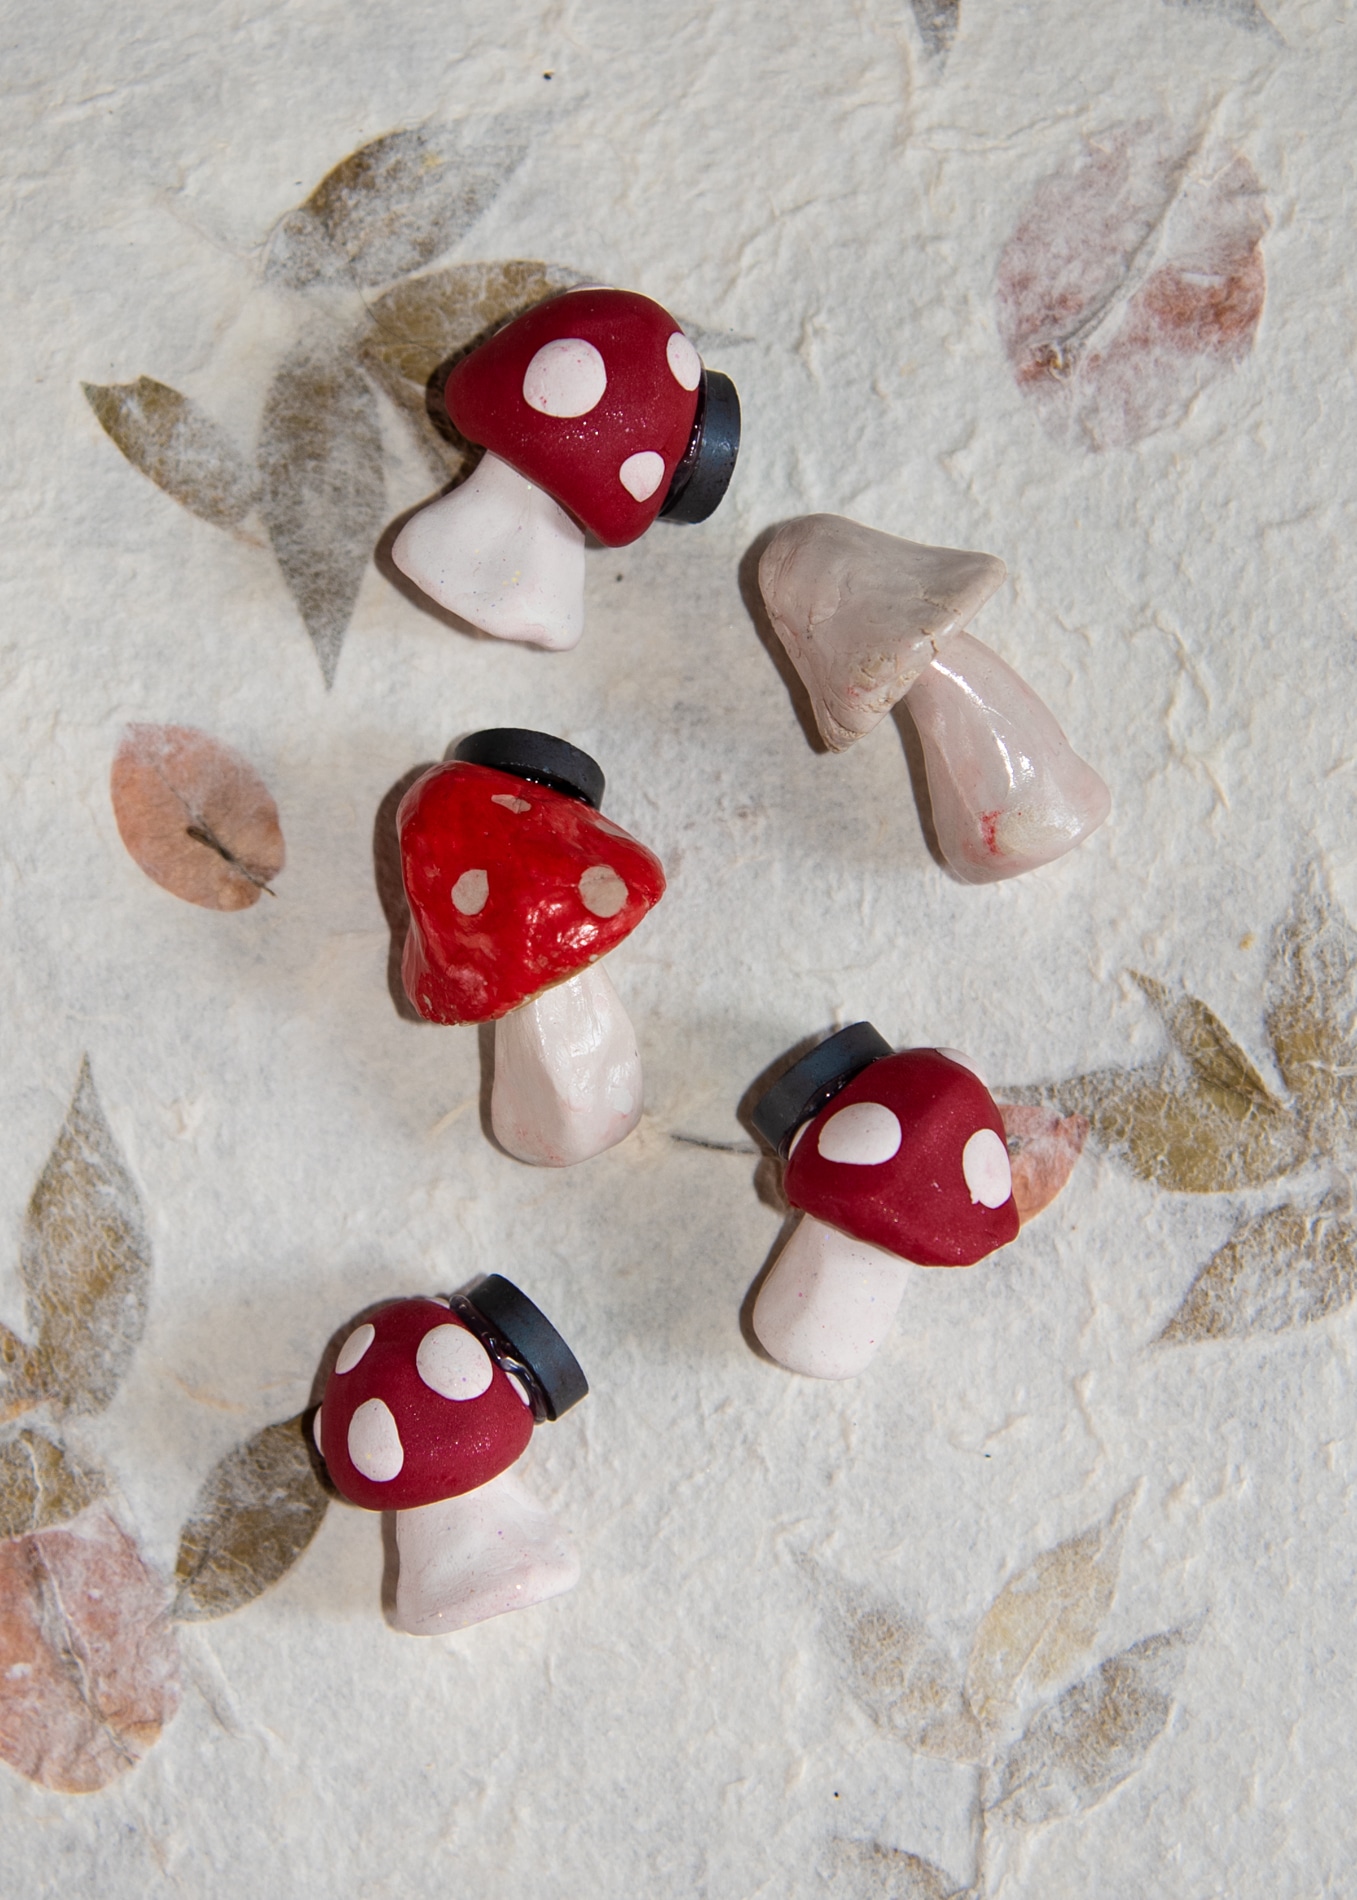
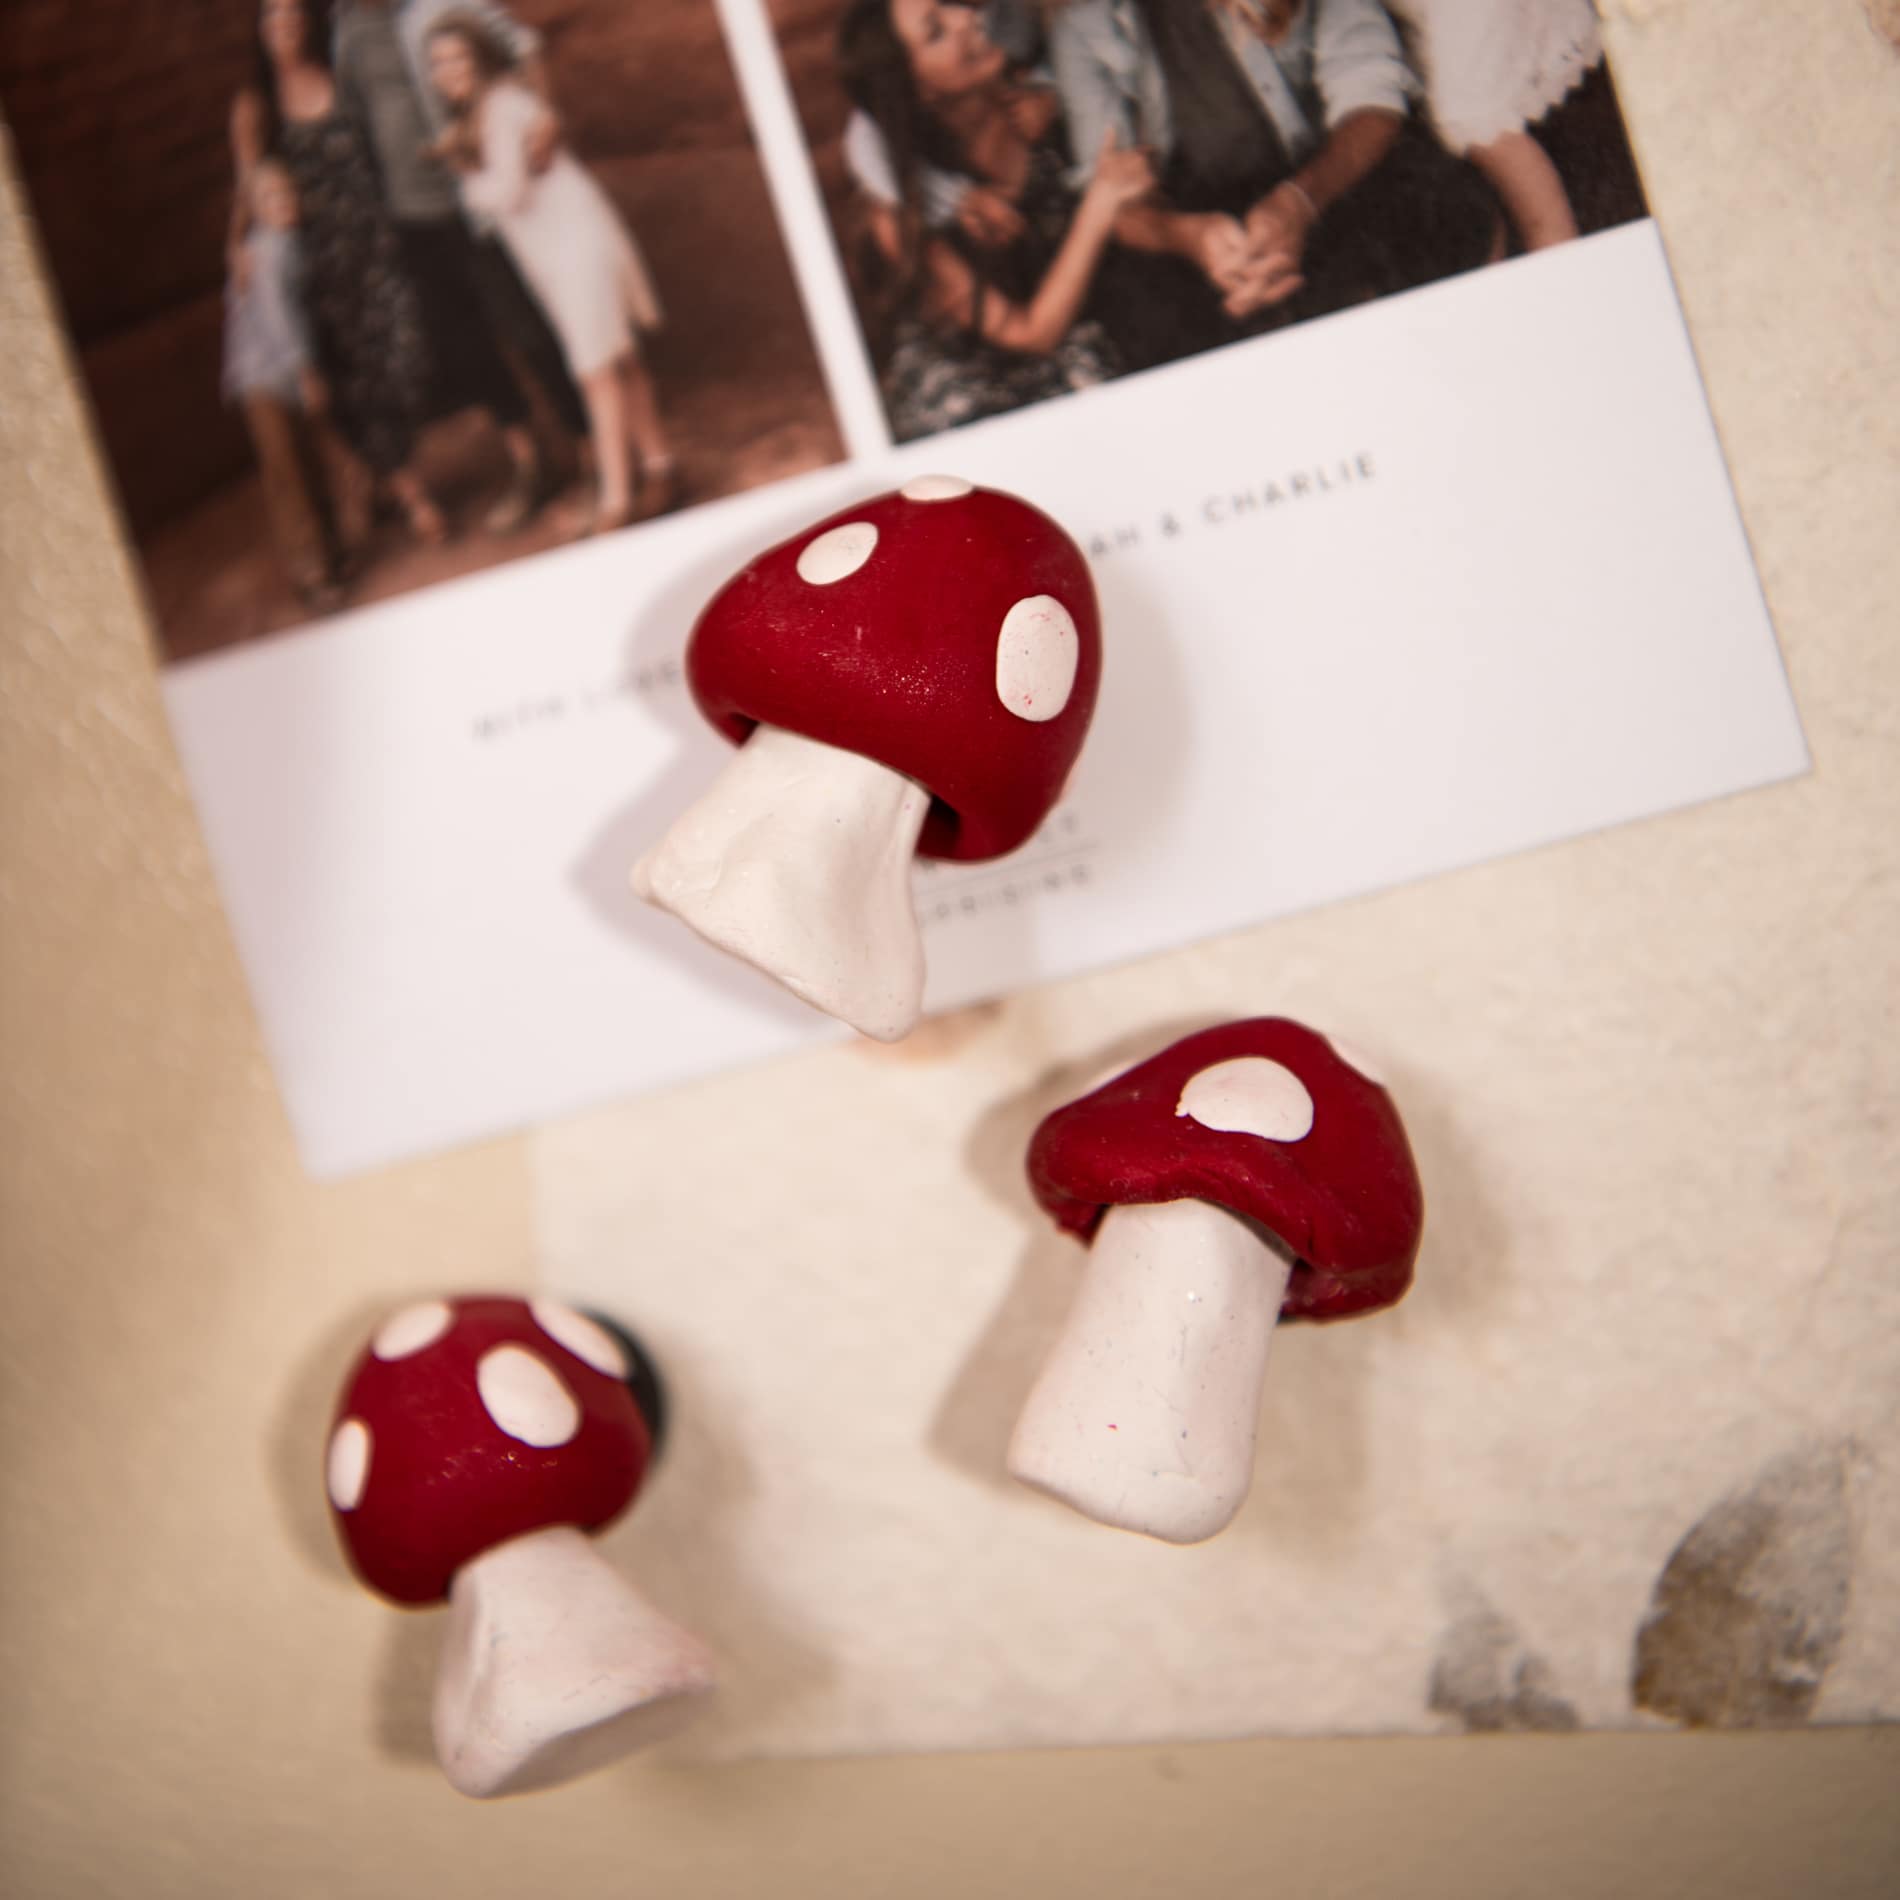
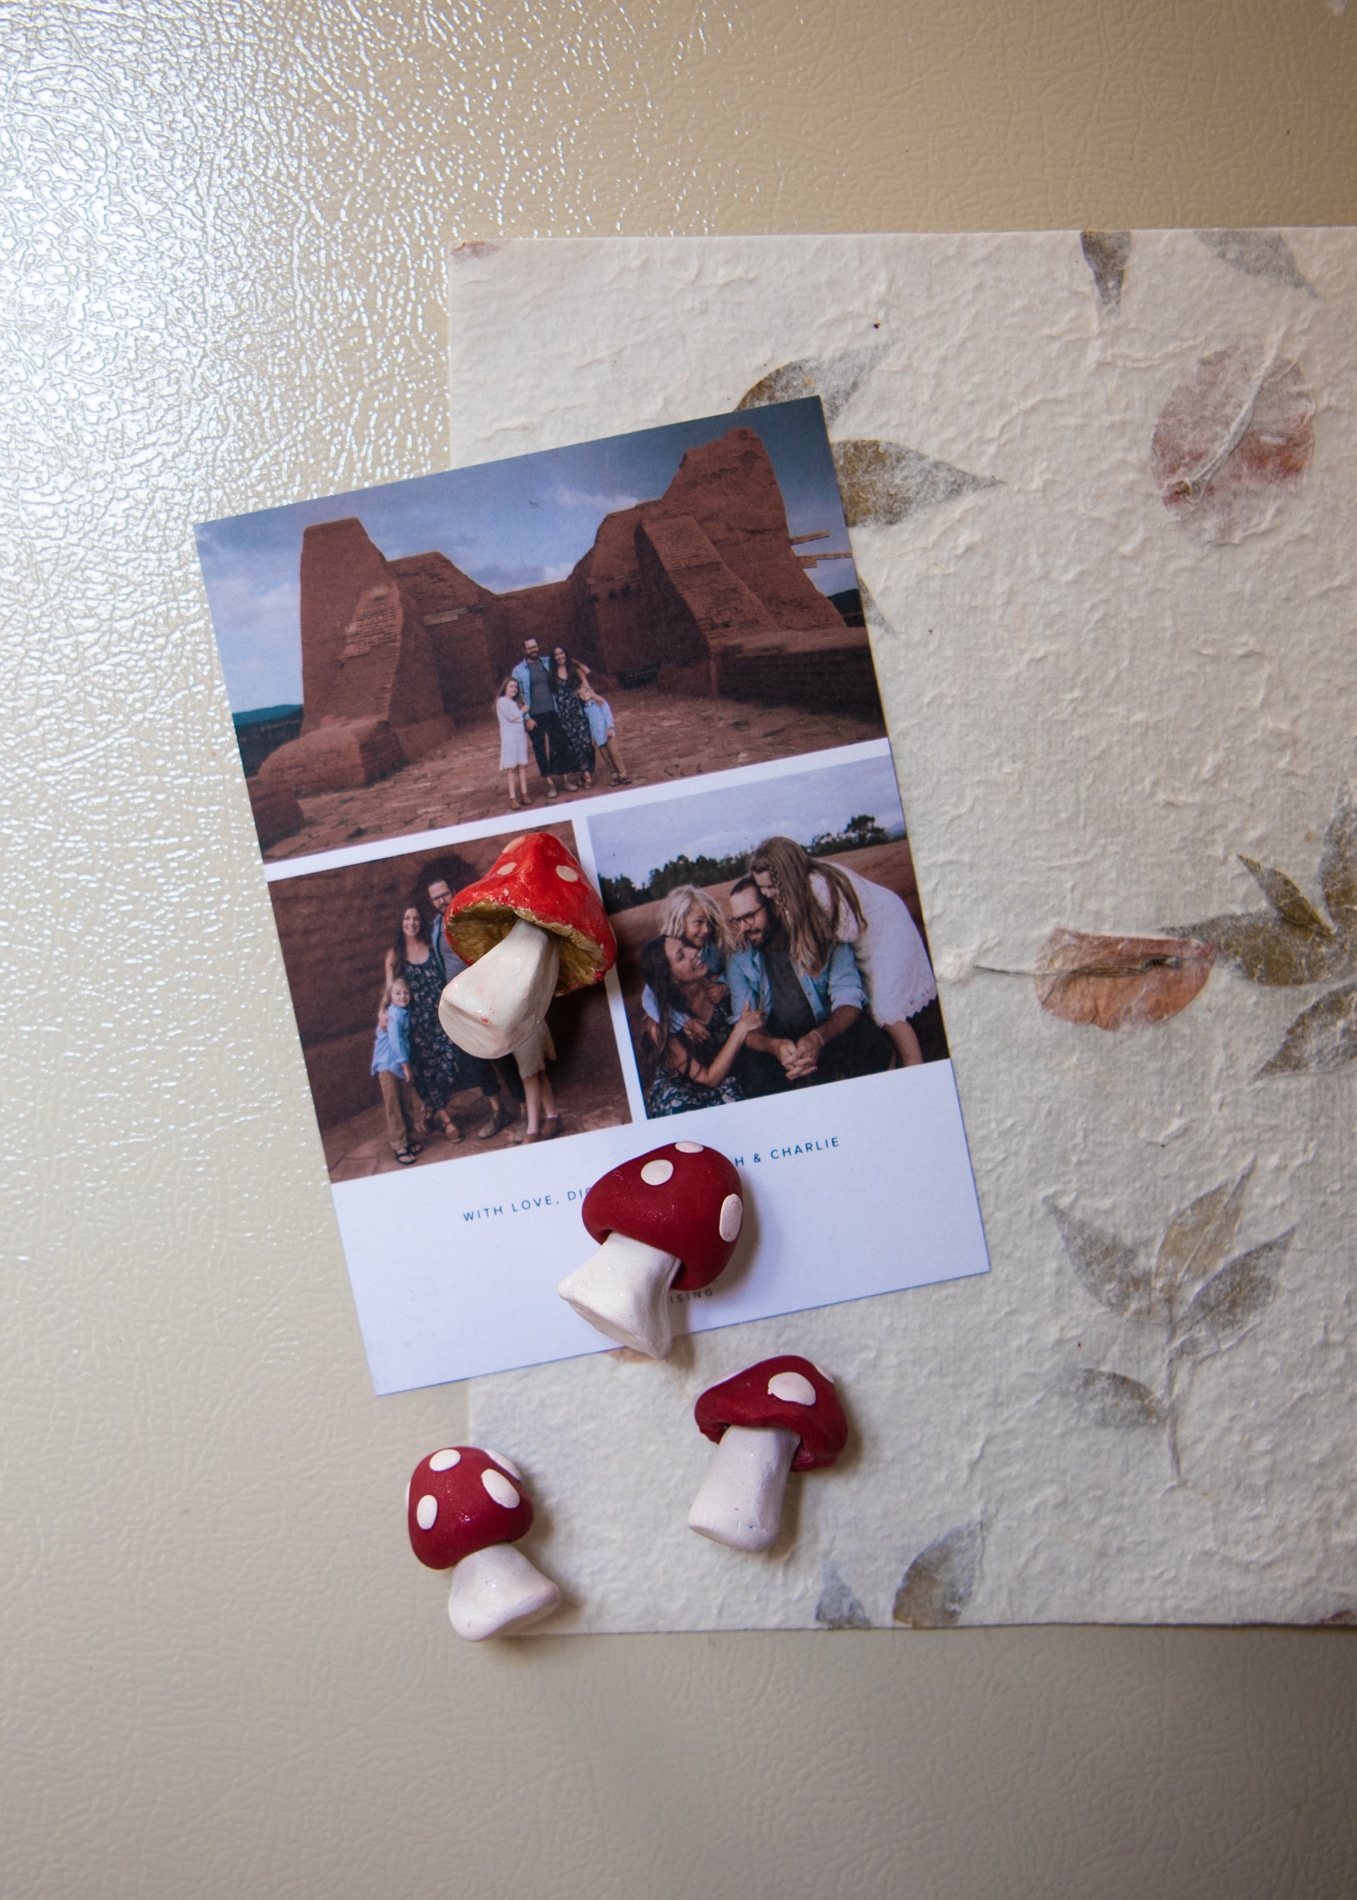
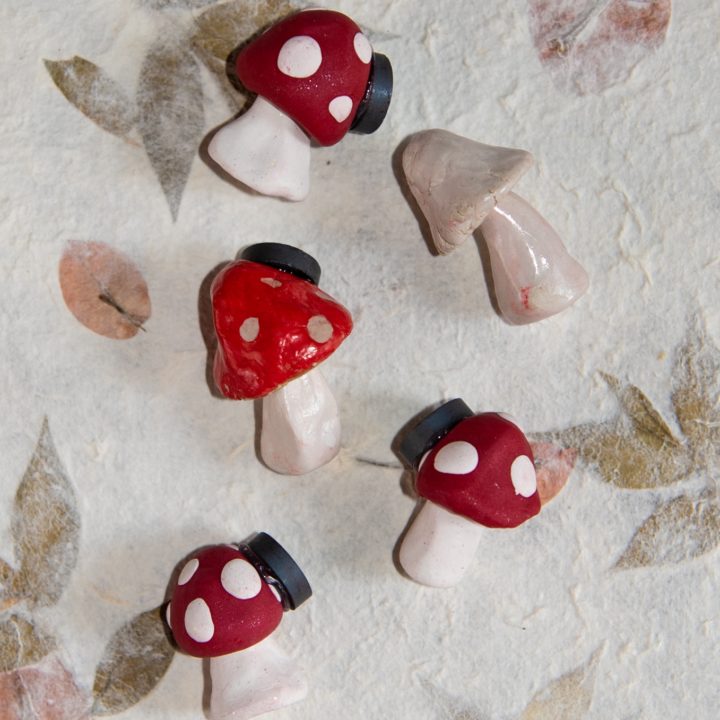
These adorable Mushroom Magnets are so fun to make and would be a super cute addition to anyone’s refrigerator!
Below, I will be sharing TWO different ways to make these cute mushroom magnets out of clay. First, I’ll explain how to make them with polymer clay (oven-baked clay) and next I’ll explain how to make them with air-dry clay.
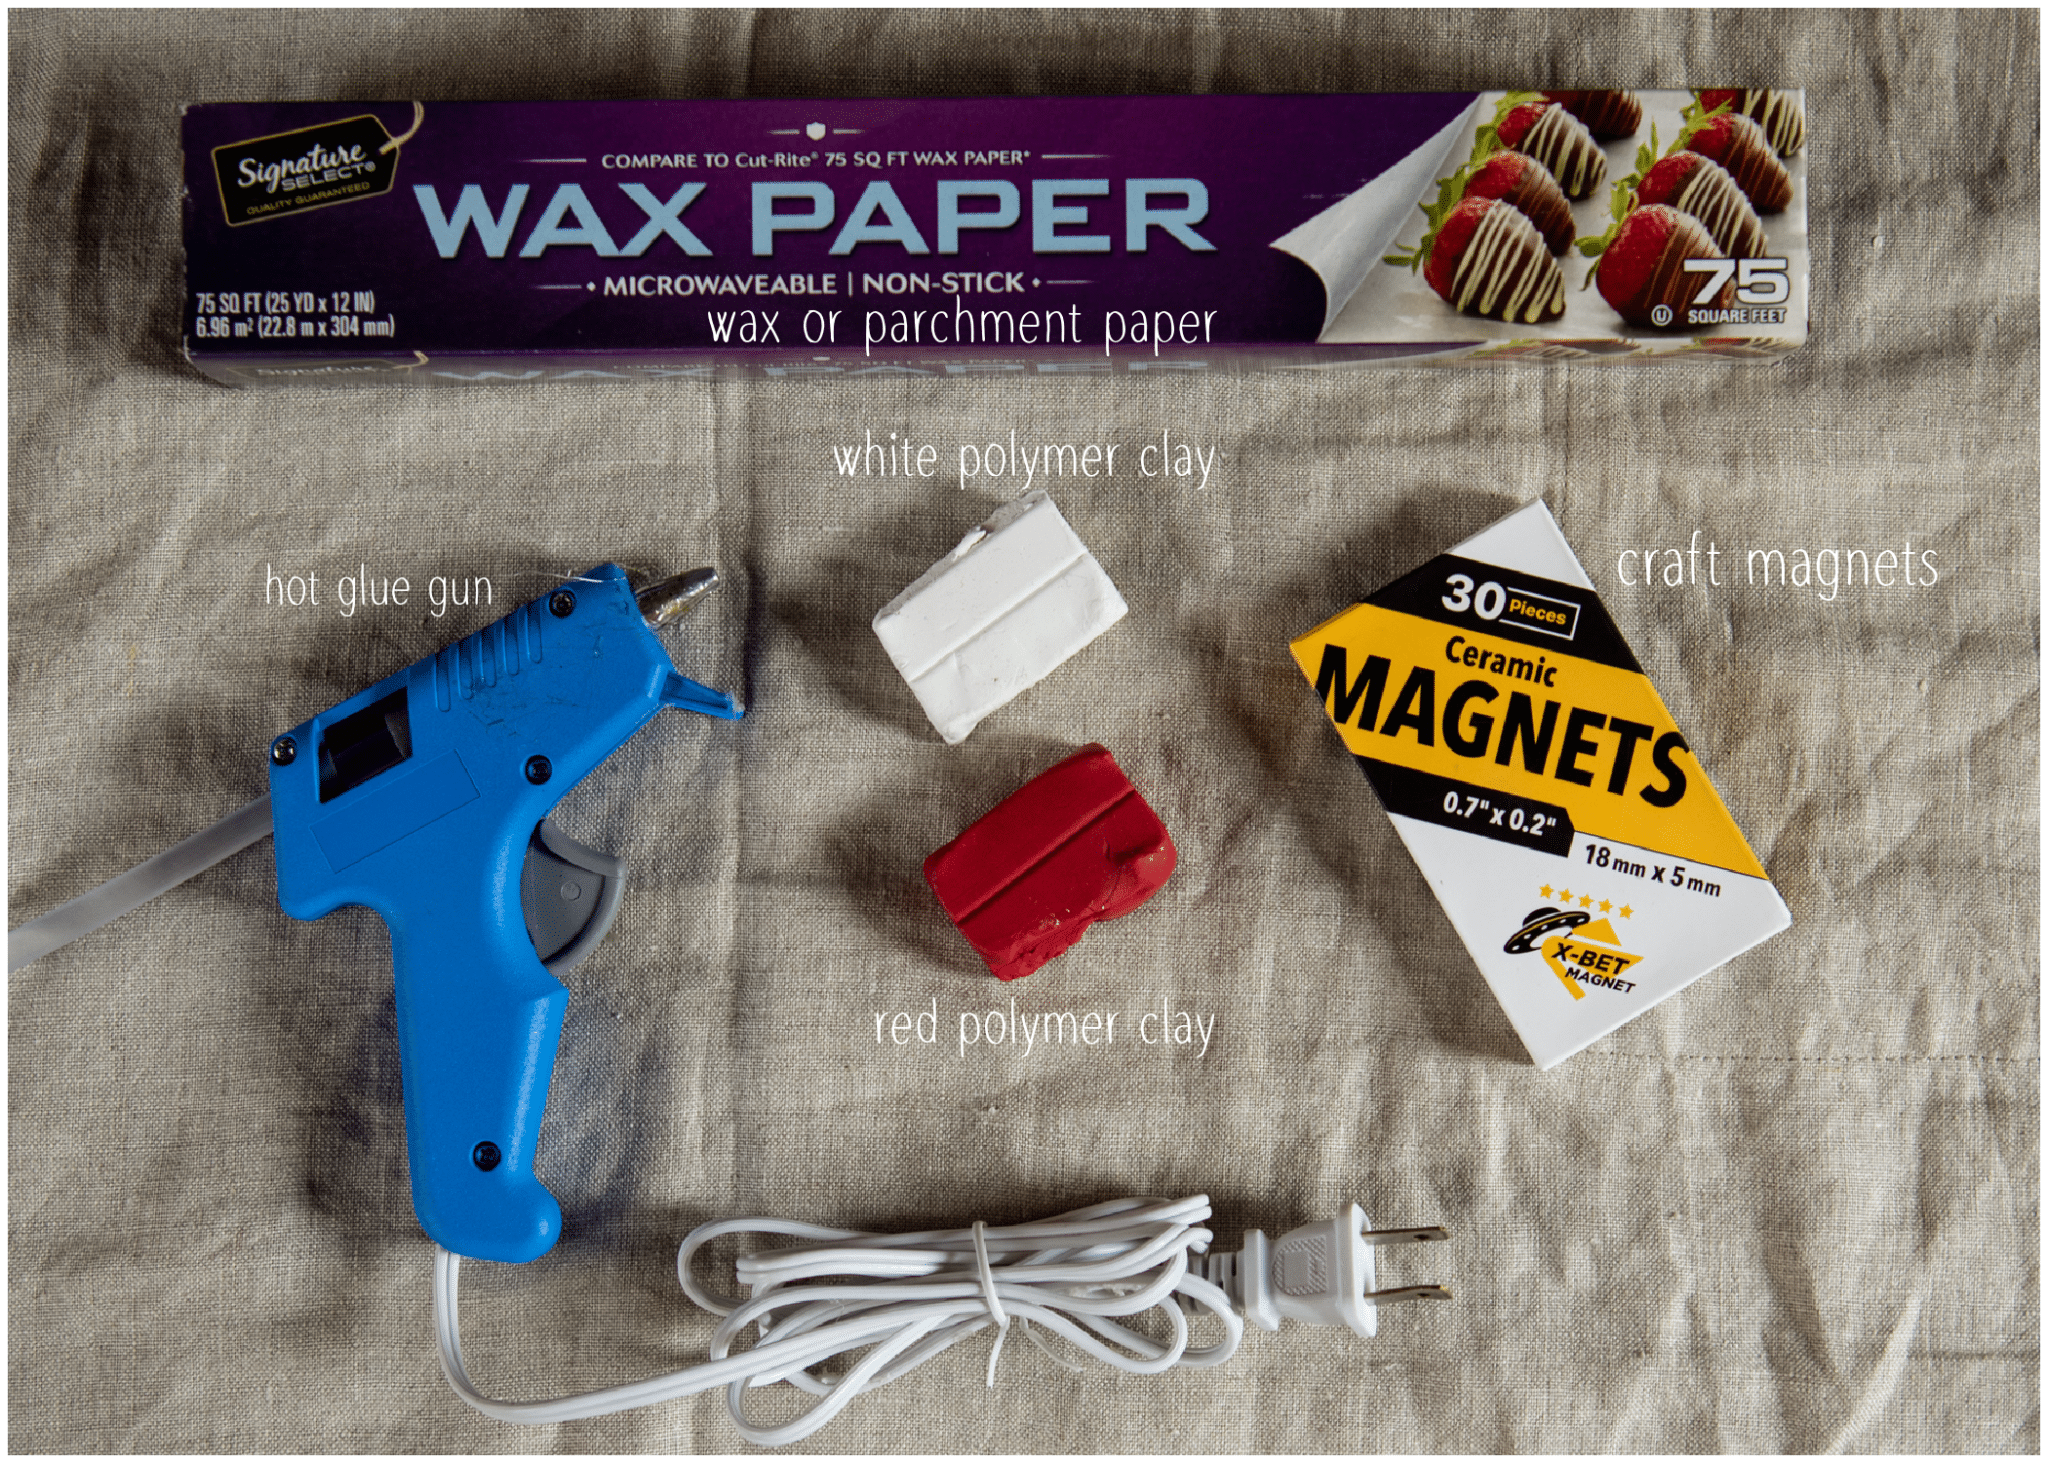
Materials Needed to Make MUSHROOM MAGNETS USING POLYMER CLAY
- Red and white polymer clay – Polymer clay is also known as oven-baked clay. We used Sculpey III Polymer Clay because it comes in a lot of different fun colors. And it’s also soft and easy to use, so it’s perfect for beginners and children!
- Parchment or wax paper – This keeps the clay from sticking on your work surface and avoids making a mess.
- Craft magnets – These mushrooms won’t be very big, so these small 18mm x 5mm round craft magnets from Amazon are perfect.
- Hot glue gun – You’ll need this to glue the craft magnets onto the mushrooms.
HOW TO MAKE MUSHROOM MAGNETS USING POLYMER CLAY
- Prepare your workspace – I like to have my kids’s workspace all ready to go before we start a craft. We always start the craft by laying down a cloth on the table and then parchment or wax paper on top of that.
- Gather supplies – Once your workspace is ready, grab your red and white polymer clay and craft magnets.
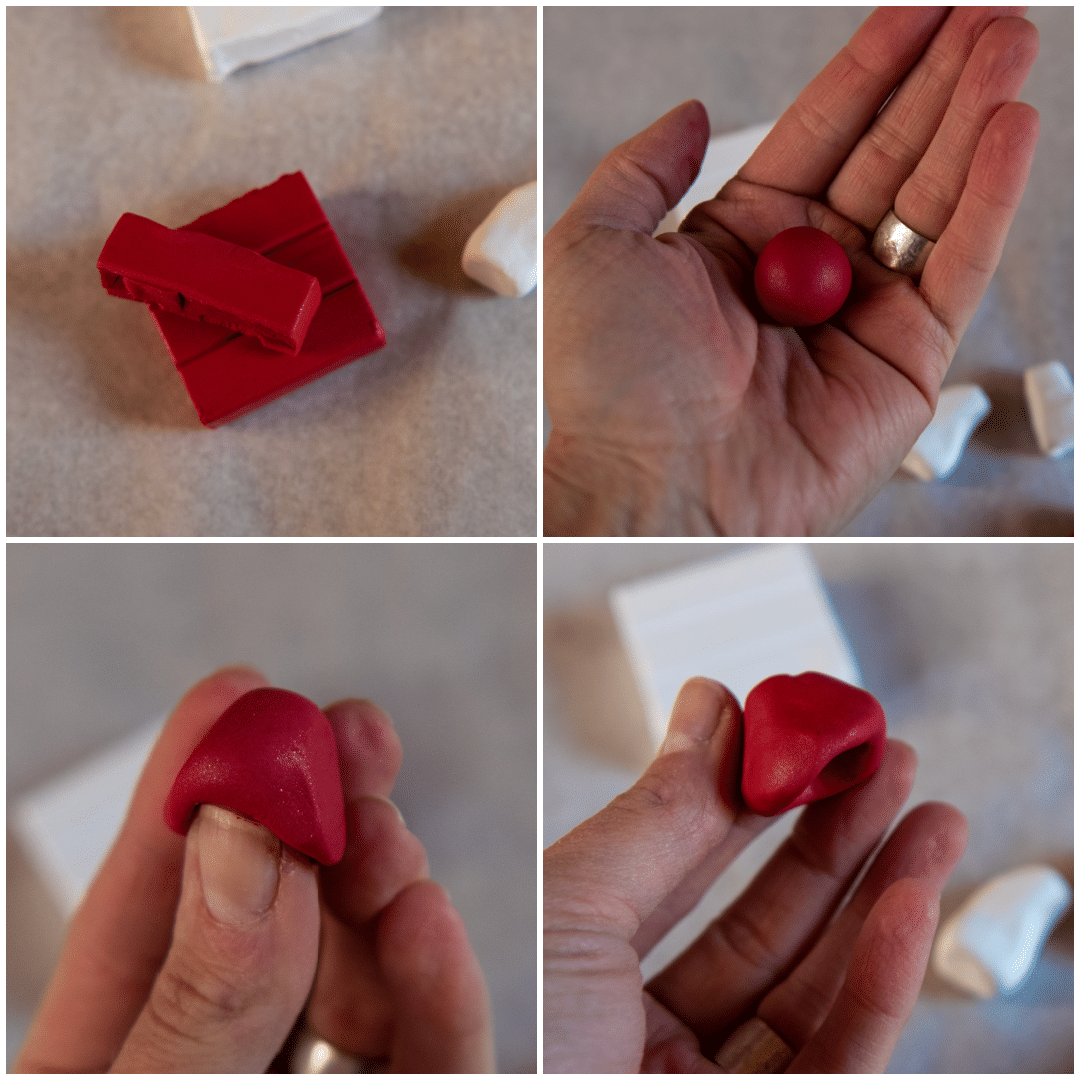
- Create mushroom cap – Form a small ball of red polymer clay, about 1 inch in diameter. Using your thumb or the eraser end of a pencil, push into one side of the ball to create a deep indentation. Then, flutter out the edges a little bit and create a blunt point at the tip – to resemble a mushroom cap. This is where you can get creative! No mushroom cap in nature will look the same, so just have fun with it! The more round it is, the more cartoon-looking it will become, but you can make it more realistic looking too. Whatever you prefer!
- Create mushroom stem – Now, grab your white clay and grab a small piece – about an ince in diameter. Roll it into a ball, just like the red cap, but then, using both palms, roll it into a thick, short snake shape. Then mold it into a shape that resembles a hershey kiss, with a wide base and pointy tip. Or make a longer stem with a more narrow base, that resembles a gnome hat.
- Create white spots – Make teeny-tiny balls with the white clay of varying sizes. All will be small, no bigger than a small pebble, but making them in a variety of sizes will give your mushroom more character. Then with your thumb and index finger, flatten the small balls into disks. Gently, place the white, flat disks in various spots around the red cap, then gently push them into the red clay so that they smoothly attach to eachother.
- Attach stem to cap – Now genlty squish the tip of the white stem into the underside cavity of the red cap. Push them together gently, so they don’t squish too much and lose their shape, but firm enough that they stick together.
- Bake – Place them on a baking sheet and bake at 275 °F (130 °C) for 15 minutes per 1/4 in (6 mm) thickness. We baked ours for about an hour and they came out perfect.
- Attach magnet – Once your mushrooms are out of the oven and have cooled, grab your hot glue gun and craft magnets. Add a small dab of glue onto a back side of a magnet and then press the magnet into the back of your mushroom. Firmly hold it in place until the glue dries. And that’s it!
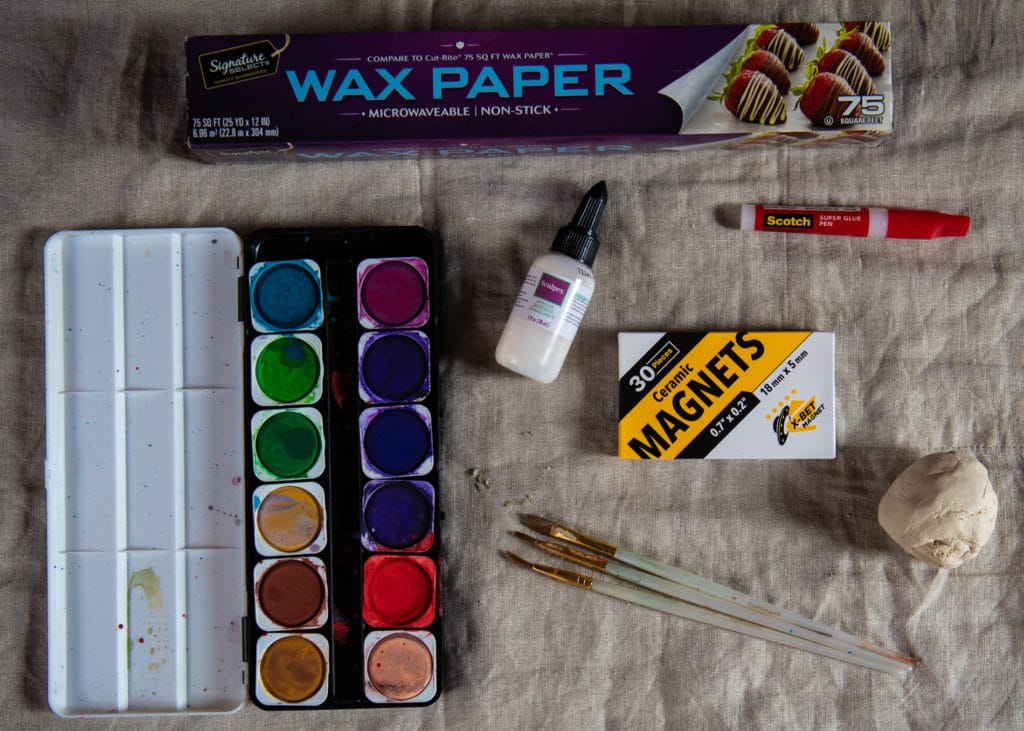
Materials Needed to Make MUSHROOM MAGNETS USING AIR-DRY CLAY
- Clay – I like to use white Crayola Air-Dry Clay because it’s easy to use and dries overnight.
- Glaze – A satin glaze will provide a smooth seal to set your clay and creates a surface that superglue will adhere to. We used Sculpey’s satin glaze because it dries fast and is easy to use.
- Water color paints and brushes – Since you’ll be using white clay, you may wish to paint your mushrooms once the clay dries and hardens.
- Parchment or wax paper – This keeps the clay from sticking on your work surface and avoids making a mess.
- Craft magnets – These mushrooms won’t be very big, so these small 18mm x 5mm round craft magnets from Amazon are perfect.
- Super glue – You’ll need this to glue the craft magnets onto the mushrooms.
HOW TO MAKE MUSHROOM MAGNETS USING AIR-DRY CLAY
- Prepare your workspace – We always begin a craft by laying down a cloth on the table and then parchment or wax paper on top of that to make clean-up easy.
- Create mushroom cap – Form a small ball of air-dry clay, about 1 inch in diameter. Using your finger (or the eraser side of a pencil), push into one side to create a deep indentation into the ball. Then, roll your finger or tool around and around to flutter out the edges a little bit and work with the clay with your fingertips, until the tip is pointed up a bit. Just try to create a shape that resembles a mushroom cap. This is where you can get creative! No mushroom cap in nature looks the same, so just have fun with it!

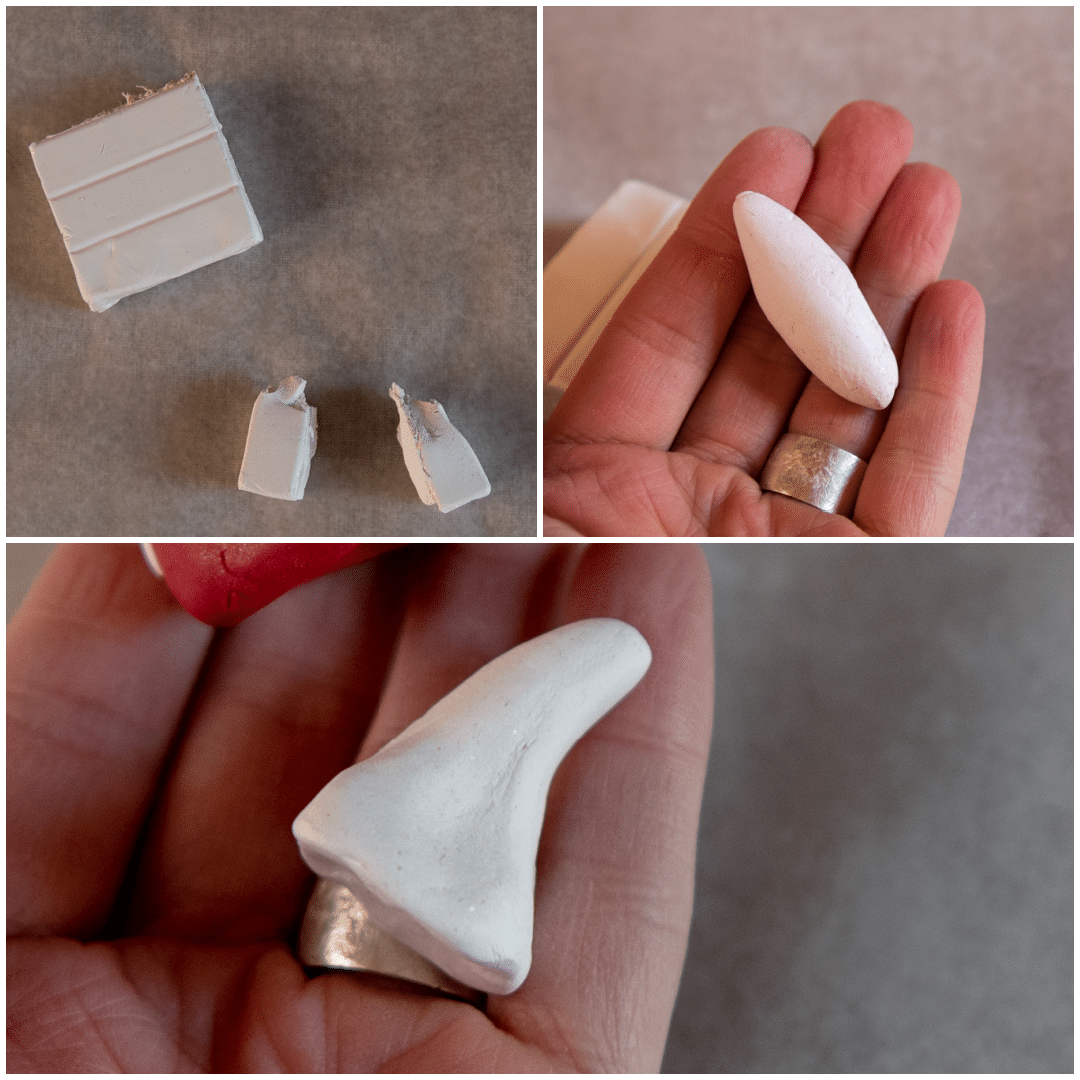
- Create mushroom stem – Grab another small piece of clay, again about an inch in diameter. Using both palms, roll it into a thick, stubby snake shape. Then mold it into a shape that resembles a gnome hat or a shark tooth, with a narrow base and pointy, dull tip.
- Let dry – Place the stems and caps onto a flat surface and allow the clay to harden and dry overnight or around 24 hours.
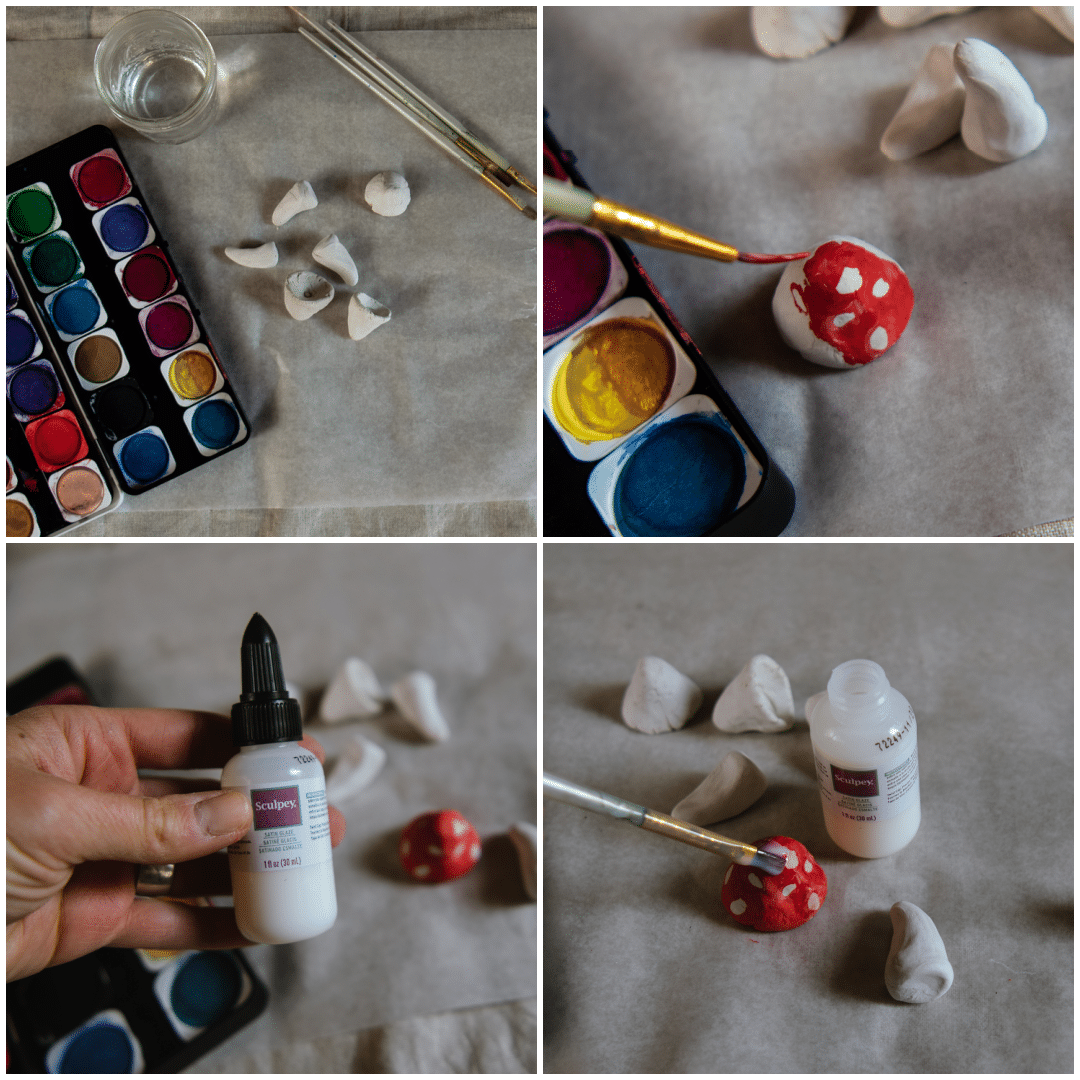
- Paint – Once your mushroom pieces have dried and hardened, grab some watercolor paints and decorate your cap. We painted ours red with white spots with a brown underside, but you can paint them however you like! When you are finished, let the pieces sit for 30 minutes to dry.
- Glaze – Once your mushroom pieces have been painted and have fully dried, grab your glaze and carefully paint a thin layer onto your mushroom pieces so that every part of the surface is covered, evenly. Let the pieces sit and dry for another 30 minutes.
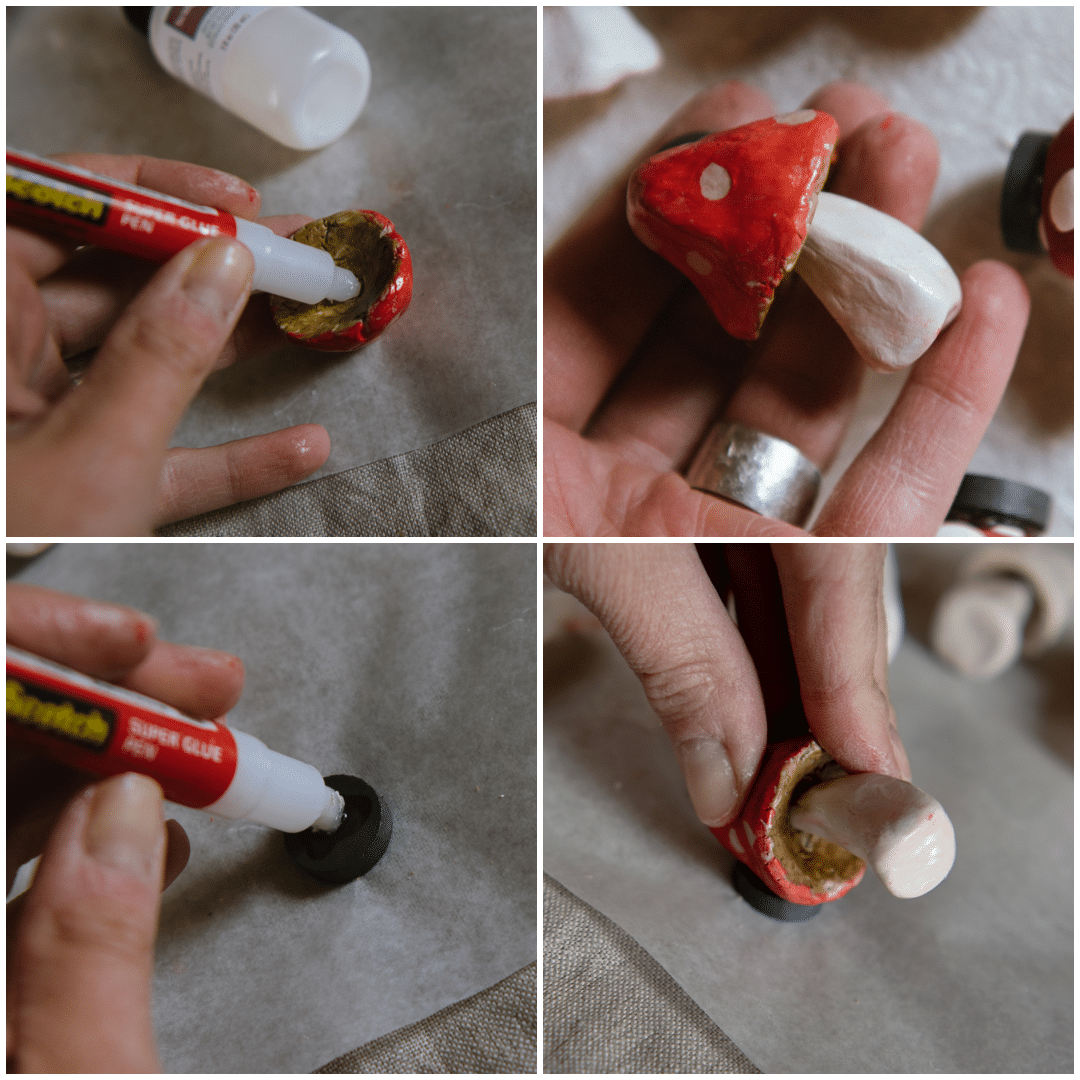
- Attach stem to cap – Once the glaze is fully dry, grab some super glue, and with a grown-up’s help, add a small amount on the inside of the bottom side of the mushroom cap. Grab your stem and push the tip into the glue and hold firmly intil it attaches and fully dries.
- Attach magnet – Again, with an adult’s help, add a small amount of superglue to the back of a craft magnet and then place on the side of the mushroom. Hold together, firmly until the mushroom fully adhere’s to the magnet.
COMPARING THESE TWO METHODS OF MAKING CLAY MUSHROOM MAGNETS
- Polymer clay pros – Easy and quick and you can complete the project within a few hours. They turn out very cute and cartoon-like. The magnet glues onto this type of clay better than the air-dry clay.
- Polymer clay cons – The clay is slightly more expensive because you don’t get as much clay per package as you do with air-dry clay. You need an oven to harden the clay.
- Air-dry clay pros – Air-dry clay is not expensive and it’s easy to work with. Painting the clay is a fun step. You don’t need an oven to set the clay. They turn out looking much more realistic looking as opposed to childlike, or cartoon looking. The glaze gives them a very clean, professional look.
- Air-dry clay cons – You need more materials to do the project. There are more steps involved and you have to wait overnight for the clay to set, so the project takes a longer time to complete. We didn’t have as much luck getting the magnet to stick onto the glazed air-dry clay as we did the oven-baked clay and super glue is more expensive and difficult to use safely than hot glue.
MORE CUTE HAND-SIZED CRAFTS THAT ARE SIMILAR TO MUSHROOM MAGNETS
- Felt Acorn Ornaments – These are a tiny nature-inspired craft using just acorn caps and felt balls.
- Clay Hearts – Are another craft that use clay to create really sweet ornaments for Valentine’s Day or any day!
- Halloween Rocks – Using palm-sized rocks and yarn to create cute monsters for Halloween.
How to Make Mushroom Magnets - Two Ways
These adorable Mushroom Magnets are so fun to make and would be a super cute addition to anyone's refrigerator!
Materials
- Polymer clay
- Air-Dry clay
- Hot glue
- Super glue
- Watercolor paints
- Glaze
- Small craft magnets
Tools
- Hot glue gun
- Paint brushes
Instructions
METHOD 1 - POLYMER CLAY
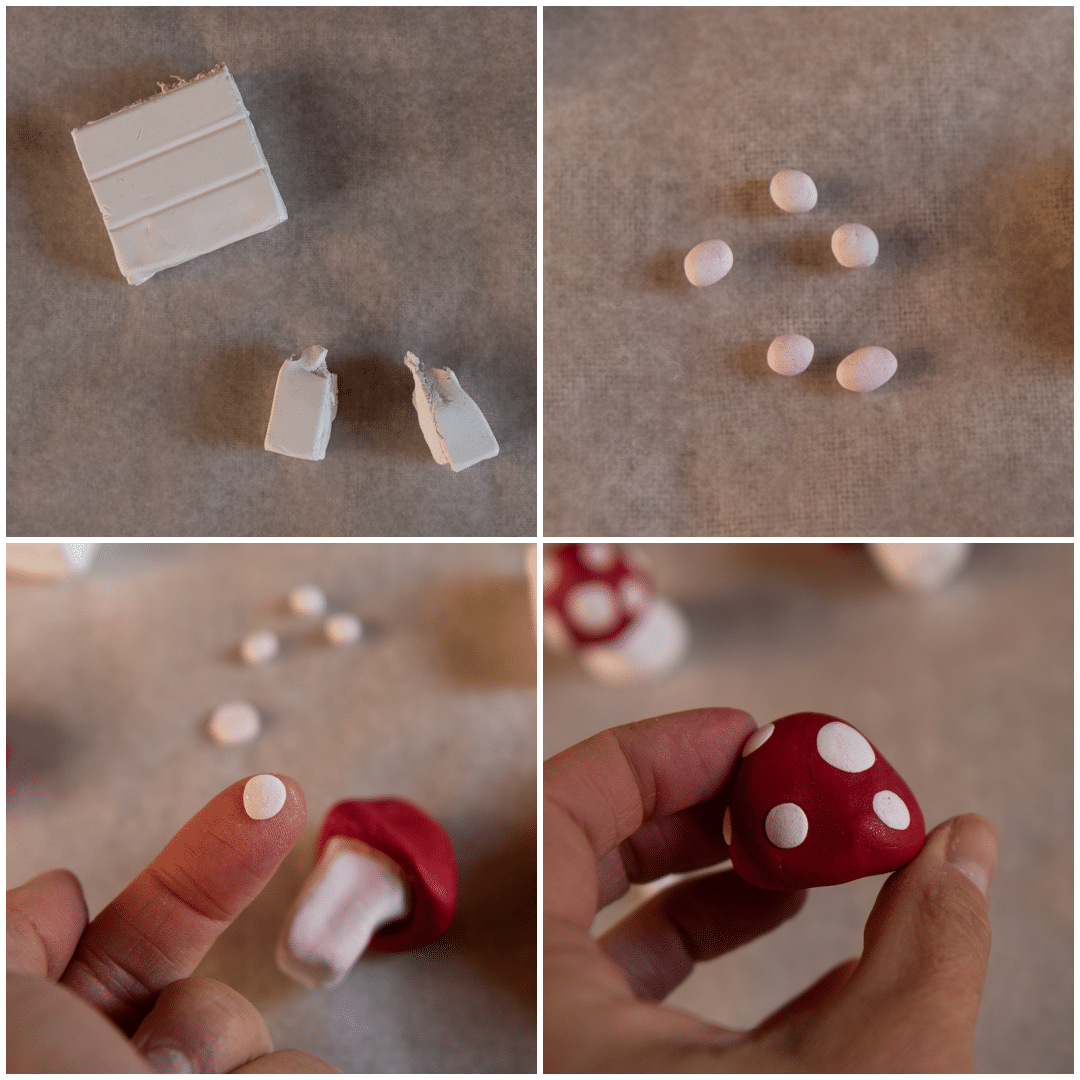
1. Create mushroom cap - Form a small ball of red polymer clay, about 1 inch in diameter. Using your thumb or the eraser end of a pencil, push into one side of the ball to create a deep indentation. Then, flutter out the edges a little bit and create a blunt point at the tip - to resemble a mushroom camp. This is where you can get creative! No mushroom cap in nature will look the same, so just have fun with it! The more round it is, the more cartoon-looking it will become, but you can make it more realistic looking too. Whatever you prefer!
2. Create mushroom stem - Now, grab your white clay and grab a small piece - about an ince in diameter. Roll it into a ball, just like the red cap, but then, using both palms, roll it into a thick, short snake shape. Then mold it into a shape that resembles a hershey kiss, with a wide base and pointy tip. Or make a longer stem with a more narrow base, that resembles a gnome hat.
3. Create white spots - Make teeny-tiny balls with the white clay of varying sizes. All will be small, no bigger than a small pebble, but making them in a variety of sizes will give your mushroom more character. Then with your thumb and index finger, flatten the small balls into disks. Gently, place the white, flat disks in various spots around the red cap, then gently push them into the red clay so that they smoothly attach to eachother.
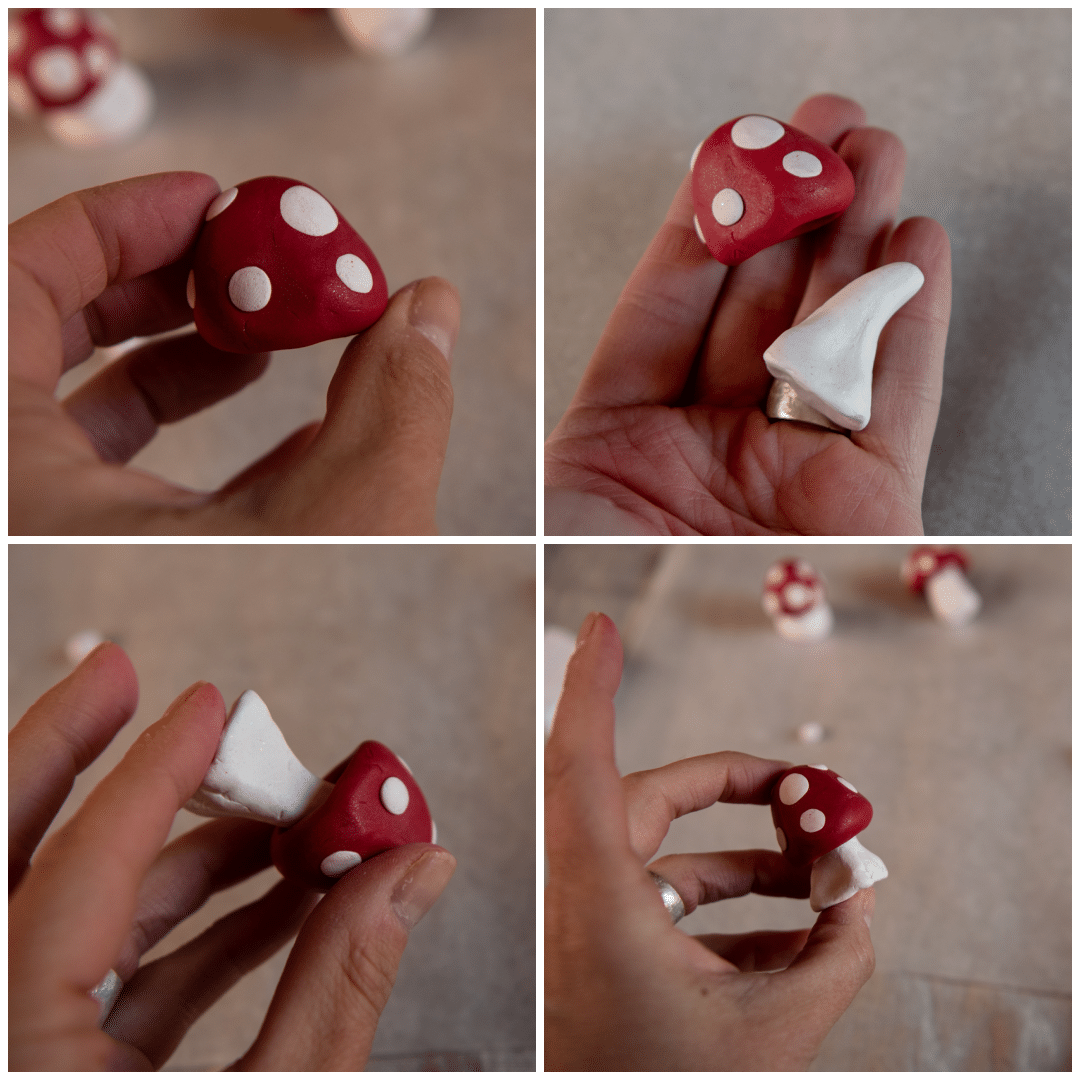
4. Attach stem to cap - Now genlty squish the tip of the white stem into the underside cavity of the red cap. Push them together gently, so they don't squish too much and lose their shape, but firm enough that they stick together.
5. Bake - Place them on a baking sheet and bake at 275 °F (130 °C) for 15 minutes per 1/4 in (6 mm) thickness. We baked ours for about an hour and they came out perfect.
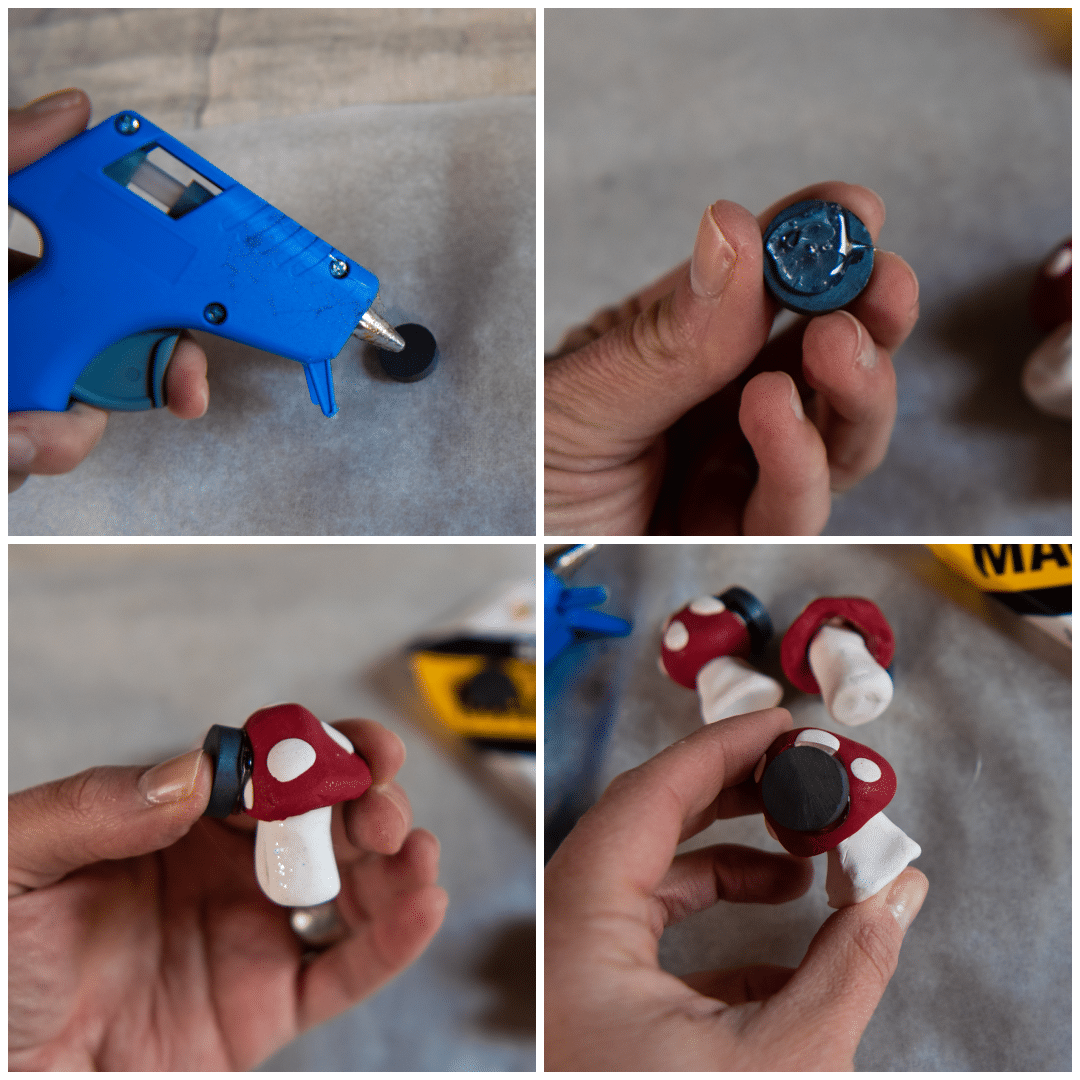
6. Attach magnet - Once your mushrooms are out of the oven and have cooled, grab your hot glue gun and craft magnets. Add a small dab of glue onto a back side of a magnet and then press the magnet into the back of your mushroom. Firmly hold it in place until the glue dries. And that's it!
METHOD 2 - AIR-DRY CLAY
1. Create mushroom cap - Form a small ball of air-dry clay, about 1 inch in diameter. Using your finger (or the eraser side of a pencil), push into one side to create a deep indentation into the ball. Then, roll your finger or tool around and around to flutter out the edges a little bit and work with the clay with your fingertips, until the tip is pointed up a bit. Just try to create a shape that resembles a mushroom cap. This is where you can get creative! No mushroom cap in nature looks the same, so just have fun with it!
2. Create mushroom stem - Grab another small piece of clay, again about an inch in diameter. Using both palms, roll it into a thick, stubby snake shape. Then mold it into a shape that resembles a gnome hat or a shark tooth, with a narrow base and pointy, dull tip.
3. Let dry - Place the stems and caps onto a flat surface and allow the clay to harden and dry overnight or around 24 hours.
4. Paint - Once your mushroom pieces have dried and hardened, grab some watercolor paints and decorate your cap. We painted ours red with white spots with a brown underside, but you can paint them however you like! When you are finished, let the pieces sit for 30 minutes to dry.
5. Glaze - Once your mushroom pieces have been painted and have fully dried, grab your glaze and carefully paint a thin layer onto your mushroom pieces so that every part of the surface is covered, evenly. Let the pieces sit and dry for another 30 minutes.
6. Attach stem to cap - Once the glaze is fully dry, grab some super glue, and with a grown-up's help, add a small amount on the inside of the bottom side of the mushroom cap. Grab your stem and push the tip into the glue and hold firmly intil it attaches and fully dries.
7. Attach magnet - Again, with an adult's help, add a small amount of superglue to the back of a craft magnet and then place on the side of the mushroom. Hold together, firmly until the mushroom fully adhere's to the magnet.