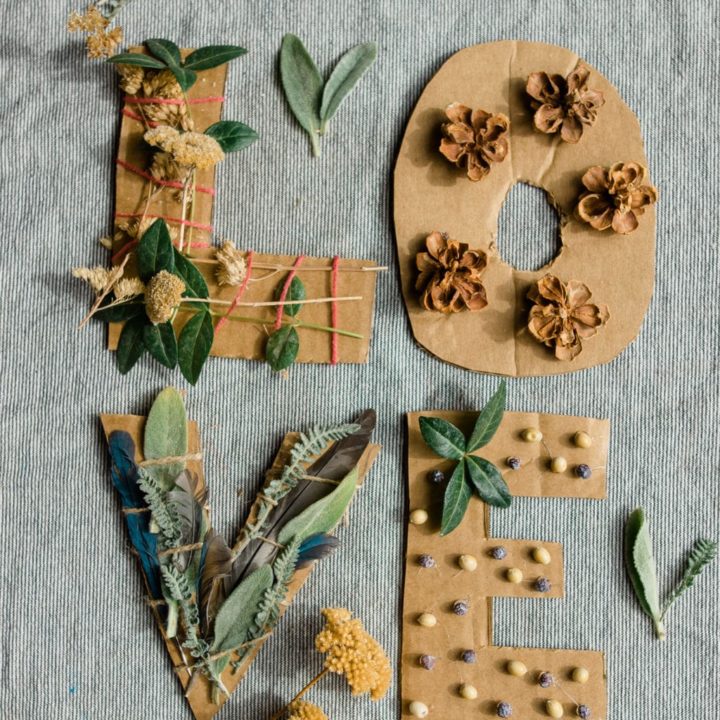
These LOVE letters are a really sweet nature-based Valentine’s Day activity using just cardboard and materials found in nature.
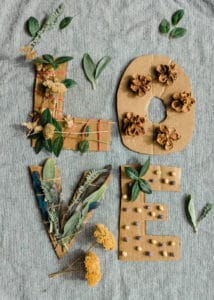
We loved doing this nature based Valentine’s Day activity! I love that it’s so easy and unique and that it only uses recycled cardboard and materials found in nature. It’s fun too! My kids really enjoyed gathering materials and decorating each letter differently.
Materials needed to make LOVE Letters
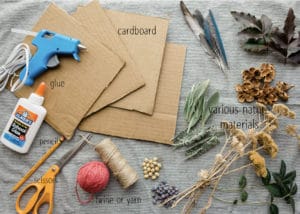
- Cardboard – You’ll want four pieces of cardboard all about the same size. This is used to cut out the letters.
- Pencil – A pencil makes drawing the letters easier, but you could just cut them freehand.
- Scissors – Used to cut the letters out of the cardboard.
- Yarn or twine – This is used to attach materials to the cardboard letters.
- Glue or hot glue – This is used to attach materials to the cardboard letters.
- Various nature materials – This will be used to decorate your letters.
Creating letters for your LOVE Letters
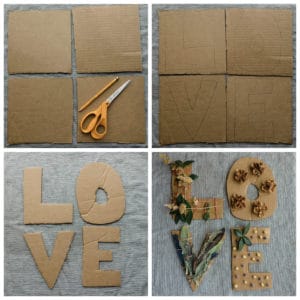
- First, you’ll need four pieces of cardboard, all around the same size.
- Using a pencil, draw a large capital letter “L” in a block-style onto the first cardboard piece. Using the same method, draw an “O” and then a “V” and finally a letter “E”.
- Carefully cut out each cardboard letter.
How to decorate your cardboard LOVE letters
- Gather nature materials. We just gathered materials from our yard. Leaves, grasses, feathers, nuts, berries, herbs, flowers, and pine cones all work great. Be creative! Any natural material will work!
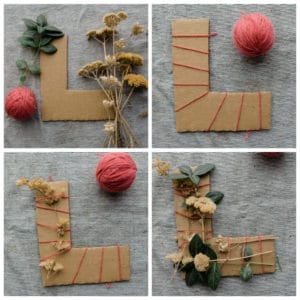
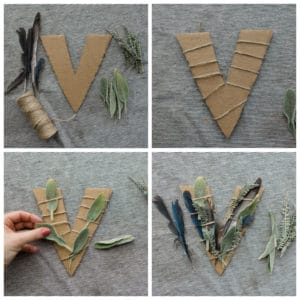
- Use yarn or twine to attach materials. Pick out a long piece of yarn or twine and tie a knot at the top of the letter, then wrap it down the letter and tie a knot at the other end. Cut off the excess twine or yarn. Then, pick out some nature materials and start weaving it through the twine wrapped on the cardboard letters. Decorate however you like!
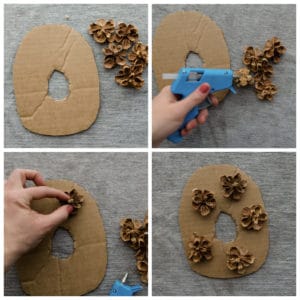
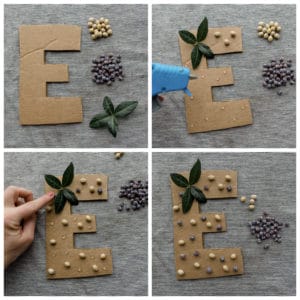
- Use glue or hot glue to attach materials. Using a hot glue gun or regular school glue, dab glue on your letters to attach material to and decorate your letters however you like! Below is how we did ours.
What we love about LOVE Letters
- Nature based activity – We love nature based activities here at Sprouting Wild Ones, because they are an effective way to get kids outside and excited about nature.
- Forest school craft – This would make a really great forest school craft because it doesn’t require many supplies to take with you and you can find all the materials out in the forest.
- Uses recycled material – We love activities and crafts that re-use things that would otherwise be thrown out.
- A fun way to learn letters – My preschooler loved this activity, because it was a fun way for him to recognize the letters L-O-V-E!
- A fun way to practice fine motor skills – Using the scissors to cut out the letters, applying the glue, wrapping the letters in twine, and decorating all are ways your child can practice their fine motor skills during this activity!
- Unique activity for Valentines day – My kids love “Love Day” – what they call Valentine’s Day. We love coming up with new, fun things to do to celebrate the holiday. In the past we have made Nature Valentines and Clay Hearts to celebrate Valentines day!
How to Make LOVE Letters
These LOVE letters are a really sweet nature-based Valentine's Day activity using just cardboard and materials found in nature.
Materials
- Cardboard
- Yarn or twine
- Nature materials (leaves, grasses, twigs, berries, nuts, herbs, feathers, pebbles, pinecones, pine needles, etc.)
Tools
- Scissors
- Pencil
- Glue or hot glue
Instructions
1. Grab four pieces of cardboard, all around the same size.
2. Using a pencil, draw a large capital letter "L" in a block-style onto the first cardboard piece. Using the same method, draw an "O" and then a "V" and finally a letter "E".
3. Carefully cut out each cardboard letter.
4. Now, go outside and gather nature materials. Leaves, grasses, feathers, nuts, berries, herbs, flowers, and pine cones all work great!
5. You can attach nature items to the letters using twine or yarn or glue.
6. If you're using twine or yarn, pick out a long piece of yarn or twine and tie a knot at the top of the letter, then wrap it down the letter and tie a knot at the other end. Cut off the excess twine or yarn. Then, pick out some nature materials and start weaving it through the twine wrapped on the cardboard letters. Decorate however you like!
7. If you're using a hot glue gun or regular school glue, add dabs of glue on your letters and decorate with nature material however you like!
Leave a Reply