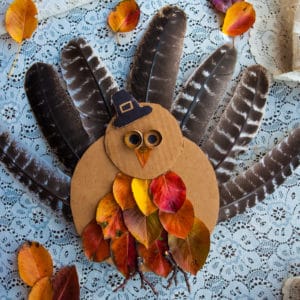
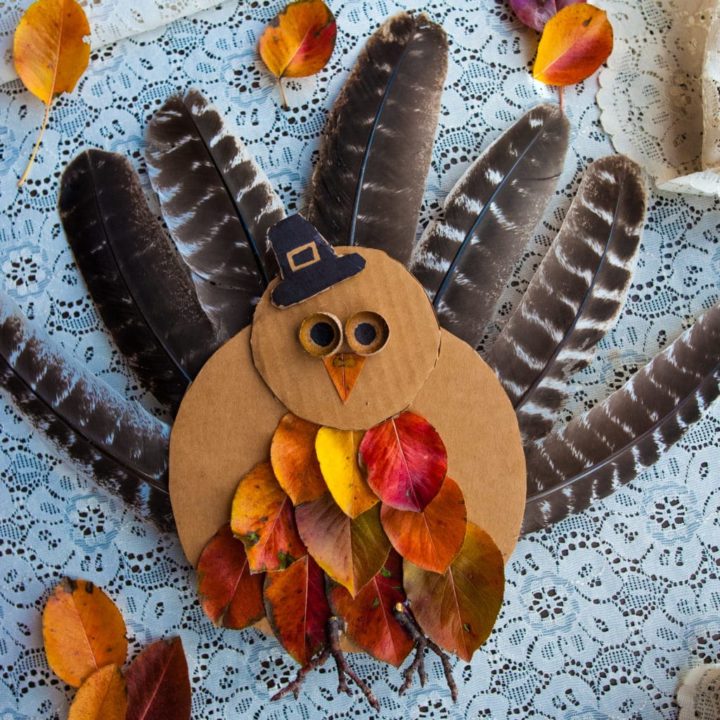
These Nature Turkeys use items found in nature and make a really adorable children’s craft, perfect for Thanksgiving.
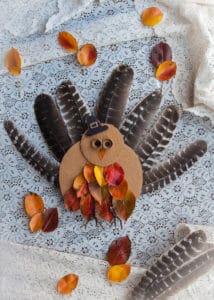
Okay, we’ve got a super cute turkey craft for ya, just in time for Thanksgiving! And aside from the cardboard base, it uses all things that can be found in nature, which we really love about it.
Materials needed for Nature Turkeys
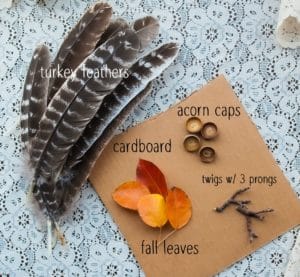
Aside from the cardboard base, everything for your turkey can be found out in nature! Here’s what you’ll need:
- Cardboard – I used medium weight cardboard so that it’s strong, but easy enough to cut through.
- Feathers – We used real turkey feathers for our turkey, but any feathers will do. Real ones are ideal, but you could make your own feathers with paper or other material too!
- Fall leaves – The only fall leaves we had left in the yard happened to be on our pear tree, but any colorful fall leaves will do!
- Acorn caps – These will be used for the turkey’s eyes, but if you can’t get your hands on acorn caps – googly eyes will work well too.
- Twigs – You’ll need two gnarly looking twigs with three prongs on each. These will be the turkey’s feet.
- You’ll also need glue, scissors, and a marker!
How to assemble nature turkeys
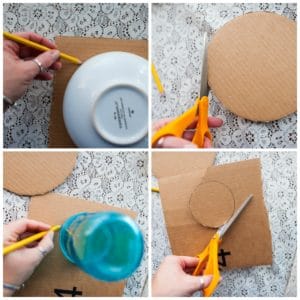
- Body and head – First, you’ll need to cut out two circles in cardboard to make the body and head. I used a large cereal bowl to trace the body and a mason jar to trace the head. Once you trace and cut out, set aside.
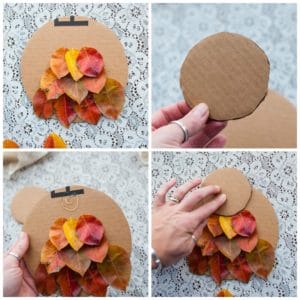
- Body feathers – Collect a handful of colorful fall leaves to use as the body feathers. Using hot glue, attach a row of leaves at the bottom of the body. Then add a second row above that, overlapping just a bit, and finally add a third row, overlapping the second row just a bit to resemble a bird’s feather pattern.
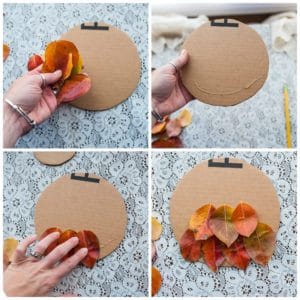
- Attach head – Once you’ve glued on all the leaves to create the feathers on the body, you’ll need to glue on the smaller circle at the top of the larger circle, to create the turkey’s head.
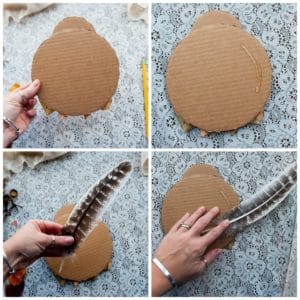
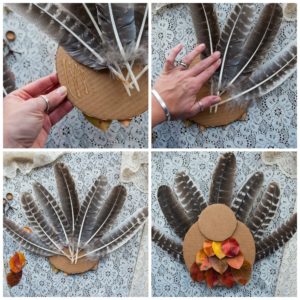
- Tail feathers – Flip the body over, and then using hot glue, attach several turkey feathers going in a row around the circle. Start toward the bottom and work your way around the circle to the other bottom side. You can add several feathers, or layer them, or just add a few, whatever you like!
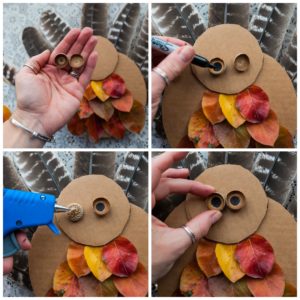
- Eyes – For the turkey’s eyes, you’ll need two evenly sized acorn caps. Using a black marker, create a large pupil in the middle of each acorn cap. Then, with hot glue, attach them to the middle area of the smaller circle.
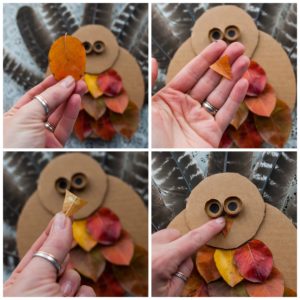
- Beak – Find an orange leaf to use for the turkey’s beak. You’ll merely need to cut out a triangle shape and glue it to the cardboard under the eyes.
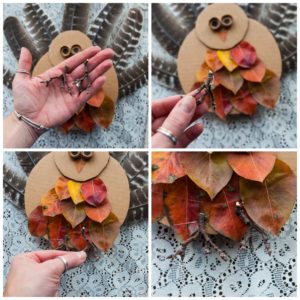
- Feet – For the feet, gather two small, gnarly twigs that have three prongs at one end. Any kind of twig will do, you’ll just want it to sort of resemble a bird’s foot. Then glue it onto the bottom of the body.
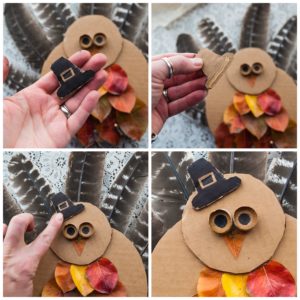
- Hat – Adding a hat to your turkey is totally optional, but I thought it made him look super cute! All you need to do is cut out a hat shape from the cardboard scraps, color it in and glue it the to the top of your turkey’s head.
What we love about Nature Turkeys
- They’re really, really cute. Okay, I’m sort of a sucker for cute kid’s crafts. This turkey’s funny little hat, his big acorn eyes, his gnarly feet…there’s just so much about these turkeys that make them adorable.
- They cost nothing to make. Unless you buy the feather’s you choose to use, everything about this craft is free! The cardboard can be used from a leftover box and everything else can be gathered out in nature.
- Nature based. As you have probably gathered, we are all about nature crafts here at Sprouting Wild Ones! Similar to other nature-based crafts we’ve done before, like Oak Owls and Nature Portraits, these turkeys are made from materials you can find in nature, so it gets kids outside gathering supplies, and connecting them to the natural world.
- Seasonal. This is a really simple and fun way to use fall leaves. Using seasonal materials or doing crafts that are seasonally based will help connect children to their current season which will teach them all about seasonal changes and the many cycles found in nature.
- Uses creativity and fine motor skills – This craft combines creativity and hand dexterity. Cutting, glueing, and arranging the materials on the turkey can be a bit tricky for little hands, so it’s a great way for your child to practice their fine motor skills. This craft also requires a big imagination to create an turkey that is uniquely their own!
How to Make Nature Turkeys
These Nature Turkeys use items found in nature and make a really adorable children's craft for Thanksgiving.
Materials
- Cardboard
- Turkey feathers
- Fall leaves
- Twigs
- Acorn caps
Tools
- Marker
- Scissors
- Hot glue/gun
Instructions
ASSEMBLE NATURE TURKEYS
Body and head - First, you'll need to cut out two circles in cardboard to make the body and head. I used a large cereal bowl to trace the body and a mason jar to trace the head. Once you trace and cut out, set aside.
Body feathers - Collect a handful of colorful fall leaves to use as the body feathers. Using hot glue, attach a row of leaves at the bottom of the body. Then add a second row above that, overlapping just a bit, and finally add a third row, overlapping the second row just a bit to resemble a bird's feather pattern.
Attach head - Once you've glued on all the leaves to create the feathers on the body, you'll need to glue on the smaller circle at the top of the larger circle, to create the turkey's head.
Tail feathers - Flip the body over, and then using hot glue, attach several turkey feathers going in a row around the circle. Start toward the bottom and work your way around the circle to the other bottom side. You can add several feathers, or layer them, or just add a few, whatever you like!
Eyes - For the turkey's eyes, you'll need two evenly sized acorn caps. Using a black marker, create a large pupil in the middle of each acorn cap. Then, with hot glue, attach them to the middle area of the smaller circle.
Beak - Find an orange leaf to use for the turkey's beak. You'll merely need to cut out a triangle shape and glue it to the cardboard under the eyes.
Feet - For the feet, gather two small, gnarly twigs that have three prongs at one end. Any kind of twig will do, you'll just want it to sort of resemble a bird's foot. Then glue it onto the bottom of the body.
Hat - Adding a hat to your turkey is totally optional, but I thought it made him look super cute! All you need to do is cut out a hat shape from the cardboard scraps, color it in and glue it the to the top of your turkey's head.
Leave a Reply