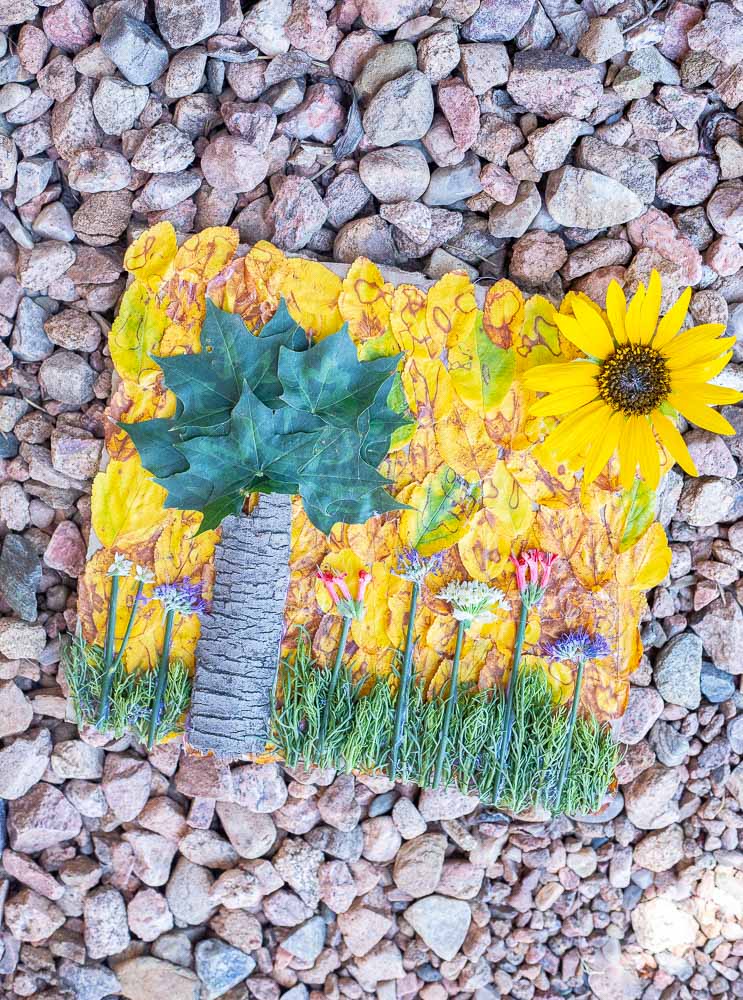
These Nature Portraits are a really fun way to make art with nature items! Your kids can get as creative as they want and they’ll love making these beautiful portraits!
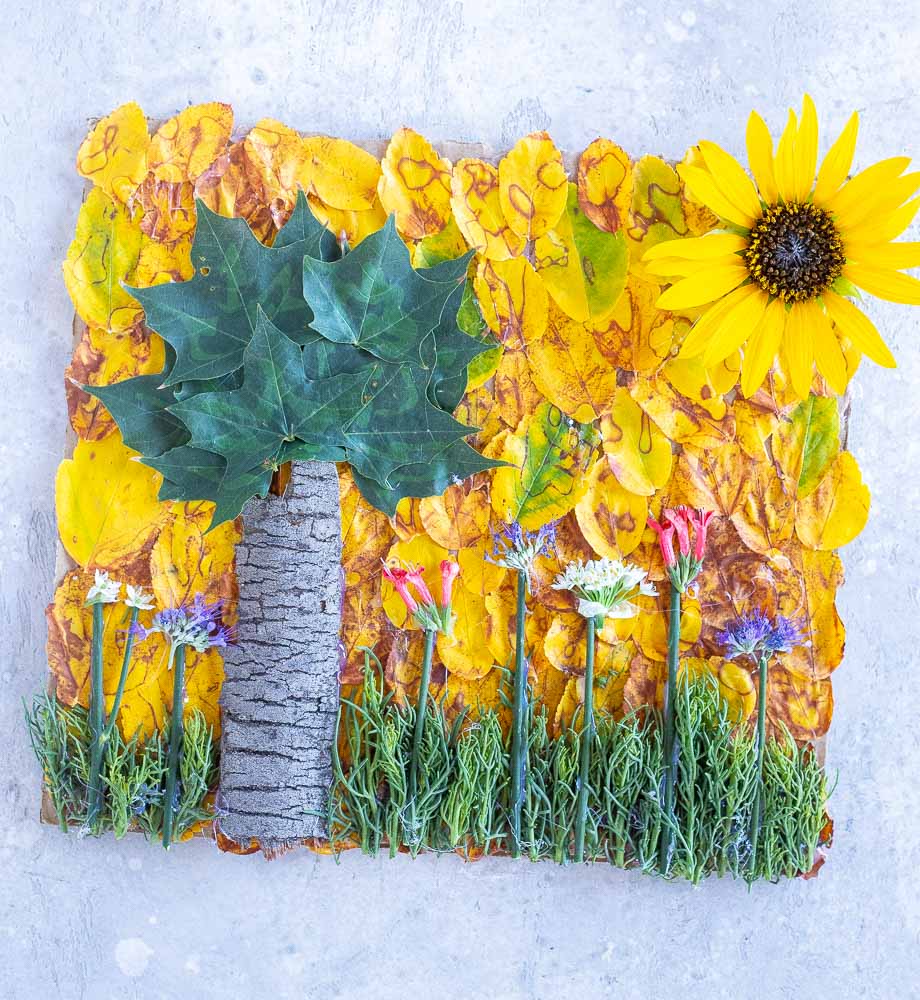
You may have noticed that I love nature themed crafts by now 🙂 All I need is a piece of cardboard, a hot glue gun and some seasonal flowers and leaves and I’m all set 🙂 My favorite thing is when we’re finished making them and my son looks at me and says, “Momma, it’s beautiful!”. It doesn’t get much better than that! These Nature Portraits are no different and your kids will have so much fun making them.
What you’ll need to create nature portraits
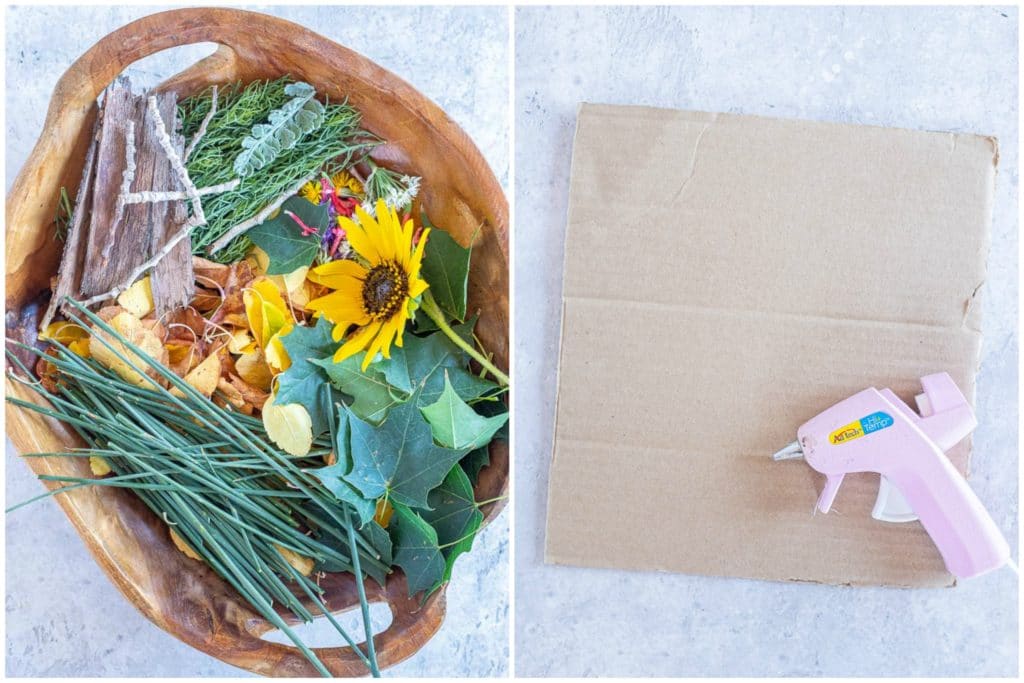
- Cardboard – We usually have some cardboard lying around and I find that it makes a perfect base for all my nature themed projects. If you don’t have cardboard you could use a cereal box or a thick piece of paper.
- Nature Items – One of my favorite things about nature crafts is when you get to go outside and collect all of your project pieces. My kids love this part too and it’s a great way to get outside and get your kids interested in nature. I like to make it a scavenger hunt and my four year old loves it.
- Hot Glue Gun – I always use hot glue because it dries really quickly and is really great at holding everything together. I usually don’t let my kids do this part (they’re 4 and 1) but lately I’ve been letting my 4 year old help more. Just make sure they are really careful. You could also use Elmers glue but it would take much longer to dry.
How To Make A Nature Portrait
There is really no right or wrong way to make one of these! Here are a few steps I like to follow to make sure they come out looking beautiful:
- Visualize in your mind what you want your portrait to look like. Doing this beforehand will allow you to be thoughtful in what shape you cut out and what nature items you collect. If you’re collecting from live plants (flowers and trees) I like to just get exactly as much as I need so I don’t waste any that I’ve picked.
- Go out into nature and collect your materials! I like to take the kids for a walk or out in the backyard with a little basket and have them help collect what we’re looking for.
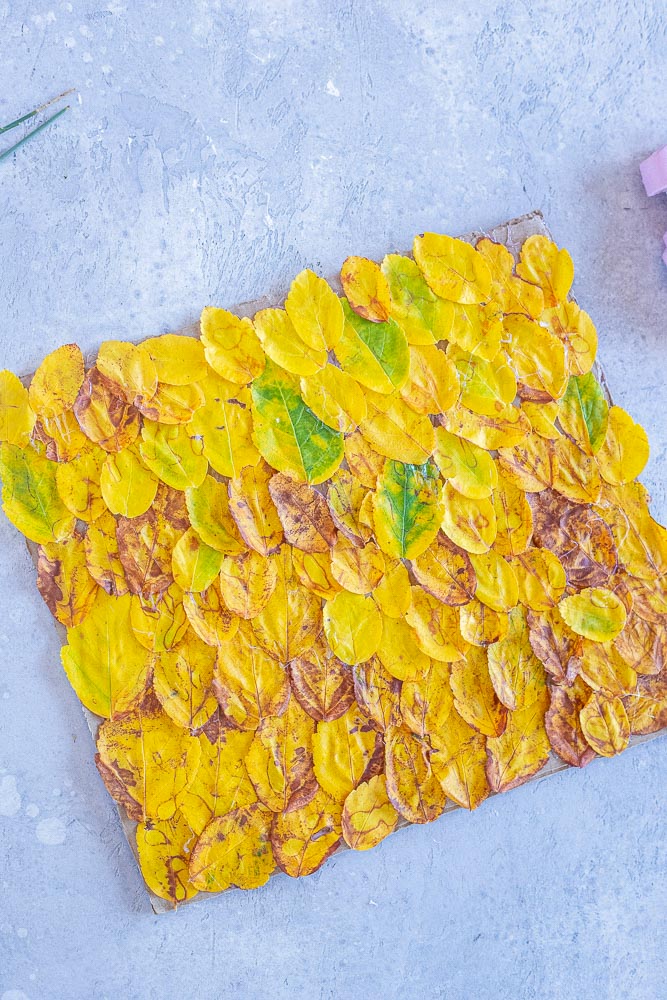
- Start assembling your portrait! If you’re doing a background other than the cardboard you want to glue that on first. You can always just have the background be the cardboard though. I then just glue the other materials on until I’m happy with my nature portrait.
How to preserve your nature portraits
I didn’t use any preservation techniques in this one so it will only look fresh as long as the plants can stay fresh without water. If you want to be able to preserve yours, I would suggest pressing all the nature materials beforehand. Unfortunately, this might not work with some of them, but if you know you want to do this, then think ahead and only collect materials you know can be pressed and preserved. That being said, even if everything is pressed, it may lose a little color overtime.

Nature Portraits
These Nature Portriats allow you to get creative to make a beautiful nature scene!
Materials
- Cardboard
- Nature items (leaves, flowers, bark, grass, rocks, sticks, etc.)
Tools
- Scissors
- Hot glue gun
Instructions
- Cut a piece of cardboard in the shape and size you like.
- Go outside and collect your nature items (leaves, grass, flowers, sticks, bark, rocks, etc.)
- Think about how you would like to design your nature portraits and carefully use the hot glue gun to attach your nature items.
- You can make as many as you want!
Notes
See notes above on how to preserve your Nature Portrait
Leave a Reply