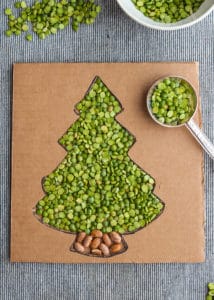
This simple Split Pea Tree Activity helps children practice their fine motor skills through fun sensory play.
Sensory play is so important for children because it helps them develop their learning skills, memory, cognition, motor skills, problem solving skills and it also helps calm down a frustrated child. This is a simple one they can do over and over again!
What you’ll need for the Split Pea Tree Activity

- Split peas – Dry split peas will be used to create the tree. You probably already have some in your cupboard, but if not, you can order some online here.
- Pinto beans – You’ll just need a few dry pinto beans to use for the stump of the tree.
- Tree template – Any tree template will do for this project, just make sure that it is large enough to use plenty of split peas. We used this template (christmas-tree-template-free), without the star.
- Cardboard – You will need two pieces of cardboard of similar sizes and width.
- Scissors – These will be used to cut out your tree template.
- Marker – You’ll need this to trace the tree onto the cardboard.
- Box cutter – These are needed to cut out the tree stencil out of the cardboard.
- Spoon – This is optional but it does make filling the tree shape easier.
- Various toppings – This is also optional, but if you’d like to turn your tree into a Christmas tree, you can add various toppings to it. Things like popcorn kernels, white chocolate chips, and dried cranberries work great.
How to do this Split Pea Tree Activity
- Cut out tree template – First you’ll need to find a tree template you like, print it out (or draw it yourself on a piece of printing paper) and then cut it out.
- Trace onto cardboard – Once you cut out the tree template, place it on a piece of cardbard and trace around it with a marker.
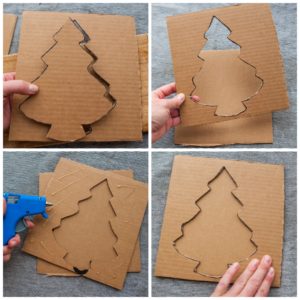
- Cut out tree with box cutters – This step requires a grown-up’s help! Now, grab a pair of sharp box cutters and a cutting board and very carefully cut out the tree, to create a stencil.
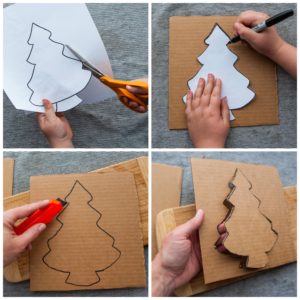
- Glue the cardboard tree stencil to the cardboard bottom layer – Once you have a tree stencil created, you’ll want to glue it onto a blank piece of cardboard. Add hot glue to the back of the tree stencil and then lay it on top of the bottom layer of plain cardboard.
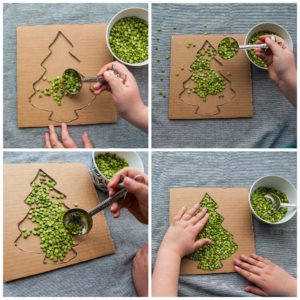
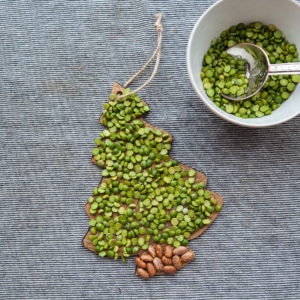
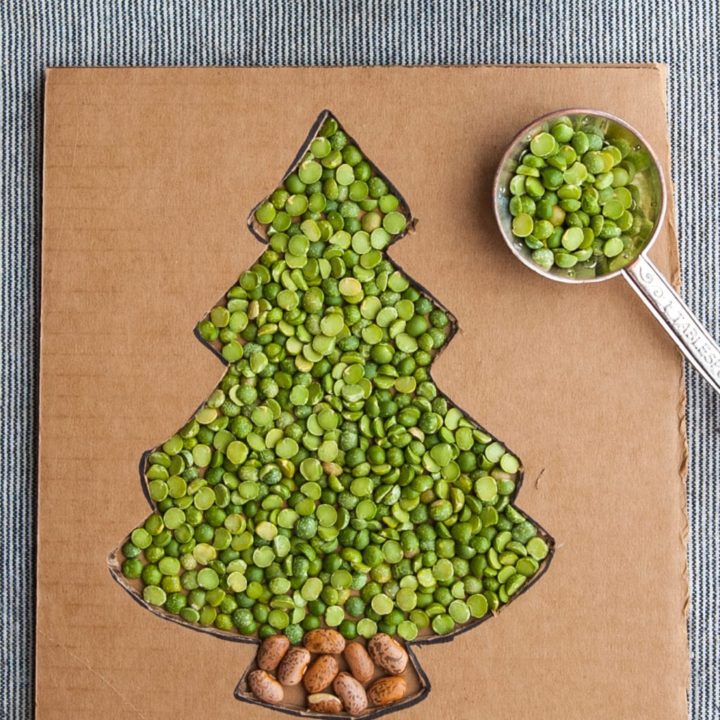
- Add split peas to tree – Once the glue dries, grab a small bowl of green dried split peas and transfer them into the empty tree.
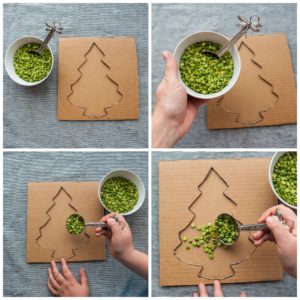
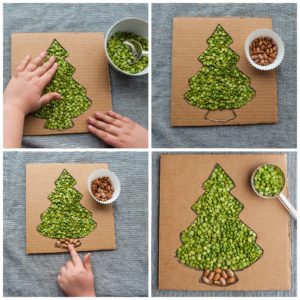
- Continue adding split peas – Keep adding handfuls of split peas until the tree is all filled up. Then pat them into place so they fill up all the branches and the body of the tree evenly.
- Add pinto beans for stump – Keep the stump area free of split peas, and instead, add a few dried pinto beans to that area, to create the stump.
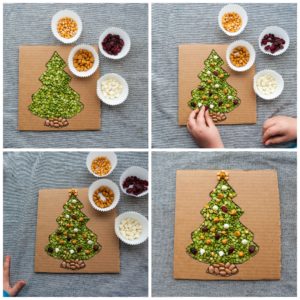
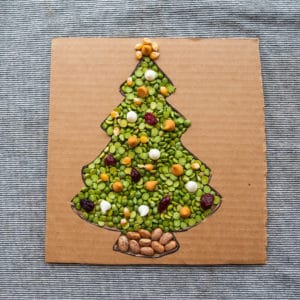
- Decorate with “ornaments” – Now, if you’d like to create a Christmas tree, start decorating it with various toppings. We used things like corn kernels, white chocolate chips, and dried cranberries as our ornaments.
What else to do with this Split Pea Tree Activity
When you’ve finished doing the sensory activity, you can use the left-overs for other things! Here are a few ideas:
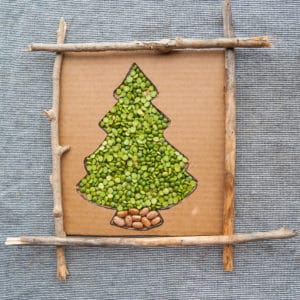
- Make a picture frame – Glue the split peas and pinto beans into the tree cavity so they stay in place. Then grab four twigs and glue them around the edges of the cardboard to create a picture frame.
- Make a Christmas ornament – Grab the cast off cardboard tree you cut out of the piece of cardboard when you were creating the tree stencil. Now, punch a hole at the top of the tree, add a loop of twine to it, then glue the split peas and pinto beans onto it and it makes a fun little Christmas ornament you can hang on your Christmas tree!
- Make it a Christmas Tree – Turn your plain split pea tree into a Christmas tree with “ornaments” or toppings like white chocolate chips, popcorn kernels and dried cranberries.
How to do the Split Pea Tree Activity
This simple Split Pea Tree Activity helps children practice their fine motor skills through fun sensory play.
Materials
- Tree template
- Split peas
- Pinto beans
- Cardboard
- Various toppings
Tools
- Scissors
- Box cutters
- Glue
- Spoon
Instructions
1. First you'll need to find a tree template you like, print it out (or draw it yourself on a piece of printing paper) and then cut it out.
2. Once you cut out the tree template, place it on a piece of cardbard and trace around it with a marker.
3. Now, grab a pair of sharp box cutters and a cutting board [with a grown-up's help], very carefully cut out the tree, to create a stencil.
4. Once you have a tree stencil created, you'll want to glue it onto a blank piece of cardboard. Add hot glue to the back of the tree stencil and then lay it on top of the bottom layer of plain cardboard.
5. Once the glue dries, grab a small bowl of green dried split peas and transfer them into the empty tree.
6. Keep adding handful of split peas until the tree is all filled up. Then pat them into place so they fill up all the branches and the body of the tree evenly.
7. Keep the stump area free of split peas, and instead, add a few dried pinto beans to that area, to create the stump.
8. Now, if you'd like to create a Christmas tree, start decorating it with various toppings. We used things like corn kernels, white chocolate chips, and dried cranberries as our ornaments.
Leave a Reply