What is better than combining a fun art project and a beloved childhood game? These stone Tic-Tac-Toe Bugs are so silly and cute that they make the well-loved game even more fun to play!
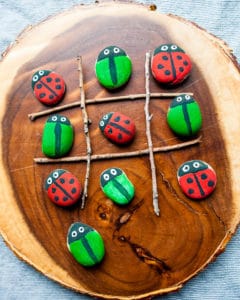
I have lost count of how many times my kids have asked me to play tic-tac-toe, but when my friend Melodie gave me this cute idea, we had to try it, even though we’ve played the game a hundred times before. From painting the stones to look like bugs to laying out the board to playing the game was all really fun to do. Read on to learn how to make your own Tic-Tac-Toe Bug game.
Materials needed to make Tic-Tac-Toe Bugs
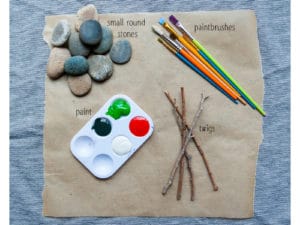
- Stones – Choose ten round and smooth stones that are all about the same size and shape. We chose round flat stones about 2 inches in diameter.
- Paint – Any kind of paint will work. And any color will work, but be sure to choose two different colors. We had red and green Crayola washable paint available, so we used that. You will also need black paint for the bug’s head and spots and white paint for its eyes.
- Paint brushes – Using several different brushes works best. Thick ones to paint the bodies and thinner ones to paint the spots.
- Twigs – you will need to find 4 thin twigs that are all the same width and length. This is needed to make the tic-tac-toe board.
Painting your Tic-Tac-Toe Bugs
- Arrange stones – First, arrange your stones on a surface that is okay to paint on. I put our on a piece of parchment paper, but a paper towel or newspaper would work great as well.
- Pick out paint – Squirt red, green, black, and white paint into a paint tray. Note, we used red and green paint for our bugs, but you can choose any two colors you like!
- Paint the bug’s body – Paint three quarters of the stone with a color. Paint five stones one color and the other five stones the other color.
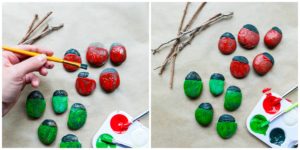
- Paint the bug’s head – Once the body has been painted, add a head to your bug, by painting the last quarter of the stone black.
- Paint extra coats of paint – We ended up needing about 5 coats of paint. This is a personal preference thing. If you don’t mind muted colors, one coat will be sufficient, but the more coats you add the brighter and bolder the bugs will become.
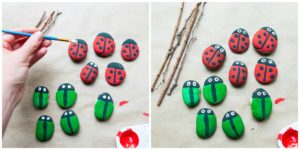
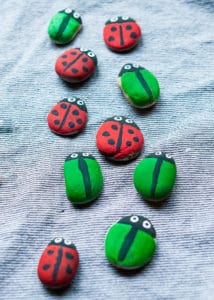
- Add spots – Once your bugs have been painted and have dried completely, it’s time to add character to your bugs. With a thin paint brush, add a black line down the center of the bug’s body. Then add two to four black spots on either side of the black line. You may need to do extra coats. We only added spots to our red bugs, but left the green ones spot-free.

- Add eyes – Once the black paint on the head dries, using a small paintbrush or q-tip, carefully add two white dots for the eyes. One the white spots dry, add an even smaller black dot in the center to create eyes.
How to play with the Tic-Tac-Toe Bugs
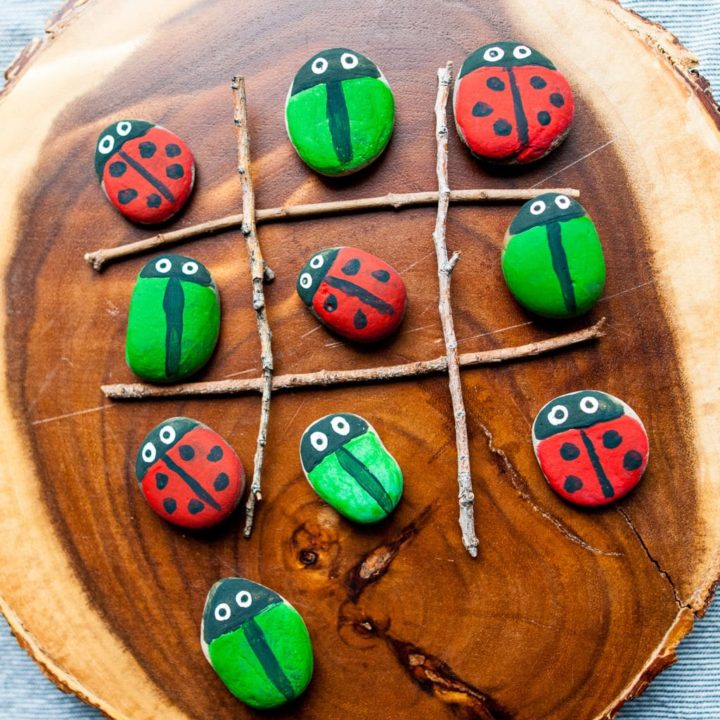
- Set up the board – Grab your four twigs and place them on a flat surface. Put two twigs parallel with each other facing north and south, and then put the remaining two twigs parallel to each other facing east and west to create a large # sign.
- Choose two players – Choose two players. Give one player all the red bugs and give the other player all the green bugs.
- Play the game – Let the players take turns going first. Ask the first player to set a bug in one of the free squares. Then the next player will set his or her bug in the a free square. They continue taking turns until someone has made a straight line with three matching bugs. Once you have a winner, remove the stones and play again!

- Why we love this activity – This is fun way to connect kids to nature, get them excited about art, and it makes a great Forest School game to play too.
How to Make Tic-Tac-Toe Bugs
What is better than combining a fun art project and a beloved childhood game? These stone Tic-Tac-Toe Bugs are so silly and cute that they make the well-loved game even more fun to play!
Materials
- 10 small smooth stones
- paint
- twigs
Tools
- Paint tray
- Paint brushes
Instructions
1. Arrange your stones on a surface that is okay to paint on.
2. Squirt black, white and two other colors of paint into a paint tray. [Note, we used red and green paint for our bugs, but you can choose any two colors you like!]
3. Paint three quarters of the stone with a color. Paint five stones one color and the other five stones the other color.
4. Once the body has been painted, add a head to your bug, but painting the last quarter of the stone black.
5. You may need to paint extra coats of paint. [Note, we used about 5 coats of paint.]
6. Once your bugs have been painted and have dried completely, it's time to add spots. With a thin paint brush, add a black line down the center of the bug's body. Then add two to four black spots on either side of the black line. You may need to do extra coats. [Note, we only added spots to our red bugs, but left the green ones spot-free.]
7. Once the black paint on the head dries, with a small paintbrush or q-tip, carefully add two white dots for the eyes. One the white spots dry, add an even smaller black dot in the center to create eyes.
Leave a Reply