These Autumn Mandala Suncatchers are so pretty, you’ll never believe how quick and easy they are!
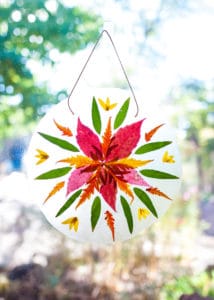
Autumn is in full swing around here! The trees around the neighborhood are turning gold and red and orange and their pretty leaves are falling everywhere. We can’t even make two steps out the front door without my kids stopping to collect a handful of leaves to show me. Yesterday, we decided to create a mandala using some leaves from our yard, and when I told my son it wasn’t a permanent creation, he was on the verge of tears. That’s when we decided to preserve our mandala so we could enjoy it for days and days to come!
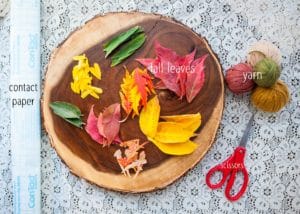
What do you need to make an autumn mandala suncatcher
- Contact paper – Contact paper is a semi-transparent adhesive used for things like lining kitchen drawers or used for crafting and scrapbooking. We used this kind of Con-Tact paper and it works perfect for this project.
- Leaves – Any kind of leaves will do, but finding lots of different colors, sizes and shapes will create the best designs. Be sure to get fresh leaves that aren’t dried out and crispy.
- Yarn – This is used to create a hanger to hang up your suncatcher. Any kind of yarn will do or you could use twine or string.
- Scissors – You’ll need scissors to cut out the contact paper and to cut the yarn. Kid scissors work fine for this project as well.
- Pencil – I used a pencil to trace the circle onto the contact paper, but it’s not totally necessary.
- Plate – I used a large dinner plate to trace a perfect circle to use. This isn’t absolutely necessary, but definitely helps form a perfect circle to create your mandala.
How to make your own autumn mandala suncatcher
- Collect the supplies and materials. Having everything you need in one place makes this project go very smoothly. Also, collecting the pretty autumn leaves was one of our favorite parts of this project. Look for fresh leaves and avoid leaves that are dried out or crunchy or falling apart. Also, get as many different colors and sizes as you can, to create a more interesting pattern.
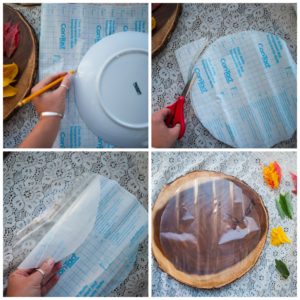
- Cut out two contact paper circles. A large dinner plate works great as a template to trace a perfect circle. Place a large dinner plate upside down on a piece of contract paper and using a pencil, trace around it. Cut out two identical circles.
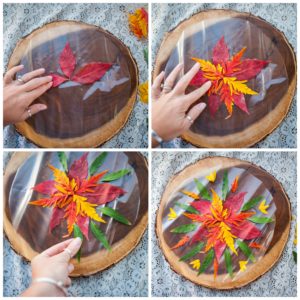
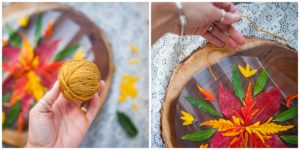
- Create your pattern. Remove the backing on the contact paper and lay the circle on a flat work surface, sticky side up. Then choose the leaves you want to use and begin creating a circular pattern, working from the inside, moving out. Get as creative and elaborate as you like! Also, be sure that all the leaves stay on the inside of the circle.
- Create a hanger. Find some yarn, thread, or twine and cut off an eight inch piece. Place one inch of one end on the top of the sticky contact paper and then place the other end of the string across from the first (on the top, about three inches across from the first end).
- Seal the pattern. Once your circular pattern is complete, grab the second contact paper circle, remove the backing and place the circle on top of the pattern, sticky side down. Be careful to keep it as straight and flat as possible, so the leaves remain flat and in place and the edges match up. Using the palms of your hand, with gentle pressure, press the contact paper together and work out all the air bubbles.
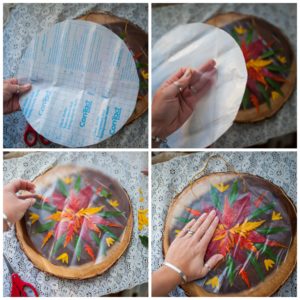
Hang up and enjoy! Trim up the sides, so there are no sticky parts visible and then grab some tape and hang it in a window that catches a lot of sunshine.
What’s special about an Autumn Mandala Suncatcher
- Mandala significance. A mandala is a geometric shape that means “circle” in Sanskrit. It is a common design among many different cultures and often appears as the sun, moon, and earth. In Hinduism and Buddhism, a mandala is a symbol representing the universe and life. The circular design is meant to express the concept that everything is connected in life.
- Suncatcher significance. Suncatchers have been used for a long time to bring feng shui into the home. They are thought to take the positive energy of the sun and spread that light around to create positive energy in the home.
- A meaningful activity. When a mandala symbol is created with things found in nature it is meaningful, because it recognizes our connection to the earth and all its living things.
- A way to express gratitude. Creating a pattern or design with fall leaves is a great time to help us slow down. This allows us the space and time to intentionally express gratitude for our earth and all its living things.
- A reminder of the connections in life. The circular design of a mandala, serves as a reminder that life is continuous. The cyclical pattern helps us remember that everything is connected.
- A time to observe natural patterns. The patterns of an autumn mandala suncatcher represent the cycles and rhythms we find in nature during the fall. This give us the chance to observe natural patterns like seasons, moon phases, the tides, and life and death.
- A learning opportunity. As you create an autumn mandala suncatcher with your children, it provides an opportunity to teach them about the earth and patterns found in nature.
- A fun and creative activity. It is a fun and simple forest school activity that kids can do independently or with a larger group. And remember, similar to this project, creating a nature mandala can be done any time of the year with any natural materials.
- Preserves autumn. Just like in our Nature Bookmarks post, contact paper is a great way to seal natural items to keep them fresh and looking pretty for months to come. With this project, instead of dried flowers, the contact paper is holding fall leaves in place and will keep them fresh and colorful for months.

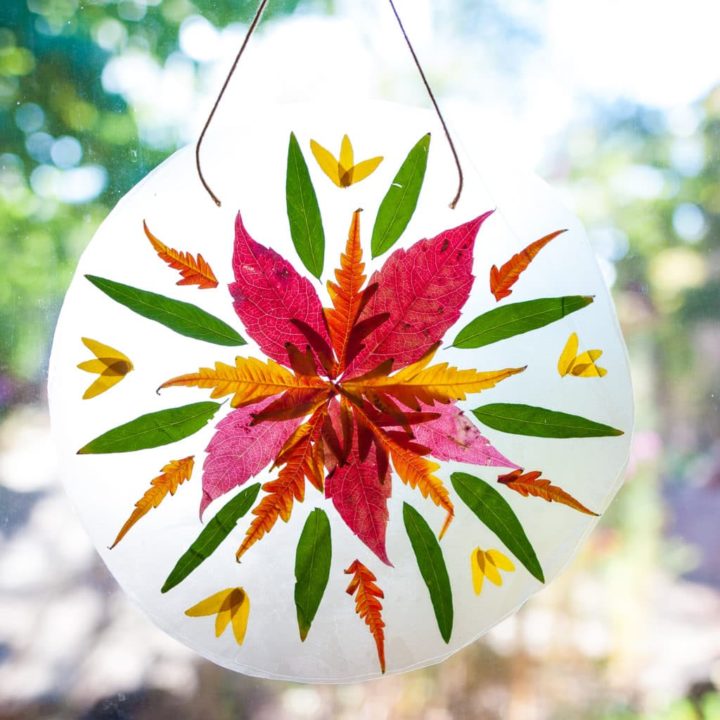
How to Make an Autumn Mandala Suncatcher
These Autumn Mandala Suncatchers are so pretty, you'll never believe how quick and easy they are!
Materials
- Autumn Leaves
- Contact Paper
- Yarn
Tools
- Pencil
- Scissors
- Dinner Plate
Instructions
1. Collect the supplies and materials. When collecting the autumn leaves, look for fresh leaves and avoid leaves that are dried out or crunchy and falling apart. Find as many different colors and sizes as you can, to create a more interesting pattern.
2. Place a large dinner plate upside down on a flat piece of contract paper. Using a pencil, trace around it the dinner plate. Cut out two identical circles.
3. Remove the backing on the contact paper and lay the circle on a flat work surface, sticky side up. Then choose the leaves you want to use and begin creating a circular pattern, working from the inside, moving out. Get as creative and elaborate as you like! Also, be sure that all the leaves stay on the inside of the circle.
4. Find some yarn, thread, or twine and cut off an eight inch piece. Place one inch of one end on the top of the sticky contact paper and then place the other end of the string across from the first (on the top, about three inches across from the first end).
5. Once your circular pattern is complete, grab the second contact paper circle, remove the backing, and place the circle on top of the pattern, sticky side down. Be careful to keep it as straight and flat as possible, so the leaves remain flat and in place and the edges match up. Using the palms of your hand, with gentle pressure, press the contact paper together and work out all the air bubbles.
6. Trim up the sides, so there are no sticky parts are visible and then grab some tape and hang it in a window that catches a lot of sunshine. Enjoy!
Leave a Reply