This Activity Advent Calendar is a sweet and simple way to countdown to Christmas Day. Each day will provide a fun and memorable holiday activity that your kids will love!
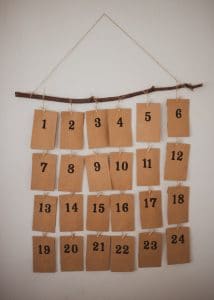
As a kid, one of my favorite memories was counting down the days until Christmas. The anticipation and excitement would build every day of December until we finally made it to the last window of our advent calendar. For my own kids, I decided to take a twist on the traditional advent calendar, and celebrate with daily activities instead. Read on to learn how to make your own and create some really sweet holiday memories too!
WHY WE LOVE this ACTIVITY ADVENT CALENDAR
- It focuses on experiences instead of stuff. Rather than give candy or frivolous gifts to my kids each day of Advent, I decided to switch the focus a bit. With an activity advent calendar, we are able to have more meaningful holiday experiences, as opposed to short-lived gifts. Some activities are bigger and more involved than others, but it will get children actively participating in the holiday season, creating meaningful moments, and building memories.
- It creates traditions. There are so many ways to celebrate Advent, but celebrating with activities and experiences cultivates family traditions. Traditions are important for young children because they nurture family connection and give a sense of belonging. They also create positive and meaningful memories for children.
- It keeps you organized. Raise your hand if the holidays make you feel a bit stressed and overwhelmed. We all do! There is just so much to do and it’s hard to stay on top of it. Our activity advent calendar keeps me organized and on track every day of December. It is a great way to schedule important activities and serves as a great reminder too.
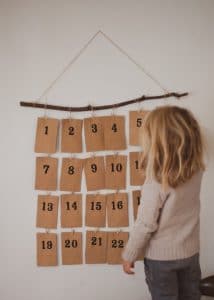
- It provides a fun learning opportunity for kids. When my kids see me hang up our activity advent calendar, they know the Christmas season is upon us! They get so eager to take turns discovering what special activity they will get to do that day. This advent calendar helps children grasp the concept of time, helps them learn their numbers, and visualize the amount of time that has past or how much time there is left to go. My youngest is currently learning his numbers and will enjoy counting each day and my oldest child is now reading and will love reading the notes out loud to us each morning.
HOW TO MAKE an ACTIVITY ADVENT CALENDAR
- Materials needed. You will need one long stick, 24 small bags, 24 mini clothes pins, and string or twine for this project.
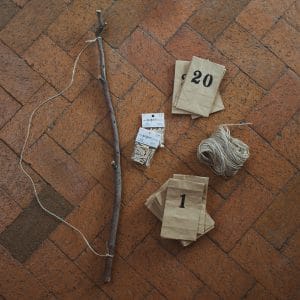
- Choose the envelope. You will need 24 individual small envelopes or baggies for this craft. You could make your own tiny festive envelopes or find many options at your local craft store. For mine, I used little brown paper snack bags. They are light and don’t take up much space, but have a large enough cavity to easily hold a handwritten note. And feel free to decorate your baggies however you like!
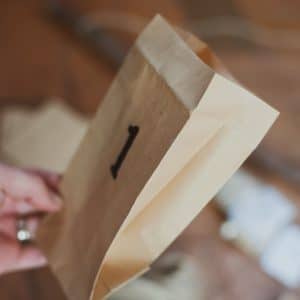
- Number the envelope. Each of your 24 envelopes or baggies will need to be marked and identified with a number. You could make number labels, use stamps or stickers, or write each number by hand. For mine, I used stencils and black paint. If you choose to do it this way, you will need to arrange the stencil on the front of the envelope, in the middle. Then, paint over it and allow it to lay flat to dry for several hours.
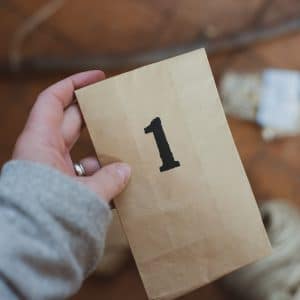
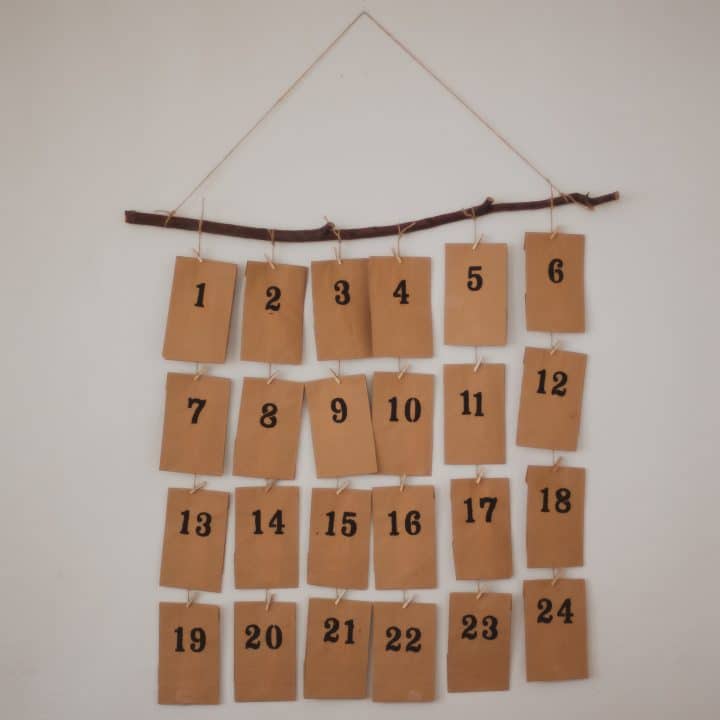
- Arrange the envelopes. Once your envelopes have been numbered and prepared, it’s time to arrange them. The finished product will resemble a mobile, with six long strings across a branch, with four envelopes hanging from each string. The envelopes will run across the mobile left to right. So, on the first string, from top to bottom you will have envelopes 1, 7, 13, and 19. The second string will have 2, 8, 14, and 20. The third string will have 3, 9, 15, and 21. The fourth string will have 4, 10, 16, and 22. The fifth string will have 5, 11, 17, and 23. And finally, the sixth string will have envelopes 6, 12, 18, and 24.
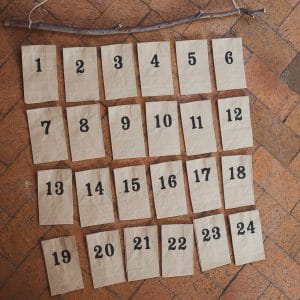
- String the envelopes. Once your envelopes are arranged, you will need to tie six pieces of twine onto the branch. The twine should be about 30 inches long. On each piece of twine, I clipped four envelopes on it with mini clothes pins.
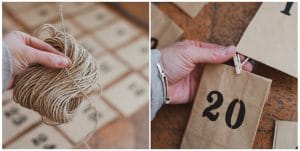
- Create daily notes. Now it’s time to plan out your holiday activities. I just grab the calendar and a few pieces of construction paper. I jot down all the important dates I see on the calendar onto the construction paper. I cut them out and add them to envelope that corresponds to the event’s date. Once I finish with all the essential events of the season, I jot down various activities to fill the rest of the envelopes. I pick and choose simple activities (like, eat a candy cane, watch a Christmas movie, dance to Christmas music) with more complicated ones (like, make Christmas ornaments or decorate a gingerbread house). That way we are not overwhelmed all December with events and big tasks. This way, there is time to do simpler activities too.

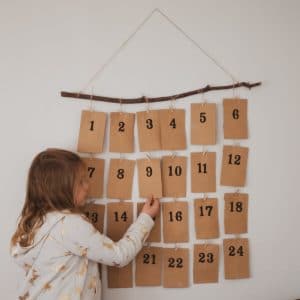
- Display – After you’ve inserted all of your notes into the envelopes. Fold the top downs (don’t seal it or use tape, so you can reuse them from year-to-year) and clip the folded top onto the string with a mini clothespin. Be sure the numbers are facing out. Once all the envelopes have been attached, tie a piece of twine to both ends of your twig and find a spot in your home to display your calendar. I always put ours on the wall where the kids can reach, so they can pick out the envelope themselves.
ACTIVITY IDEAS FOR YOUR own ACTIVITY ADVENT CALENDAR
- Put up the Christmas tree
- Decorate the Christmas tree
- Make Christmas ornaments
- Make handmade gifts
- Make a holiday bouquet
- Make snow ice cream
- Build a snowman
- Go sledding
- Cut out paper snowflakes
- Mail out Christmas cards
- Dance to Christmas music
- Build a fire and roast marshmallows
- Watch a Christmas movie in your pj’s
- Bake a Yule Log cake
- Attend a local holiday festival
- Make Christmas candy
- Make garland
- Go ice skating
- Go skiing
- Bake and decorate Christmas cookies
- Make wreaths
- Attend the Nutcracker
- String up outdoor Christmas lights
- Read holiday books
- Decorate a gingerbread house
- Eat a candy cane
- Drink a cup of cocoa
- Bake gingersnaps
- Celebrate the first day of Hanukkah (December 22)
- Celebrate the winter solstice (December 21)
- Celebrate St. Lucia Day (December 13)
- Celebrate Kwanzaa
- Celebrate St. Nicholas Day (December 6)
- Look at your neighborhood’s Christmas lights
- Bake a Christmas pie
- Bake Christmas star bread
- Visit Santa
- Volunteer at a local food pantry or homeless shelter
- Donate to Toys for Tots or children in need
- Support a local charity
- Shovel your neighbor’s sidewalk
Check out exactly how to make this Activity Advent Calendar below!
How to Make an Activity Advent Calendar
This Activity Advent Calendar is a sweet and simple way to countdown to Christmas Day. Each day will provide a fun and memorable holiday activity that your kids will love!
Materials
- one long stick
- 24 small bags or envelopes
- 24 mini clothes pins
- number stickers or paint and stencils
- string or twine
Instructions
1. Pick out 24 individual small envelopes or baggies.
2. Label each envelope 1 through 24 with stickers or paint on numbers using a stencil.
3. Once your envelopes have been numbered and prepared, arrange them in the order they will hang. The numbers will run from left to right in four rows. On the first of six columns, the envelopes will read 1, 7, 13, and 19. The second column will have 2, 8, 14, and 20. The third will have 3, 9, 15, and 21. The fourth will have 4, 10, 16, and 22. The fifth will have 5, 11, 17, and 23. And finally, the sixth string will have envelopes 6, 12, 18, and 24.
4. Once the envelopes are arranged, tie six pieces of twine onto the stick. The twine should be about 30 inches long. On each piece of twine, clip four envelopes on it with mini clothes pins.
5. Write down various activities on strips of construction paper and put a different one inside each envelope until all the envelopes are filled.
6. After all the notes have been inserted into the baggies, clip the baggie onto the string with a mini clothes pin. Be sure the numbers are facing out. Once all the envelopes have been attached, tie a piece of twine to both ends of the stick and display.
Leave a Reply